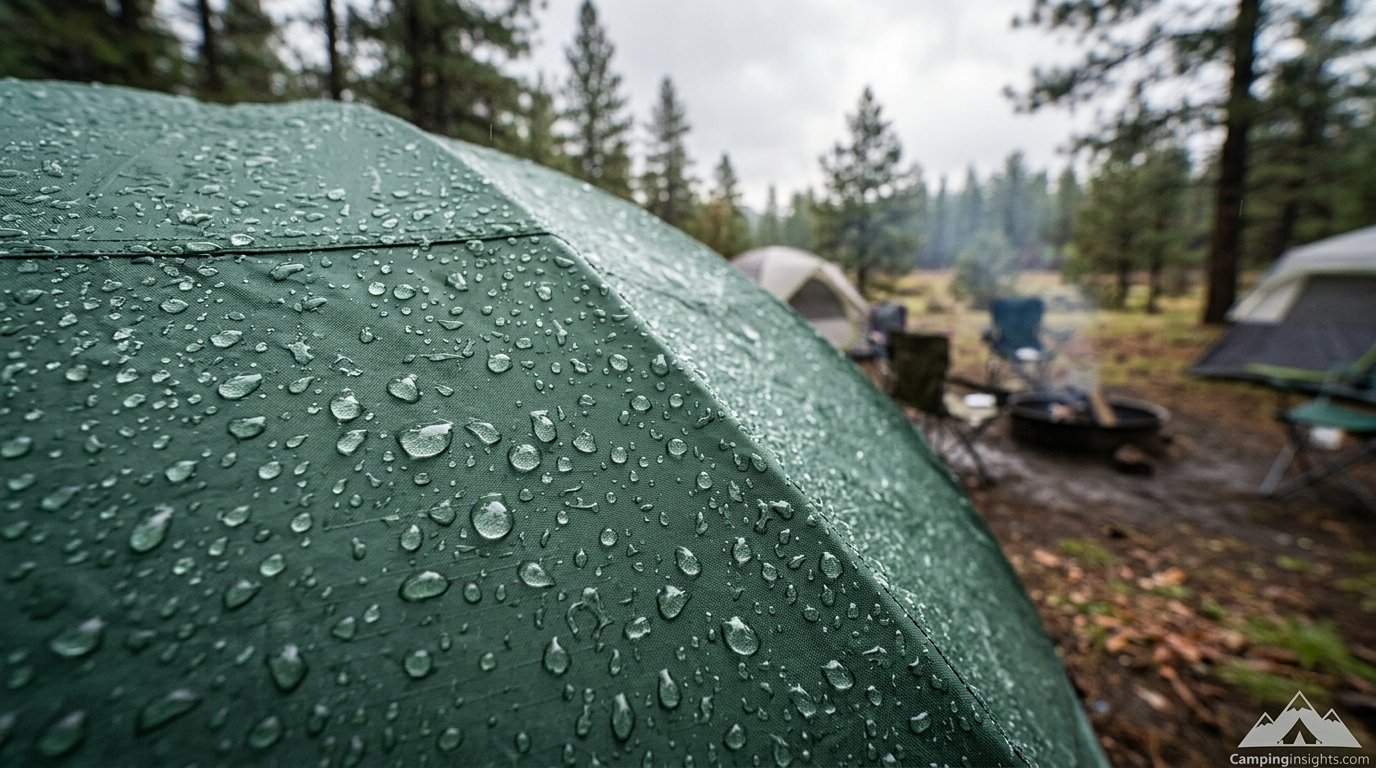
Camping in the Rain: Tips That Actually Keep You Dry, Warm, and Sane
A practical, no-nonsense guide to surviving — and even enjoying — a wet weekend under canvas, from tent setup to soggy-boot recovery.
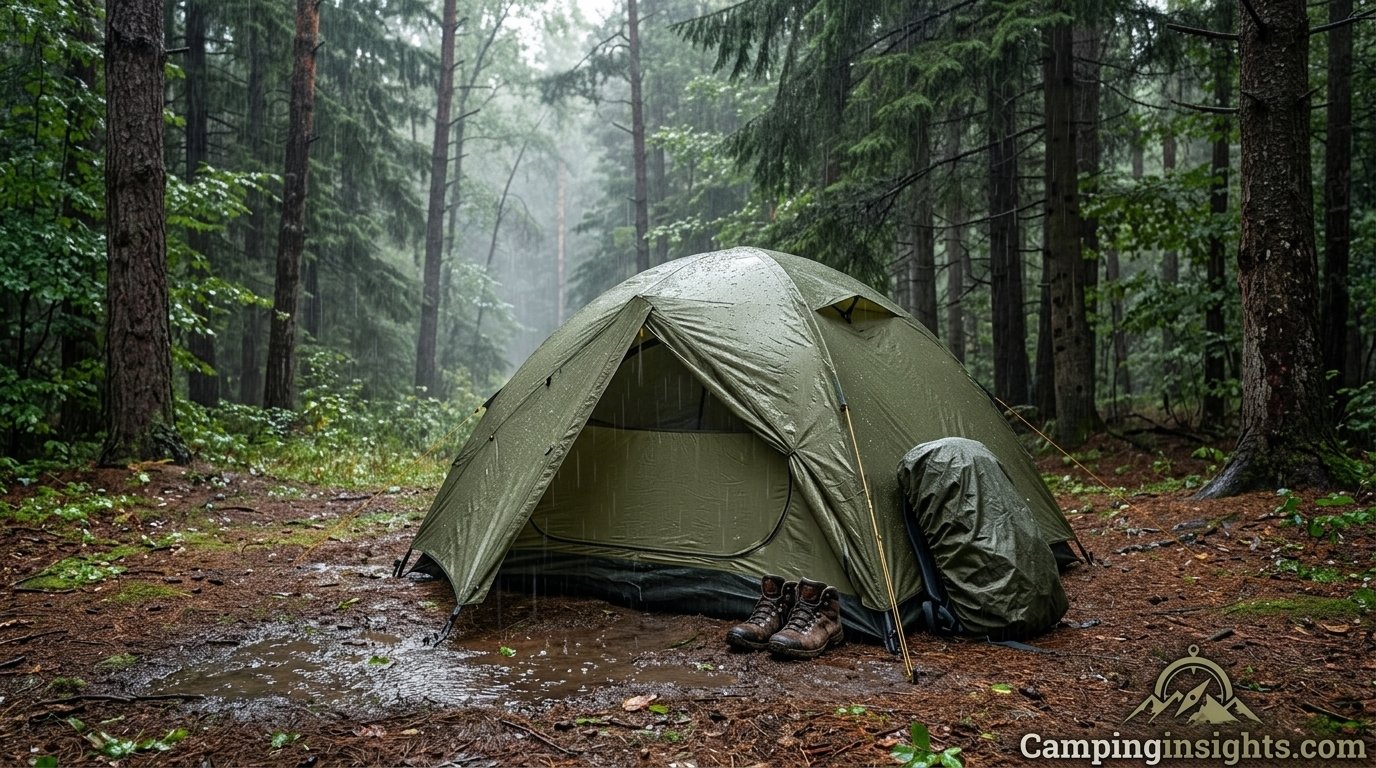
Rain doesn’t have to end the trip early — the right prep changes everything.
There’s a particular kind of dread that sets in when you check the weather app the night before a camping trip and see a little grey cloud with rain lines sitting right over your dates. Maybe you’ve been there: bags half-packed, cooler ready, and suddenly you’re wondering if it’s even worth going anymore. Here’s the truth after years of pitching tents in everything from light drizzle to genuine downpours — rain doesn’t ruin a camping trip. Being unprepared for rain ruins a camping trip.
The difference between a miserable, tent-bound weekend and a genuinely memorable one usually comes down to a handful of decisions made before you ever leave the driveway, plus a few habits you build once you’re on-site. This guide walks through all of it: choosing gear that’s actually built for wet conditions, setting up a campsite that won’t turn into a puddle, keeping your sleep system dry, cooking without setting anything on fire (or drowning your stove), and staying in good spirits when the sky won’t cooperate.
Use the table of contents on the side to jump to whatever’s most relevant to you, or read straight through if you’re planning a trip and want the full picture. Either way, by the end you’ll have a rain-day game plan that doesn’t rely on hoping the forecast is wrong.
It’s worth saying upfront that “camping in the rain” covers a wide range of actual experiences. A soft, steady drizzle over an afternoon calls for a very different response than a multi-hour downpour with gusty wind, and part of getting good at wet-weather camping is learning to read which situation you’re actually in rather than treating every bit of rain the same way. The gear, the site selection habits, and the small daily routines below are written to scale across that whole range, from a light shower that barely interrupts dinner to a genuine storm that keeps everyone in camp for most of a day.
There’s also a mental shift worth making before you even get to the practical tips. Experienced wet-weather campers tend to stop thinking of rain as something that’s happening “to” the trip and start treating it as simply one of the conditions they’re camping in, the same way they’d plan around heat, cold, or wind. That shift alone tends to make people more observant about site selection, more careful with gear, and considerably less likely to panic when the sky opens up on day two.
1. Choosing a Tent Built for Wet Weather
Every rain strategy starts with the tent, because no amount of clever packing will save a trip if water is coming through the roof. Not all tents handle rain equally, even ones that look similar on a store shelf. The two numbers that matter most are the hydrostatic head rating of the rainfly and floor (measured in millimeters) and the denier of the fabric, which tells you how tough the material is against abrasion and pressure.
As a rough guide, a rainfly rated around 1,500mm will handle light-to-moderate rain, but anything above 2,000mm is what you want if you’re expecting a genuine storm or planning to camp somewhere with consistently wet weather. The floor should ideally be rated even higher than the fly, since it’s under constant pressure from your body weight and gear, which pushes water through weaker fabric far more easily than rain falling on an angled fly.
Beyond the numbers, look at the actual shape of the tent. Dome and tunnel tents with steep-angled walls shed water faster than tents with flatter roof panels, where water can pool and eventually seep through seams. A full-coverage rainfly that extends close to the ground offers far better protection than a minimal “cap” style fly that only covers the top third of the tent, since it also blocks wind-driven rain from hitting the mesh panels directly.
If you’re shopping for a tent with rain performance as a priority, it’s worth comparing a few models side by side rather than picking based on price alone. A detailed breakdown of well-reviewed options is available in this guide to the best camping tents, which is a useful starting point if your current tent has let you down in wet conditions before.
One habit that pays off more than most people expect: practice pitching a brand-new tent at home, in the yard or even the living room, before its first real trip. Doing this in dry, calm conditions lets you learn exactly how the poles, clips, and rainfly attach without the added pressure of rain already falling and daylight fading. It also means you’ll notice any missing parts or defective zippers while you’re still near a return counter, rather than discovering them for the first time at a campsite an hour from the nearest store.
Vestibule size is another detail worth checking before you buy, especially if wet-weather trips are a regular thing for you. A generous vestibule gives you a covered, protected spot to store muddy boots, wet packs, and cooking gear without bringing any of it into the main sleeping area, which keeps both the floor and the air inside noticeably drier over a multi-day trip.
| Fabric Type | Rain Performance | Durability | Weight |
|---|---|---|---|
| Polyester (coated) | Very good, resists UV/water sag | Moderate | Light |
| Nylon (silicone-coated) | Excellent when new, can stretch when wet | Moderate-High | Very Light |
| Canvas | Good once “weathered in,” heavy when soaked | Very High | Heavy |
| PU-coated Polyester | Excellent, budget-friendly | Moderate | Light-Moderate |

Looking for a tent that can genuinely handle rain? Compare top-rated weatherproof options on Amazon.
Shop Weatherproof Tents →2. Waterproofing Your Tent Before You Leave
Even a well-rated tent loses its water resistance over time. Factory coatings break down from UV exposure, repeated packing and unpacking, and general wear, which is why a tent that kept you bone-dry two seasons ago might start letting water through the seams or fly today. The good news is that restoring waterproofing is inexpensive and doesn’t take long, and doing it before a trip — not after you get rained on — is the whole point.
Start with the seams. Factory-taped seams can peel or crack, especially at stress points like the corners of the floor and the guyline attachment points. A seam sealer applied along any suspect areas, left to cure fully before packing, closes up these micro-gaps completely. Next, treat the rainfly itself with a spray-on or wash-in durable water repellent (DWR), which restores the fabric’s ability to bead water rather than absorb it. You’ll know your DWR treatment has faded when rain starts soaking into the fabric instead of rolling off in beads.
The tent floor deserves its own pass. Ground moisture pushes upward with your body weight on top of it, so even a small pinhole or worn patch on the floor can let water seep in overnight. A groundsheet or footprint placed underneath adds a physical buffer and also protects the floor from sharp rocks and roots that can puncture it.
For a complete step-by-step walkthrough of treating seams, fabric, and zippers, this guide on how to make a tent waterproof covers the full process in more depth, including which products work best for different fabric types.

Refresh your tent’s waterproofing before your next trip with a trusted DWR spray or seam sealer.
Shop Waterproofing Sprays →3. Picking a Campsite That Won’t Flood
Where you pitch your tent matters just as much as what you pitch. A perfectly waterproof tent can still end up sitting in an inch of standing water if it’s placed in a natural drainage path, and this is one of the most common mistakes even experienced campers make when they’re tired and just want to set up quickly.
Before committing to a spot, walk the immediate area and look for subtle signs of where water travels when it rains. Slight depressions, patches of moss or bare, compacted dirt, and areas downhill from any slope are all warning signs. Water follows the path of least resistance, and low points that look dry on a sunny afternoon can become shallow streams within an hour of steady rain.
Aim for slightly elevated, flat ground — a barely-there rise is ideal, since it’s enough to redirect runoff without leaving you on an uncomfortable slope. Avoid pitching directly under large trees during storms, since heavy branches and dead limbs (“widowmakers”) become genuinely dangerous in wind and rain, even though the tree canopy might seem like it would offer shelter. Also steer clear of dry creek beds no matter how appealing they look as a flat, sandy site; flash flooding can turn them into fast-moving water with very little warning.
If you arrive at a site and rain starts before you can survey properly, a fast trick is to dig a small perimeter trench uphill from your tent (where permitted) to redirect water around rather than under it. This isn’t always necessary with a good site choice, but it’s a useful backup when conditions turn quickly.
Wind direction matters more in rain than most people account for, since a storm rarely falls perfectly straight down. If you can tell which way the prevailing wind tends to blow through a valley or clearing, orienting your tent’s door and lowest-profile side into that wind, rather than broadside to it, reduces how much rain gets driven directly into vents, zippers, and seams over the course of a storm. Natural windbreaks like a rock outcrop, a dense treeline, or even a gentle rise in the land can meaningfully cut down on wind-driven rain without you needing to do anything except pitch on the sheltered side of them.
Finally, think about your walking paths, not just the tent footprint itself. A site that looks great for the tent but requires crossing a boggy low patch every time you walk to the bathroom or the cooking area will leave you with wet, muddy feet dozens of times a day. Scouting a dry, direct route between your key spots — tent, cooking area, water source, toilet — before you fully commit to a layout saves a surprising amount of daily frustration.
Good Site Signs
- Slightly elevated, flat ground
- Natural windbreaks (not directly under trees)
- Well-draining soil, not compacted clay
Warning Signs
- Depressions or moss-covered low spots
- Dry creek beds or ravines
- Directly beneath large dead branches
4. Staking Down Properly in Wet Ground
Wet and muddy ground behaves very differently from dry soil when it comes to holding a tent stake, and this is one of the more overlooked parts of rain prep. Standard stakes that hold fine in firm, dry dirt can simply slide out of saturated ground when wind pulls against the tent, and a tent that comes loose mid-storm is one of the fastest ways to turn a wet night into a genuinely bad one.
In muddy or loose conditions, wider stakes with more surface area — like V-shaped or angled stakes — hold significantly better than thin round pegs, since they resist being pulled straight back out. Driving stakes in at a slight angle away from the tent, rather than straight down, also improves holding power because it works with the direction of pull rather than against it.
If you’re regularly camping in rocky, root-filled, or otherwise difficult ground, it’s worth investing in a stake set designed specifically for those conditions rather than relying on the flimsy stakes that often come bundled with budget tents. This roundup of the best tent stakes for rocky ground covers options that hold firm even when the terrain isn’t cooperating.
Guylines deserve equal attention. Tightening every guyline and using all available tie-out points on your rainfly keeps the fabric taut, which prevents pooling and reduces flapping in wind-driven rain. A rainfly that’s sagging or loosely staked collects water in low spots, and that pooled weight can eventually stress the seams or cause water to seep through.

Upgrade to stakes that actually hold in mud, sand, and rocky ground.
Shop Tent Stakes →5. Stopping Condensation Inside the Tent
Here’s a detail that surprises a lot of newer campers: much of the “leak” people notice inside a tent during rain isn’t actually rain getting through the fabric at all — it’s condensation forming on the inside of the rainfly and dripping down. Warm, humid air from your breathing and body heat hits the cooler fly material and turns to water droplets, which then fall or run down onto your gear.
The fix isn’t a better rainfly — it’s better ventilation, which sounds counterintuitive when it’s raining outside, but it’s genuinely the solution. Keep vents and mesh panels open as much as the weather allows, even just slightly, to let humid air escape rather than build up inside the tent. Avoid cooking inside the tent itself, since the added moisture from boiling water or hot food makes condensation dramatically worse.
Positioning matters too. Pitching your tent with proper airflow around it, rather than jammed against dense brush that blocks any breeze, helps humid air move away from the tent rather than sitting stagnant against the walls. Wiping down the inside of the fly with a small towel before bed and again in the morning also helps manage the moisture that does build up.
For a deeper dive into ventilation setups, gear choices, and nightly habits that make a real difference, this guide on how to stop condensation in a tent walks through the full picture, including how tent material and group size affect how much moisture builds up overnight.
6. Rain Gear and Clothing Layers
What you wear determines how much of the trip you actually enjoy versus how much time you spend huddled in the tent waiting for a break in the weather. The layering system that works best for wet, active days is built around three components: a moisture-wicking base layer, an insulating mid layer, and a genuinely waterproof (not just water-resistant) outer shell.
Cotton is the one fabric to avoid entirely in wet conditions. It absorbs water, holds onto it, and loses almost all of its insulating ability once damp, which is how people end up dangerously cold even in relatively mild temperatures. Merino wool or synthetic base layers, by contrast, wick moisture away from skin and retain warmth even when slightly damp.
For the outer shell, check that a jacket is taped-seam waterproof rather than simply “water-resistant” or treated with a light DWR coating alone, since the difference becomes very obvious after a few hours of steady rain. Pit zips and a properly adjustable hood make a bigger difference to comfort than most people expect, since they let you regulate temperature without opening the whole jacket.
Footwear is where a lot of people compromise and regret it. Waterproof hiking boots with a good tread are worth the investment, and packing a dedicated pair of dry camp shoes to change into once you’re back at the site prevents the miserable cycle of wet feet all evening. Pack extra socks — more than you think you’ll need — since wet socks are one of the fastest ways to feel cold and demoralized on a rainy trip.
| Layer | Best Material | Avoid |
|---|---|---|
| Base layer | Merino wool, polyester blends | Cotton |
| Mid layer | Fleece, synthetic insulation | Down (if it might get wet) |
| Outer shell | Taped-seam waterproof jacket/pants | Basic water-resistant windbreakers |
| Footwear | Waterproof boots + dry camp shoes | Canvas sneakers |

A genuinely waterproof shell jacket makes every rainy activity more bearable.
Shop Rain Jackets →7. Keeping Your Sleep System Dry and Warm
Nothing ends a camping trip faster than a genuinely bad, cold, damp night of sleep. Rain adds humidity and often drops temperatures, so your sleep setup needs to work harder than it would on a clear night, and a few smart choices here make an enormous difference to how rested — and how willing to stay another day — you feel in the morning.
Start with what’s between you and the ground. An insulated sleeping pad does double duty: it keeps cold and dampness from the ground from pulling heat out of your body all night, and a pad rated for colder conditions performs noticeably better in the kind of temperature drop that often follows a rainstorm. This comparison of the best sleeping pads for winter camping is a good reference even for three-season rain trips, since the insulation principles are the same.
If you’re camping somewhere with genuinely wet or uneven ground, a camping cot lifts you off the surface entirely, which avoids ground moisture altogether and can be considerably more comfortable on lumpy terrain. For side sleepers specifically, standard cots can feel unforgiving at the hips and shoulders, so it’s worth looking at options built with that in mind — this guide to the best camping cots for side sleepers breaks down which designs actually flex and cushion properly.
Warmth overnight is its own challenge when humidity is high. A few field-tested habits make a real difference: change into completely dry clothes before bed even if you feel only slightly damp, keep a hot water bottle at your feet if you have a way to boil water safely, and avoid breathing directly into your sleeping bag hood, since it adds moisture right where you don’t want it. This detailed guide on how to keep a tent warm at night covers additional techniques, and if you’re dealing with colder wet-weather trips specifically, how to keep a tent warm in winter goes further into insulation layering for the tent itself.
Dry bags are worth their weight for anything you can’t afford to get wet — your sleeping bag most of all. Even inside a “waterproof” backpack, a sleeping bag stored in its own dry bag or heavy-duty liner is protected even if water finds its way in elsewhere.

Keep your sleeping bag bone-dry no matter what the weather does with a dedicated waterproof dry bag.
Shop Dry Bags →8. Cooking and Eating Safely in the Rain
Cooking in the rain takes a bit of reorganizing, but it doesn’t need to be miserable or unsafe if you plan around a few key risks. The biggest one, and it bears repeating clearly: never run a gas stove inside your tent, even in a vestibule with the door mostly closed. Carbon monoxide buildup in an enclosed space is a serious, sometimes fatal risk, and it’s not worth it no matter how unpleasant the rain is outside.
Instead, set up a dedicated cooking area under a separate tarp or a dining canopy, pitched far enough from your sleeping tent that condensation and cooking smells don’t drift over, but close enough to be convenient. A tarp rigged in an A-frame or lean-to shape, angled so water runs off away from your cooking gear rather than pooling on top, gives you a genuinely dry working space even in steady rain.
Simplify your rainy-day menu. One-pot meals that come together quickly reduce the amount of time you’re standing in wet conditions fiddling with multiple pans, and pre-measuring ingredients into zip bags at home means less prep work exposed to the elements. A small camp umbrella clipped to a pack or trekking pole can also give you just enough dry space to manage a stove without a full tarp setup.
Keep a dedicated dry towel just for wiping down cooking equipment, and store your stove and fuel in a waterproof container between uses — wet matches and a damp lighter are a frustratingly common way for meal prep to grind to a halt. A butane lighter kept in a small waterproof pouch, plus waterproof matches as backup, solves this reliably.
Cleanup deserves the same amount of planning as the cooking itself. Wet ground turns a normal dish-washing routine into a muddy, slippery hassle, so setting up a small designated cleaning station — a folding basin on a flat rock or camp table under the same tarp — keeps things contained. Pack an extra dish towel or two specifically for this, since a single towel gets soaked through quickly in humid, rainy conditions and stops being useful halfway through the job.
If you’re cooking for a group, consider shifting to foods that reheat well or require less active tending, like a stew or chili made the day before and simply warmed up, rather than a dish that needs someone standing over it, stirring, for twenty minutes in the rain. This small adjustment to the menu can meaningfully cut down on how much time anyone spends exposed to the weather while still eating well.
9. Fire and Warmth Without a Campfire
A traditional campfire is genuinely difficult to get going and keep going in sustained rain, and it’s often not worth the frustration of fighting damp wood for an hour. That doesn’t mean you’re stuck cold, though — there are several reliable ways to get warmth and even some fire-based comfort without needing a roaring blaze.
If you do want to attempt a fire, focus entirely on finding dry tinder and kindling rather than dry logs — standing deadwood, the dry underside of larger branches, and the inner bark of certain trees stay dry even after hours of rain and burn far more easily than anything picked up off the wet ground. Building a small platform of dry sticks off the ground, and shielding the initial flame with a tarp held above (never directly over) the fire, gives a struggling flame a much better chance.
For a more reliable heat source, a portable propane heater rated for outdoor or well-ventilated use, or simply a few hot water bottles distributed around the tent, provide warmth without any of the smoke or fuss of an open flame. Battery-powered heated blankets are another increasingly popular option for car camping specifically, since they don’t involve any combustion risk at all.
Whatever heat source you choose, ventilation rules still apply strictly — anything that burns fuel needs fresh air, full stop, and this is not an area to cut corners on even when it’s cold and miserable outside.
10. Emergency Repairs When Gear Fails
Gear failures happen more often in rain than in dry weather, simply because wet, muddy conditions put extra strain on zippers, seams, and poles, and everything is a bit more slippery and harder to handle carefully. Having a small, dedicated repair kit on hand turns a potential trip-ending problem into a five-minute fix.
A solid kit should include a few sheets of strong repair tape (specifically made for tent fabric, since duct tape degrades and leaves residue), a needle and heavy-duty thread, spare tent pole sections or a splint sleeve, and a small tube of seam sealant for on-the-spot leak fixes. This breakdown of the best tent repair kits covers a few complete options that cover most common failures without adding much weight to your pack.
For a torn rainfly in the middle of a storm, a strip of repair tape applied to a dry, clean patch of fabric (wipe it down first, even with a dry cloth, since tape won’t adhere to wet material) will usually hold through the rest of the trip. A snapped tent pole can often be temporarily splinted using the pole’s own repair sleeve, which most quality tents include, or a sturdy stick and some cord in a pinch.
Zipper problems are especially common in wet, gritty conditions. If a zipper starts sticking or separating, a quick rub of zipper wax or even a bit of lip balm on the teeth can restore smooth function temporarily, buying you time until you can do a proper repair or replacement after the trip.

Don’t let a torn rainfly or busted pole end your trip early — pack a compact repair kit.
Shop Tent Repair Kits →11. Rainy-Day Activities and Morale
The physical side of rain prep is only half the equation — the other half is keeping spirits up, especially with kids or a group that’s not used to rough conditions. A dry, comfortable body handles a rainy afternoon fine; a bored, restless one starts counting down the minutes until the trip is over.
Set up a communal dry space early, whether that’s a large tarp shelter, a screen tent, or a vehicle with the trunk open, and stock it with games, cards, or a book before the rain actually starts. Waiting until everyone’s already stuck under a dripping tarp to figure out entertainment tends to feel chaotic; having it ready in advance makes the transition to “rain plan” feel smooth rather than like an emergency.
Short, well-timed outdoor bursts between rain bands — a quick walk in rain gear to spot wildlife more active in the wet, or simply standing under a tree canopy watching the storm — can actually become a highlight of the trip rather than something to dread, especially for kids who often find rain far more exciting than adults do. Hot drinks, whether coffee, tea, or hot chocolate, do a disproportionate amount of work for group morale relative to how little effort they take to make.
Finally, manage expectations honestly before the trip. A group that knows rain is likely and has planned around it handles a wet day far better than one that was promised sunshine and feels blindsided. A little forecast honesty upfront saves a lot of frustration later.
It also helps to build in a bit of structure to a rainy day rather than leaving it completely open-ended, since unstructured downtime under a tarp can start to feel long fairly quickly, especially for kids. Simple things — a planned round of a card game after lunch, a “spot the animal tracks” walk once the rain eases slightly, or a group cooking project like assembling foil-pack dinners together — give the day a shape and something to look forward to, even when the main activity is technically “waiting out the weather.”
Photography is an underrated rainy-day activity too. Mist settling over a lake, raindrops on leaves, or the particular quality of light that shows up right as a storm clears are all things a lot of people never get to see because they only camp on clear weekends. Framing the rain as something to document rather than just endure can shift the whole mood of a group surprisingly quickly.
12. Packing Up and Drying Gear Afterward
How you pack up after a wet trip determines whether your gear is ready for the next adventure or slowly growing mildew in a storage bin for the next six months. Never pack a tent away wet if you can help it — even a few hours of dampness trapped in a stuff sack is enough to start mildew growth, which produces a smell that’s extremely difficult to remove completely.
If you have to break camp while it’s still raining, pack the wet tent separately in its own bag (a large trash bag works fine in a pinch) and commit to fully setting it up again at home — in a garage, spare room, or even the backyard on the next dry day — to air out and dry completely before long-term storage. The same goes for tarps, rainflies, and any wet clothing; separating damp items from dry gear in your pack also keeps everything else from absorbing that moisture on the drive home.
Sleeping bags deserve particular care, since down insulation especially loses loft and warmth when compressed while even slightly damp. Hang bags fully open to air dry rather than stuffing them straight back into a compression sack.
Wipe down muddy stakes, poles, and cookware before packing, both to prevent rust on metal components and to avoid transferring mud and grit into your storage bins where it can work its way into fabric and zippers over time. A few minutes of cleanup at the end of the trip saves considerably more time and money in gear replacement down the line.
13. Camping in the Rain with Kids and Pets
Rain adds an extra layer of planning when you’re bringing along children or a dog, mostly because neither one reliably tells you when they’ve crossed from “having fun in the puddles” to “actually cold and starting to shut down.” Watching for the early signs of chill — shivering, quietness, cold hands — matters more than waiting for an obvious complaint, since younger kids especially often don’t recognize or articulate it until they’re already fairly cold.
Pack at least one full backup outfit per child, sealed in its own dry bag or freezer bag, separate from the rest of the luggage. Kids find their way into puddles and wet grass with impressive speed, and having a genuinely dry, ready-to-grab outfit prevents the scramble of digging through a damp duffel bag looking for something wearable. Rain boots and a proper rain suit (rather than just a jacket, since pants stay dry too) make an enormous difference in how long kids can comfortably stay outside enjoying the weather instead of retreating to the tent.
For pets, a towel routine at the tent entrance — wiping paws and belly before they come inside — keeps mud and moisture from soaking into your tent floor and sleeping area. Dogs lose body heat fast once their coat is wet, even breeds that seem built for cold weather, so a packable dog coat or a dry towel to wrap them in after a wet walk is worth the extra pack space. Keep an eye on paw pads too, since prolonged exposure to cold, wet ground can cause the same kind of chill and discomfort that cold, wet feet cause in people.
Both kids and pets benefit enormously from a dedicated dry “base” — the tarp shelter or screen tent mentioned earlier — where they can decompress, warm up, and play without immediately tracking mud into the sleeping area. Setting clear boundaries about which space is the “wet zone” and which is the “dry zone” early in the trip saves a lot of frustration later.
14. Rainy-Weather Packing Checklist
It’s easy to remember the big items — tent, rainfly, jacket — and forget the smaller things that end up mattering most once you’re actually standing in the rain. This checklist covers the details that experienced wet-weather campers tend to pack without thinking twice, precisely because they’ve been caught without them before.
| Category | Must-Pack Items |
|---|---|
| Shelter | Waterproof tent, footprint/groundsheet, extra guylines, repair tape |
| Personal gear | Waterproof jacket & pants, spare socks (extra), dry camp shoes, wide-brim hat |
| Sleep system | Insulated sleeping pad, dry bag for sleeping bag, extra base layer for bed |
| Cooking | Tarp for cooking area, waterproof matches, backup lighter, one-pot meal ingredients |
| Utility | Zip-top bags (multiple sizes), microfiber towel, headlamp with spare batteries, portable heater or hot water bottle |
| Repairs | Tent repair kit, seam sealant, zipper wax, spare tent pole sleeve |
None of these items are expensive or hard to find, but they’re the ones that consistently get left off packing lists that only account for sunny-day camping. Running through this list the night before, rather than the morning of departure, gives you time to actually track down anything missing instead of leaving with gaps in your kit.

Grab the small essentials that make the biggest difference on a wet trip — dry bags, zipper wax, and backup fire starters.
Shop Rainy-Weather Essentials →Frequently Asked Questions
Is it actually safe to camp in the rain?
Yes, light to moderate rain is generally safe for camping as long as you’re prepared with proper shelter, dry layers, and a campsite chosen away from flood-prone low points. Severe thunderstorms, high winds, or flash-flood-prone areas are where you should reconsider or postpone a trip, since lightning and rapid water rise are genuine safety hazards rather than just discomforts.
How do I stop my tent floor from getting wet underneath?
Use a groundsheet or footprint sized slightly smaller than your tent’s actual footprint (so it doesn’t collect and funnel water underneath), choose a slightly elevated pitch site, and make sure your tent floor’s waterproof coating is refreshed before the trip if it’s more than a season or two old.
Why does my tent feel wet inside even though it’s not leaking?
This is almost always condensation rather than a leak — warm, humid air inside the tent meets the cooler rainfly and turns into water droplets. Improving ventilation by keeping vents and mesh panels open, and avoiding cooking inside the tent, usually resolves it.
What’s the best fabric for a rainy-weather tent?
Silicone-coated nylon and polyurethane-coated polyester both perform well, offering a strong balance of water resistance, weight, and durability. Canvas performs well once it’s “weathered in” but becomes very heavy when saturated, which matters if you’re carrying it any distance.
Can I use a tarp instead of a tent in the rain?
A tarp can work for short trips or as a supplementary shelter, but it offers far less protection from wind-driven rain, insects, and cold compared to a fully enclosed tent with a rainfly. Most campers use tarps to create dry cooking or gathering spaces alongside a proper tent, rather than as a full replacement.
How do I keep my sleeping bag dry during a rainy trip?
Store it in a dedicated waterproof dry bag or a heavy-duty liner, even inside a backpack that’s marketed as water-resistant. Avoid packing it directly against the outside of your bag or in outer mesh pockets where rain has direct access.
Is it dangerous to run a stove inside my tent to stay warm?
Yes, this is genuinely dangerous. Combustion appliances of any kind, including gas stoves and charcoal, produce carbon monoxide, which can build up to lethal levels in an enclosed tent even with a vent partly open. Use battery-powered heaters or hot water bottles for in-tent warmth instead.
What should I do if my tent starts leaking mid-storm?
Locate the source if possible and apply repair tape to a wiped-dry patch of fabric, or seam sealant directly over a leaking seam. Moving affected gear away from the leak and using a small towel to manage drips until conditions calm down enough for a proper fix also helps in the moment.
How do I stop tent stakes from pulling out in muddy ground?
Use wider, angled stakes rather than thin round pegs, drive them in at a slight angle away from the tent rather than straight down, and make sure every available guyline is used and tightened, since this spreads the load across more anchor points.
What’s the biggest mistake people make when camping in the rain?
Underestimating campsite selection. Even great gear can’t compensate for a tent pitched in a natural drainage path or low spot, so scouting the ground carefully before setting up is one of the highest-value habits you can build.
Should I cancel a camping trip if rain is forecast?
Not necessarily — a well-prepared trip with proper gear, site selection, and rain-day activities planned in advance can still be enjoyable and memorable. Reserve cancellation for forecasts involving severe storms, flash flood warnings, or conditions that genuinely compromise safety rather than just comfort.
Final Thoughts: Rain Isn’t the Enemy, Being Unprepared Is
Every point in this guide comes back to the same basic idea: rain changes the conditions, but it doesn’t have to change the outcome of your trip. A tent that’s actually rated for wet weather, a campsite chosen with drainage in mind, dry layers packed in advance, and a repair kit tucked into your bag together cover almost every scenario a rainy weekend can throw at you.
None of this requires an entirely new gear closet. Most campers can dramatically improve their rain-readiness with a handful of targeted upgrades — refreshed waterproofing, better stakes, a proper dry bag for the sleeping bag — rather than replacing everything at once. Start with whatever’s weakest in your current setup and build from there.
Shop Rainy-Weather Camping Essentials →
Pingback: Camping Safety Tips for a Stress-Free Experience