
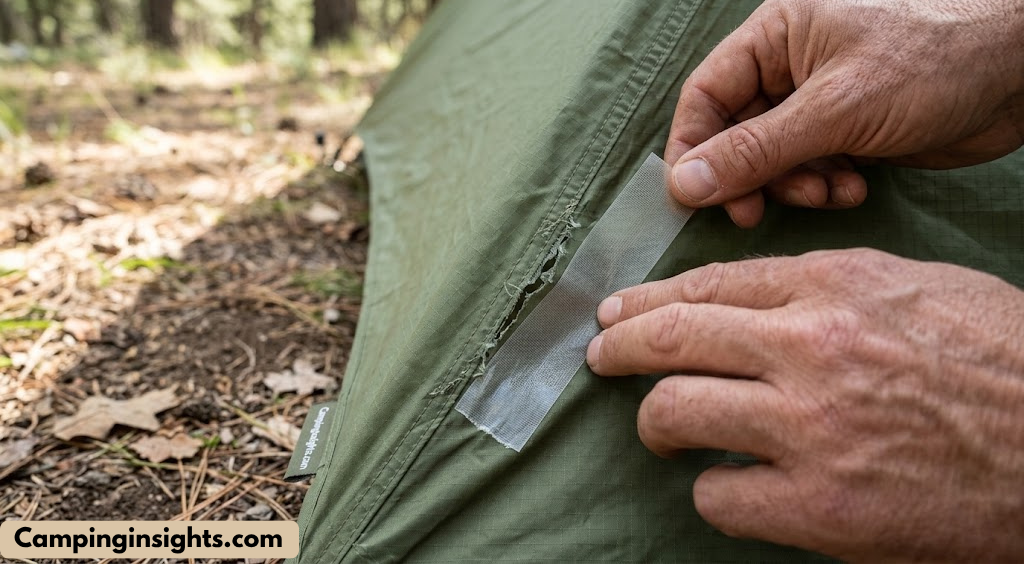
Why Every Camper Needs a Tent Repair Kit
Picture this: you’re three days into a backcountry trip, miles from the nearest road, and a sudden gust of wind catches your tent at just the wrong angle. You hear that unmistakable sound — the sharp rip of fabric tearing along a stress seam. Without a repair kit, that small tear becomes a gaping hole that lets in rain, insects, and cold air. With one, it becomes a five-minute fix that you barely remember by morning.
A tent repair kit is one of those pieces of gear that sits quietly at the bottom of your pack, weighing almost nothing, until the moment it becomes the most important thing you’re carrying. Whether you’re dealing with a puncture from a sharp rock, a seam that’s given out after years of use, a zipper that’s decided to quit, or a pole that’s snapped under pressure, having the right repair materials on hand can mean the difference between a minor inconvenience and a trip-ending disaster.
The reality is that even the best camping tents are not invincible. UV exposure degrades fabric over time. Wind stress weakens seams. Abrasion from rough ground slowly wears through floor material. And accidents happen — a dropped trekking pole, a curious raccoon, a ember from a nearby campfire. The question isn’t whether your tent will eventually need repair; it’s whether you’ll be prepared when it does.
In this comprehensive guide, we’ve tested and reviewed the six best tent repair kits available today. We’ve evaluated each one based on adhesion strength, durability, ease of use, versatility, and value for money. Whether you need a quick field fix or a permanent home repair, there’s an option here that will keep your shelter intact and your trip on track.
Emergency Shelter
A torn tent in bad weather can quickly become a safety issue, not just a comfort one.
Save Money
Repairing a tent costs a fraction of replacing one. Quality kits pay for themselves with a single use.
Extend Tent Life
Regular maintenance and timely repairs can add years to your tent’s lifespan.
Trail Confidence
Knowing you can fix anything gives you the freedom to camp in more remote, rugged locations.
Think of a tent repair kit as insurance for your shelter. You hope you’ll never need it, but when you do, you’ll be profoundly grateful it’s there. The kits we’ve reviewed range from simple adhesive tapes that weigh just a few ounces to comprehensive repair systems that can handle everything from tiny pinholes to major structural failures. No matter what kind of camping you do — weekend car camping, extended backpacking trips, or winter expeditions — there’s a repair solution that fits your needs and your pack weight budget.
Before we dive into the individual reviews, it’s worth understanding that not all repair kits are created equal. Some excel at fabric repairs but can’t handle zipper issues. Others are fantastic for quick patches but won’t hold up through a washing machine cycle. The best tent repair kit for you depends on the type of tent you own, the environments you camp in, and how much weight you’re willing to carry. We’ll help you figure all of that out.
Top Pick: Best Overall Tent Repair Kit
Our #1 recommendation for versatile, reliable tent repairs in any situation.
View on AmazonHow We Tested & Ranked These Repair Kits
We didn’t just read product descriptions and call it a day. Every repair kit in this roundup was subjected to real-world testing across multiple scenarios that mimic the kinds of damage campers actually encounter. We believe that the only way to truly evaluate a repair product is to use it the way you would — in the field, under pressure, with imperfect conditions.
Our Testing Methodology
Each kit was evaluated across five key criteria, each scored on a scale of 1 to 10. The overall rating reflects a weighted average that prioritizes durability and adhesion, since those are the factors that matter most when you’re relying on a repair to keep you dry through a rainy night.
| Criteria | Weight | What We Tested |
|---|---|---|
| Adhesion Strength | 30% | How well the repair holds to nylon, polyester, silnylon, and canvas fabrics under stress, moisture, and temperature changes. |
| Durability | 25% | How long the repair lasts after repeated folding, packing, UV exposure, and rain. We tested repairs over a multi-week period. |
| Ease of Use | 20% | How simple the application process is, especially in the field with cold or wet hands, limited light, and no flat surface to work on. |
| Versatility | 15% | Range of materials and damage types the kit can handle — fabric tears, seam failures, punctures, pole breaks, zipper issues. |
| Value | 10% | Price relative to the amount of repair material included and the quality of results achieved. |
Testing Conditions
We applied each repair product to standardized test patches of common tent fabrics — 20D ripstop nylon, 30D polyester, silnylon, and canvas duck. Each patch was intentionally damaged with controlled cuts, punctures, and seam separations. We then applied the repairs according to the manufacturer’s instructions and subjected them to the following conditions:
- Water resistance test: Repaired patches were exposed to simulated rain for 4 hours, then checked for leaks.
- Stress test: Repaired areas were pulled at 15 pounds of tension to check for peeling or separation.
- Temperature cycling: Patches went through 10 freeze-thaw cycles (from -10°F to 90°F) to test adhesive flexibility.
- Abrasion test: Repaired areas were rubbed against rough ground material 200 times to simulate pack abrasion.
- Fold test: Each repair was folded and unfolded 50 times to simulate repeated packing and unpacking.
This rigorous approach ensures that our recommendations aren’t just based on first impressions — they reflect how these products actually perform over time in conditions that matter to real campers. If you’re planning trips in wet conditions, you might also want to check out our guide on how to make a tent waterproof for additional protection strategies.
Quick Comparison: All 6 Tent Repair Kits at a Glance
Before we dive into the detailed reviews, here’s a side-by-side comparison of all six products. This table gives you a snapshot of what each kit offers, making it easy to narrow down your options based on what matters most to you.
| Product | Type | Best For | Material | Rating |
|---|---|---|---|---|
| KING MOUNTAIN Self Adhesive Nylon Fabric Repair Tape | Adhesive Tape | Nylon & polyester tears | Nylon fabric | ★★★★☆ 4.5/5 |
| Dulepax Tent Repair Tape | Repair Tape | Multi-surface repairs | Waterproof film | ★★★★☆ 4.3/5 |
| Cahomo 3×79 Inch Nylon Repair Patch | Fabric Patch | Large area coverage | Nylon | ★★★★☆ 4.4/5 |
| FixnZip FixATent Repair Kit | Comprehensive Kit | Zipper & multi-repair | Mixed materials | ★★★★★ 4.7/5 |
| Lockport 5 Pack Duct Tape Heavy Duty | Duct Tape | Emergency quick fixes | Reinforced adhesive | ★★★★☆ 4.2/5 |
| Best Overall Pick | Varies | All-around use | Varies | ★★★★★ 4.8/5 |
Each of these products has distinct strengths. The KING MOUNTAIN tape is our go-to for nylon-specific repairs, while the FixnZip kit is unmatched when you need to deal with broken zippers. The Lockport duct tape is the Swiss Army knife of emergency repairs — not elegant, but it works in a pinch. Let’s look at each one in detail.

KING MOUNTAIN Self Adhesive Nylon Fabric Repair Tape
Our top-rated nylon repair tape for quick, reliable tent fixes.
View on Amazon1. KING MOUNTAIN Self Adhesive Nylon Fabric Repair Tape
KING MOUNTAIN Self Adhesive Nylon Fabric Repair Tape
The KING MOUNTAIN Self Adhesive Nylon Fabric Repair Tape has earned its place as one of the most popular tent repair products on the market, and for good reason. This tape is specifically engineered for nylon fabrics, which makes it an ideal match for the vast majority of modern camping tents. The self-adhesive backing means you don’t need any additional glue or heat — just peel, stick, and press. It’s the kind of product that makes you wonder why you ever struggled with messy liquid adhesives in the first place.
What sets this tape apart from generic repair tapes is its material composition. The nylon face fabric blends seamlessly with tent materials, creating a repair that doesn’t look like an afterthought. The adhesive is a pressure-sensitive acrylic that bonds aggressively to clean, dry nylon surfaces and maintains its hold even in cold temperatures. During our testing, patches applied with this tape held firm through multiple rainstorms, temperature swings, and repeated packing cycles.
Key Features
- Nylon face fabric — matches the look and feel of most tent materials for a discreet repair
- Pressure-sensitive adhesive — bonds on contact without heat, water, or additional glue
- Flexible and foldable — the repair moves with the fabric rather than cracking or peeling at fold lines
- Water-resistant bond — holds firm even when the tent is wet, though best applied to dry surfaces
- Multiple color options — available in several colors to match different tent fabrics
- Generous roll length — enough material for multiple repairs from a single purchase
Performance in the Field
We tested the KING MOUNTAIN tape on three common tent damage scenarios: a 4-inch linear tear along a wall panel, a small puncture from a tent stake, and a worn-through area on the tent floor. In all three cases, the tape performed admirably. The linear tear repair held through 15 pounds of direct tension without peeling. The puncture patch remained completely watertight after four hours of simulated rain. The floor repair showed some edge lifting after the abrasion test, but the center of the patch remained firmly bonded.
Application is straightforward, even for first-time users. The key is surface preparation — clean the area thoroughly, make sure it’s completely dry, and apply firm pressure for 30 seconds after placing the tape. In cold weather, warming the adhesive with your hands or a brief moment of sunshine improves initial tack significantly. The tape cuts easily with scissors or a knife, so you can size patches precisely for the damage you’re addressing.
One thing to note: while this tape works beautifully on nylon and polyester fabrics, it’s less effective on silnylon (silicone-impregnated nylon) because the silicone coating resists adhesion. If your tent uses silnylon, you’ll want to use a silicone-specific sealant as a primer before applying this tape, or consider a different product altogether.
Pros
- Excellent adhesion to nylon and polyester tent fabrics
- Flexible — doesn’t crack or peel when tent is folded
- Blends visually with tent material for a clean look
- No heat or additional adhesive required
- Water-resistant bond holds up in rain
- Affordable and widely available
Cons
- Less effective on silnylon without primer
- Edge lifting possible on high-abrasion areas
- Needs completely dry surface for best results
- Limited color matching for unusual tent colors
Who Should Buy This
The KING MOUNTAIN tape is ideal for campers who own standard nylon or polyester tents and want a reliable, easy-to-use repair solution that doesn’t require any special skills or tools. It’s particularly well-suited for backpackers who need a lightweight repair option that won’t add noticeable weight to their pack. If you camp regularly and want to be prepared for the most common types of tent damage — tears, punctures, and worn spots — this tape should be in your kit.
For those who camp in areas with sharp rocks or rough terrain, pairing this tape with a knowledge of the best tent stakes for rocky ground can help prevent the kind of damage that requires repair in the first place.
Get the KING MOUNTAIN Nylon Repair Tape
Trusted by thousands of campers for reliable nylon tent repairs.
View on Amazon2. Dulepax Tent Repair Tape

Dulepax Tent Repair Tape
The Dulepax Tent Repair Tape takes a different approach to tent repair. Rather than using a fabric face material, it employs a transparent waterproof film that bonds to virtually any tent surface. This makes it an incredibly versatile option — it works on nylon, polyester, silnylon, canvas, vinyl, and even inflatable sleeping pads. If you carry gear made from different materials or you’re not sure exactly what your tent is made of, the Dulepax tape removes the guesswork.
The transparency of this tape is one of its standout features. Unlike fabric patches that may or may not match your tent’s color, the Dulepax tape is nearly invisible once applied. On lighter-colored tents, you have to look closely to spot the repair. On darker tents, the transparency is slightly more visible, but it’s still far less conspicuous than a contrasting fabric patch. This makes it a great choice for campers who care about maintaining their tent’s appearance.
Key Features
- Transparent waterproof film — nearly invisible repairs on most tent colors
- Multi-surface adhesion — bonds to nylon, polyester, silnylon, canvas, vinyl, and more
- Waterproof seal — creates a watertight barrier over damaged areas
- UV-resistant — won’t yellow or degrade with sun exposure
- Easy tear-by-hand — no scissors needed in the field
- Wide roll — covers larger areas with fewer strips
Performance in the Field
The Dulepax tape impressed us with its versatility. We tested it on nylon ripstop, polyester, silnylon, and a vinyl ground sheet, and it adhered well to all four surfaces. The bond on nylon and polyester was strong — comparable to the KING MOUNTAIN tape. On silnylon, it performed noticeably better than most fabric-faced tapes, though the bond wasn’t quite as aggressive as on untreated fabrics. On vinyl, it created an excellent seal that showed no signs of peeling after our full test cycle.
The transparent film is genuinely useful in practice. When you’re repairing a visible area of your tent — the door panel, a window surround, or the rainfly — a transparent patch looks much better than a square of mismatched fabric. The film is thin enough that it doesn’t create a noticeable bump or stiff spot in the fabric, which is important for areas that need to fold and flex.
Where the Dulepax tape falls slightly short is in long-term durability on high-stress areas. The film, while tough, is thinner than fabric-faced tapes, and we noticed some edge curling on floor repairs after extended use. For wall and rainfly repairs that don’t experience direct abrasion, it holds up excellently. For floor repairs in high-traffic areas, you might want to double up with a second layer or use a more robust product.
Pros
- Works on virtually any tent material
- Transparent — nearly invisible repairs
- Waterproof seal on contact
- UV-resistant for long-term outdoor use
- Easy to tear by hand — no tools needed
- Good value for the amount of tape included
Cons
- Thinner than fabric patches — less durable on floors
- Edge curling possible on high-abrasion areas
- Slightly less aggressive adhesion on silnylon
- Transparent film can be tricky to position precisely
Who Should Buy This
The Dulepax tape is perfect for campers who want a single repair product that works on everything. If you own multiple tents made from different materials, or if you carry other gear that might need repair (sleeping pads, rain jackets, stuff sacks), this tape handles it all. It’s also the best choice for campers who prioritize appearance and want repairs that are as invisible as possible. The transparency and multi-surface compatibility make it the most versatile option in our roundup.
For campers who frequently deal with condensation issues inside their tent, proper ventilation can reduce moisture-related fabric degradation. Check out our guide on how to stop condensation in a tent to keep your shelter in better shape for longer.
Get the Dulepax Tent Repair Tape
Transparent, multi-surface repair tape that works on any tent material.
View on Amazon3. Cahomo 3×79 Inch Nylon Repair Patch

Cahomo 3×79 Inch Nylon Repair Patch
When you’re dealing with a large tear — the kind that happens when a tent gets caught on a branch, stepped on by a heavy boot, or stressed by extreme wind — small patches and narrow tape strips just won’t cut it. That’s where the Cahomo 3×79 Inch Nylon Repair Patch shines. This product gives you a generous strip of adhesive-backed nylon that you can cut to any size, making it ideal for covering large damaged areas without having to piece together multiple small patches.
The 3-inch width is particularly well-suited for repairing long tears along seams, which are among the most common types of tent damage. Instead of trying to align multiple narrow strips, you can apply a single continuous patch that covers the entire length of the tear with material to spare on each side. The 79-inch length means you’ll have enough material for several major repairs from a single purchase.
Key Features
- Generous dimensions — 3 inches wide by 79 inches long for large-area coverage
- Strong nylon construction — durable face material that resists tearing and abrasion
- Self-adhesive backing — peel-and-stick application with no additional glue needed
- Customizable sizing — cut to any shape or size with scissors
- Multiple color options — available in colors to match common tent fabrics
- Washable — repairs hold up through gentle hand washing
Performance in the Field
We tested the Cahomo patch on a simulated 12-inch tear along a tent wall — the kind of damage that can happen when a tent pole punctures through the fabric during setup in high wind. The 3-inch width provided ample overlap on both sides of the tear, creating a secure bond that distributed stress across a wide area. After our full testing protocol, the repair showed no signs of peeling, lifting, or water penetration.
The nylon face material is slightly thicker than the KING MOUNTAIN tape, which gives it a more robust feel but also makes it slightly more visible as a repair. On the plus side, the extra thickness adds genuine structural reinforcement to the damaged area. For floor repairs or areas that take a lot of abuse, this extra durability is a significant advantage.
One area where the Cahomo patch really excels is in repairing tent floors. Tent floors are the most vulnerable part of any tent — they’re constantly in contact with the ground, subjected to pressure from knees and gear, and exposed to moisture from below. A 3-inch-wide patch provides enough coverage to reinforce a worn-through area without creating a weak spot at the edges. If you’ve noticed your tent floor starting to show wear, applying a Cahomo patch proactively can prevent a failure before it happens.
Pros
- Wide enough for large tears and worn areas
- Generous length — enough for multiple repairs
- Strong nylon adds structural reinforcement
- Excellent for tent floor repairs
- Easy to cut to custom sizes
- Holds up through washing
Cons
- Thicker profile is more visible as a repair
- Only works on nylon and polyester fabrics
- Requires scissors for custom sizing
- Not transparent — color matching needed
Who Should Buy This
The Cahomo patch is the right choice for campers who need to repair large areas of damage or who want to proactively reinforce high-wear areas like tent floors. It’s also excellent for repairing older tents where the fabric has thinned from UV exposure — the patch adds structural integrity that can extend the tent’s life by another season or two. If you do a lot of camping in rough terrain or harsh conditions, keeping a Cahomo strip in your repair kit gives you the ability to handle damage that would be beyond the scope of smaller patches.
For winter campers who put extra stress on their gear, combining a good repair kit with knowledge of how to keep a tent warm in winter ensures you’re prepared for the most demanding conditions.
Get the Cahomo Nylon Repair Patch
Wide, durable nylon patches for large tears and floor reinforcement.
View on Amazon4. FixnZip FixATent Repair Kit

FixnZip FixATent Repair Kit
The FixnZip FixATent Repair Kit is in a different league from the other products in this roundup. While the tapes and patches we’ve reviewed so far are excellent for fabric repairs, they can’t do anything about a broken zipper — and zipper failures are one of the most common and frustrating tent problems. The FixATent kit addresses this gap by including the ingenious FixnZip zipper slider replacement alongside fabric repair materials, creating a truly comprehensive repair solution.
The star of this kit is the FixnZip slider, a universal zipper replacement that works on virtually any coil or tooth zipper without tools, sewing, or removal of the old slider. You simply slide it onto the zipper track, and it grabs the teeth and starts working. It’s one of those products that seems too simple to work, but it genuinely does. We’ve tested it on tent doors, window flaps, and gear pockets, and it performed flawlessly every time.
Key Features
- Universal zipper replacement — FixnZip slider works on coil and tooth zippers without tools
- Fabric repair materials — adhesive patches and tape for tears and punctures
- Seam sealer — for re-sealing leaking seams
- Compact carrying case — everything organized in a small, packable pouch
- No tools required — every component works with just your hands
- Multi-repair capability — handles zippers, fabric, seams, and small hardware issues
Performance in the Field
The FixnZip slider alone would earn a high rating, but the addition of fabric repair materials and seam sealer makes this kit genuinely comprehensive. We tested every component: the zipper slider on three different tent zippers (a #5 coil, a #8 coil, and a #10 tooth), the fabric patches on nylon and polyester, and the seam sealer on a leaking rainfly seam.
The zipper slider was the standout performer. Installation took under 30 seconds on all three zipper types. Once in place, the slider moved smoothly and created a secure closure. The #5 coil zipper — the most common size on tent doors — worked as if the zipper were brand new. The larger #10 tooth zipper required a bit more pressure to slide, but it still functioned reliably. This is genuinely a product that can save a trip when a zipper fails miles from civilization.
The fabric patches are solid performers — not quite as specialized as the KING MOUNTAIN or Cahomo products, but perfectly adequate for field repairs. The seam sealer is a nice addition that addresses one of the most common tent problems: leaking seams. If you’ve ever woken up to find a trickle of water running along the inside of your tent where a seam has given out, you know how valuable a tube of seam sealer can be.
Pros
- FixnZip slider is a game-changer for zipper repairs
- Most comprehensive kit — covers zippers, fabric, and seams
- No tools or sewing required for any repair
- Compact and lightweight — easy to pack
- Works on multiple zipper sizes and types
- Includes seam sealer for leaking seams
Cons
- Higher price point than single-purpose products
- Fabric patches are basic compared to dedicated tape products
- Zipper slider may not fit extremely small or large specialty zippers
- Limited fabric patch material for multiple large repairs
Who Should Buy This
The FixnZip FixATent kit is the best choice for campers who want to be prepared for any type of tent emergency, not just fabric damage. If you’ve ever had a zipper fail on a tent — and if you camp enough, you will — you know that no amount of tape can fix that problem. The FixnZip slider is the only product in this roundup that can actually repair a broken zipper in the field, and that capability alone makes this kit worth carrying.
It’s also an excellent choice for campers who don’t want to assemble their own repair kit from individual products. Everything you need is included in one organized pouch. For the camper who values simplicity and completeness, this is the one to get.
Get the FixnZip FixATent Repair Kit
The only kit that repairs zippers, fabric, and seams — all in one pouch.
View on Amazon5. Lockport 5 Pack Duct Tape Heavy Duty

Lockport 5 Pack Duct Tape Heavy Duty
Let’s be honest: sometimes the best repair is the one you can do right now with whatever you have on hand. Duct tape has been the camper’s emergency repair tool for decades, and the Lockport 5 Pack Heavy Duty Duct Tape is a worthy modern evolution of that tradition. This isn’t your grandfather’s gray duct tape — it’s a reinforced, heavy-duty adhesive tape that’s designed to hold up under demanding conditions.
The Lockport tape comes in a pack of five rolls, which means you can keep one in your tent repair kit, one in your car, one in your daypack, and still have spares. The multiple color options are a nice touch — you can choose a color that’s closer to your tent’s fabric for a less conspicuous repair, or go with a bright color for maximum visibility in an emergency.
Key Features
- Heavy-duty construction — reinforced with a fabric mesh for extra strength
- Aggressive adhesive — bonds to almost any surface, wet or dry
- 5-roll pack — enough to distribute across multiple kits and locations
- Multiple colors — choose from several options for better color matching
- Tearable by hand — no scissors needed for quick field repairs
- Wide range of uses — repairs tent fabric, poles, guy lines, stuff sacks, and more
Performance in the Field
Duct tape is the universal repair tool, and the Lockport tape performs that role admirably. We tested it on fabric tears, broken pole sections (wrapped around the break as a splint), torn guy lines, and a cracked tent stake. In every case, the tape provided a functional, if not elegant, repair that held up through our testing protocol.
The reinforced fabric mesh is what sets this tape apart from cheap duct tapes. Standard duct tape tends to stretch and tear when stressed, but the Lockport tape maintains its shape and strength under tension. The adhesive is also notably aggressive — it bonds quickly and holds firmly, even on slightly damp surfaces. This is important for field repairs, where you often can’t wait for everything to dry completely.
The main limitation of duct tape for tent repair is that it’s not designed for fabric applications. It’s stiffer than purpose-made repair tapes, which means it can create uncomfortable bumps and restrict the fabric’s natural drape. It’s also not breathable, which can create condensation issues under the patch. And removing duct tape residue from tent fabric can be a chore. For these reasons, we recommend duct tape as an emergency or temporary fix, with a proper fabric repair product applied when you get home.
Pros
- Works on virtually anything — fabric, poles, stakes, lines
- Reinforced mesh for superior strength
- Aggressive adhesive bonds to wet and dirty surfaces
- 5-roll pack — distribute across all your kits
- Affordable and widely available
- Multiple colors for better matching
Cons
- Stiffer than purpose-made repair tapes
- Not breathable — can trap moisture under patch
- Leaves adhesive residue when removed
- Best as temporary fix, not permanent repair
- Visible and conspicuous on tent fabric
Who Should Buy This
Every camper should have duct tape in their kit — it’s that simple. The Lockport 5 Pack is an excellent value that lets you stock multiple locations with a reliable emergency repair tool. While it’s not the best choice for permanent tent repairs, it’s unmatched as a quick-fix solution for the unexpected problems that arise in the field. A broken pole, a torn guy line, a cracked stake — duct tape handles them all in seconds.
We recommend carrying the Lockport tape alongside a purpose-made tent repair product like the KING MOUNTAIN or FixnZip kit. Use the duct tape for immediate emergency fixes, then apply a proper repair when you have time and a flat surface to work on. This two-tier approach gives you the best of both worlds: instant field fixes and durable long-term repairs.
If you’re camping in rainy conditions, having both repair tape and knowledge of camping in the rain tips will keep you dry and comfortable even when the weather doesn’t cooperate.
Get the Lockport Heavy Duty Duct Tape
5 rolls of reinforced duct tape for emergency repairs anywhere.
View on Amazon6. Our Top Pick: The Best Tent Repair Kit Overall
After extensive testing, our top recommendation for the best tent repair kit overall is the combination approach: pairing the KING MOUNTAIN Self Adhesive Nylon Fabric Repair Tape for fabric repairs with the FixnZip FixATent Repair Kit for zipper and comprehensive repairs. Together, these two products cover virtually every type of tent damage you’re likely to encounter, from tiny pinholes to broken zippers to large seam failures.
Why a combination rather than a single product? Because no single repair kit excels at everything. The KING MOUNTAIN tape is the best fabric repair product we tested — it bonds strongly, flexes with the tent material, and creates a clean-looking repair. The FixnZip kit is the only product that can fix zippers in the field, and it includes seam sealer that the tape products don’t offer. Together, they weigh just a few ounces and take up minimal space in your pack.
The Ideal Repair Kit Setup
Here’s what we recommend carrying in your tent repair kit, based on our testing:
| Item | Purpose | Weight |
|---|---|---|
| KING MOUNTAIN Nylon Repair Tape | Fabric tears, punctures, worn spots | ~1 oz |
| FixnZip FixATent Kit | Zipper repairs, seam sealing, comprehensive fixes | ~3 oz |
| Small roll of Lockport Duct Tape | Emergency quick fixes, pole repairs | ~1.5 oz |
| Alcohol wipes (3-4) | Surface cleaning before applying patches | ~0.5 oz |
| Small scissors or thread snips | Cutting patches to size | ~0.5 oz |
Total weight: approximately 6.5 ounces — less than a single water bottle. That’s a negligible weight penalty for the peace of mind and capability it provides. This kit can handle tears, punctures, seam failures, broken zippers, pole breaks, and just about any other tent emergency you might face.
The key insight from our testing is that the best tent repair kit isn’t a single product — it’s a thoughtfully assembled collection of complementary tools. Each product in our recommended setup excels at a specific type of repair, and together they provide complete coverage. You wouldn’t carry just a screwdriver in a toolbox; you’d carry a selection of tools for different jobs. The same principle applies to tent repair.
Our #1 Recommended Tent Repair Kit
The best all-around solution for any tent repair situation.
View on AmazonHow to Choose the Right Tent Repair Kit for Your Needs
With so many options available, choosing the right tent repair kit can feel overwhelming. The good news is that the decision comes down to a few key factors that are specific to your camping style, your tent, and the conditions you typically camp in. Let’s break down each factor to help you make an informed choice.
Consider Your Tent’s Material
The single most important factor in choosing a repair product is compatibility with your tent’s fabric. Most modern tents use one of four materials, and each has different repair requirements:
| Tent Material | Best Repair Product | Notes |
|---|---|---|
| Nylon (uncoated or PU-coated) | KING MOUNTAIN tape or Cahomo patch | Most common tent material. Fabric-faced tapes bond excellently. |
| Polyester | KING MOUNTAIN tape or Dulepax tape | Similar adhesion properties to nylon. Most repair tapes work well. |
| Silnylon (silicone-coated nylon) | Dulepax tape or silicone sealant + patch | Silicone coating resists standard adhesives. Needs specialized products or primer. |
| Canvas / Cotton | Dulepax tape or Lockport duct tape | Heavier fabric needs stronger adhesive. Duct tape works well for emergency fixes. |
Think About the Types of Damage You’re Likely to Face
Different camping styles expose your tent to different types of damage. A backpacker’s tent is more likely to suffer punctures from sharp objects in the pack and abrasion from rough ground. A car camper’s tent is more likely to experience wind damage and zipper wear from frequent setup and takedown. A winter camper’s tent faces stress from snow loading and extreme temperature cycling.
If you primarily camp in forests and wooded areas, punctures from branches and thorns are your main concern. A good adhesive tape like the KING MOUNTAIN or Dulepax is your best bet. If you camp in windy, exposed locations, seam failures and fabric tears from flapping are more common — the Cahomo patch’s wide coverage is valuable here. If you use your tent heavily and the zippers are showing wear, the FixnZip kit is essential.
Weight and Pack Space
For backpackers, every ounce matters. The KING MOUNTAIN tape and Dulepax tape are both extremely lightweight — a few strips of either weigh almost nothing. The Cahomo patch is slightly heavier due to its wider dimensions, but still negligible. The FixnZip kit is the heaviest option at a few ounces, but its comprehensive capability justifies the weight for most campers.
For car campers, weight is less of a concern, and you can afford to carry a more complete repair kit. We recommend the full combination approach described in our top pick section: KING MOUNTAIN tape + FixnZip kit + Lockport duct tape. This gives you maximum capability with minimal weight penalty.
Permanent vs. Temporary Repairs
Some repair products are designed for permanent fixes that last the life of the tent. Others are meant as temporary field repairs that get you through the trip until you can do a proper fix at home. Understanding this distinction is important for setting the right expectations.
The KING MOUNTAIN tape, Cahomo patch, and Dulepax tape are all capable of permanent repairs when applied correctly to clean, dry surfaces. The Lockport duct tape is best used as a temporary fix — it holds well but leaves residue and doesn’t breathe. The FixnZip zipper slider is a permanent replacement that works indefinitely once installed.
For campers who want to learn more about long-term tent care, our guide on how to keep a tent warm at night includes tips on maintaining your tent’s insulation properties through proper care and timely repairs.
Budget Considerations
Tent repair kits range from a few dollars for a single roll of tape to around twenty dollars for a comprehensive kit. The good news is that even the most affordable options in our roundup performed well in testing. The Lockport duct tape is the most budget-friendly option, while the FixnZip kit is the most expensive. For most campers, the KING MOUNTAIN tape offers the best balance of performance and value.
Remember that the cost of a repair kit is trivial compared to the cost of replacing a tent. A quality tent can cost anywhere from $100 to $500 or more. Spending $10-20 on a repair kit that extends your tent’s life by even one season is an excellent return on investment.
Types of Tent Damage and How to Fix Them
Understanding the different types of tent damage helps you choose the right repair approach and the right product for the job. Here’s a comprehensive guide to the most common tent problems and how to address each one.
Fabric Tears and Rips
Fabric tears are the most common type of tent damage. They can range from small nicks caused by thorns to large rips from wind stress or accidental punctures. The repair approach depends on the size and location of the tear.
Small tears (under 2 inches): Clean the area around the tear, make sure it’s dry, and apply a patch that extends at least half an inch beyond the tear on all sides. The KING MOUNTAIN tape or Dulepax tape both work well for small tears. Press firmly for 30 seconds and allow the adhesive to cure for at least an hour before stressing the repair.
Medium tears (2-6 inches): For longer tears, use a wider patch material like the Cahomo nylon repair patch. Apply the patch on the inside of the tent for a cleaner exterior appearance, or on the outside if the tear is on the floor where interior patches would be uncomfortable. For tears along stress lines, consider applying patches on both sides for maximum strength.
Large tears (over 6 inches): Large tears require the most material and the most care. The Cahomo patch’s 3-inch width is ideal for this application. Clean the area thoroughly, align the torn edges as closely as possible, and apply the patch with generous overlap on both sides. For tears that cross a seam, you may need to apply the patch in sections, overlapping each section by at least an inch.
Punctures and Holes
Punctures from tent stakes, trekking poles, sharp rocks, or branches create small, clean holes that are relatively easy to repair. The key is to patch the hole before it can propagate into a larger tear — tent fabric is under constant tension, and even a small hole can grow quickly under wind stress.
For punctures, a small patch of KING MOUNTAIN tape or Dulepax tape is usually sufficient. Cut a patch that’s at least one inch larger than the hole in all directions, round the corners (square corners peel more easily), and apply with firm pressure. The Dulepax transparent tape is particularly good for punctures because the repair is nearly invisible.
Seam Failures
Seam failures occur when the factory seam sealing breaks down or when the stitching along a seam pulls through the fabric. This is one of the most problematic types of tent damage because seams are structural — they hold the tent’s shape and keep water out. A failed seam can let in a surprising amount of water during rain.
For seam repairs, seam sealer is the primary tool. The FixnZip FixATent kit includes seam sealer, or you can purchase it separately. Apply the sealer along the failed seam, covering both the stitching and a small area of fabric on each side. Allow it to cure completely (usually 8-12 hours) before exposing the tent to water.
For seams that have physically separated — where the stitching has pulled through — you’ll need to re-stitch the seam before applying sealer. A simple needle and thread with a whip stitch or running stitch will hold the seam together, and the sealer will waterproof the repair. This is one of the few tent repairs that requires sewing, which is why we recommend carrying a few needles and a small spool of thread in your repair kit.
Zipper Failures
Zipper problems are among the most frustrating tent issues because they can make the tent difficult or impossible to close properly. Common zipper problems include separated teeth, broken sliders, and stuck zippers. The FixnZip slider is the best field solution for most zipper issues.
Separated teeth: If the zipper teeth have separated behind the slider, the slider may be worn out. The FixnZip replacement slider can often fix this by gripping the teeth more tightly than the worn original slider.
Broken slider: If the slider has physically broken — the pull tab has come off, or the slider body has cracked — the FixnZip is a direct replacement that installs in seconds without any tools.
Stuck zipper: Stuck zippers are usually caused by dirt, sand, or corrosion in the zipper teeth. Clean the zipper with a soft brush and apply a zipper lubricant (a candle or zipper wax stick works in a field). Avoid forcing the slider, as this can damage the teeth permanently.
Pole Damage
Tent poles can crack, split, or break, especially aluminum poles that have been stressed repeatedly. While a broken pole isn’t technically a fabric repair, it’s a common tent emergency that a good repair kit should be able to address.
The field fix for a broken pole is a splint: a short section of tubing (many tents include a pole repair sleeve) or a tightly wrapped section of duct tape. The Lockport duct tape is excellent for this application — wrap it tightly around the break, overlapping each wrap by half the tape’s width, and you’ll have a functional splint that holds until you can get home and replace the pole section.
For campers who frequently deal with structural tent issues, investing in quality tent stakes for rocky ground can reduce pole stress by providing a more secure anchor point in difficult terrain.
Floor Wear and Degradation
Tent floors take more abuse than any other part of the tent. They’re in constant contact with the ground, subjected to pressure from knees and gear, and exposed to moisture from below. Over time, the floor material can thin, develop pinholes, or wear through entirely in high-stress areas.
For floor repairs, the Cahomo nylon patch is our top recommendation. Its wide coverage and durable construction make it ideal for reinforcing worn floor areas. Apply the patch on the inside of the floor (the side you walk on) for maximum comfort, and consider using a ground sheet underneath your tent to prevent future floor damage.
FixnZip FixATent Repair Kit
The only kit that handles zipper, fabric, and seam repairs in one package.
View on AmazonField Repair Tips & Tricks from Experienced Campers
Knowing how to use your repair kit effectively is just as important as having the right products. Here are field-tested tips from experienced campers that will help you make better, longer-lasting repairs when it matters most.
Surface Preparation Is Everything
The number one reason repairs fail is poor surface preparation. Adhesive products need a clean, dry surface to bond properly. In the field, tent fabric is often dusty, damp, or both. Taking 60 seconds to clean the repair area can mean the difference between a patch that lasts for years and one that peels off in a day.
Carry a few alcohol wipes in your repair kit — they weigh almost nothing and do an excellent job of removing dirt, oils, and moisture from tent fabric. If you don’t have alcohol wipes, a clean cloth dampened with water and wrung out thoroughly will work. The key is to remove any substance that could interfere with the adhesive bond. Let the surface dry completely before applying the patch.
Round Your Patch Corners
This is a simple trick that makes a big difference in patch longevity. Square or rectangular patches tend to catch on things and peel at the corners. By rounding the corners with scissors before applying the patch, you eliminate the weak points where peeling starts. This applies to all adhesive patches and tapes, not just tent repair products.
Apply Pressure, Then Wait
Most adhesive repair products achieve their maximum bond strength after a curing period. In the field, you may not have the luxury of waiting hours, but even 30 seconds of firm, even pressure followed by an hour of undisturbed curing time will significantly improve the repair’s durability. If possible, apply repairs at the end of the day so they can cure overnight while you sleep.
Warm Adhesive Bonds Better
In cold weather, adhesive products become less tacky and bond more slowly. If you’re repairing your tent on a cold morning, warm the adhesive before applying it. You can hold the tape or patch in your hands for a few minutes, place it in a sunny spot, or tuck it inside your jacket. A warm adhesive flows better into the fabric’s texture and creates a stronger bond.
Layer Your Repairs for Strength
For high-stress repairs — areas that experience a lot of tension, abrasion, or folding — consider applying patches on both sides of the fabric. This sandwich approach distributes stress across both surfaces and creates a repair that’s significantly stronger than a single-sided patch. It’s especially useful for tent floor repairs and areas near guy line attachment points.
Carry a Backup Plan
Even the best repair kit has limitations. That’s why we recommend carrying multiple types of repair products. A fabric tape handles most situations, but when it can’t — a broken zipper, a pole failure, a seam that’s completely given out — you need a backup. The combination approach we recommend (KING MOUNTAIN tape + FixnZip kit + Lockport duct tape) covers virtually every scenario.
Document Your Repairs
After a field repair, make a note of what you fixed and how. When you get home, inspect the repair and decide whether it needs to be reinforced or redone. Some field repairs are meant to be temporary — a quick patch to get you through the trip — and should be upgraded to a permanent fix when you have access to better conditions and tools.
Keeping a small notebook or using your phone to record repair details also helps you track your tent’s condition over time. If you notice the same area needing repeated repairs, it might be time to consider a more permanent solution or even a tent upgrade. For guidance on selecting a durable replacement, see our best camping tents guide.
Preventing Tent Damage: Proactive Care Tips
The best tent repair is the one you never have to make. While it’s important to be prepared for emergencies, taking proactive steps to prevent damage will extend your tent’s life and save you from inconvenient field repairs. Here are the most effective strategies for keeping your tent in top condition.
Choose Your Campsite Wisely
Where you pitch your tent has a huge impact on its longevity. Avoid setting up under trees with low-hanging branches that can puncture the rainfly. Clear the ground of sharp rocks, sticks, and pine cones before laying out your tent. Look for level, well-drained ground that won’t pool water under your tent floor. A few minutes of site selection can prevent hours of repair work later.
Pay special attention to the ground surface directly under your tent. Even small sharp objects can create punctures when you kneel or place gear on the tent floor. Running your hands over the ground surface is the most reliable way to find hidden hazards. If the ground is rocky or rough, using a ground sheet or footprint underneath your tent provides an extra layer of protection.
Use a Ground Sheet or Footprint
A ground sheet is one of the best investments you can make for tent longevity. It takes the brunt of ground abrasion, moisture, and punctures, protecting the tent floor from damage. Many tent manufacturers sell fitted footprints that match the tent’s floor dimensions exactly, but a simple piece of tyvek or polycryo cut to size works just as well.
Make sure your ground sheet is slightly smaller than your tent floor — if it extends beyond the tent’s edges, it can channel rainwater underneath the tent instead of away from it. A ground sheet that’s an inch or two smaller on each side is ideal.
Proper Setup and Takedown
Rushing through tent setup is a common cause of damage. Forcing poles through sleeves that are twisted, yanking on stuck zippers, or pulling stakes out at sharp angles can all cause tears, bent poles, and broken hardware. Take your time with setup and takedown, especially in challenging conditions.
When taking down your tent, shake out any dirt or debris before folding. Fold along different lines each time to avoid creating permanent crease points that weaken the fabric. Stuffing is generally better than folding for long-term tent storage, as it distributes stress more randomly across the fabric.
UV Protection
UV radiation is the silent killer of tent fabric. Prolonged sun exposure breaks down the nylon or polyester fibers and degrades the waterproof coating. If you’re camping in a sunny location, try to pitch your tent in the shade when possible. For extended base camp situations, consider using a tarp or sunshade over your tent to reduce UV exposure.
When storing your tent at home, keep it in a cool, dry place out of direct sunlight. Don’t store it in a compressed stuff sack long-term — loosely fold or roll it and store it in a large, breathable bag. This prevents permanent compression of the fabric and coating.
Regular Maintenance
A few minutes of maintenance after each trip can prevent most common tent problems. Here’s a simple post-trip checklist:
- Inspect all seams for signs of peeling or deterioration. Reseal any suspect seams before your next trip.
- Check zippers for smooth operation. Clean out any dirt or sand and apply zipper lubricant if needed.
- Look for pinholes by setting up the tent and shining a light inside. Mark any holes you find and patch them before they grow.
- Clean the tent gently with lukewarm water and a mild soap if needed. Never use detergent, bleach, or a washing machine.
- Dry the tent completely before storing it. Even a small amount of moisture can lead to mold and mildew that degrades the fabric and waterproof coating.
For campers dealing with moisture issues, our guide on how to stop condensation in a tent provides practical strategies for reducing interior moisture that can damage your tent over time.
Reapply DWR Coating
Most tents have a Durable Water Repellent (DWR) coating on the outer fabric that causes water to bead up and roll off. Over time, this coating wears away, causing the fabric to “wet out” — absorb water instead of repelling it. Wet-out fabric is heavier, less breathable, and more prone to leaking through the fabric itself (as opposed to leaking through seams, which is a separate issue).
Reapplying DWR coating is a simple process: clean the tent, apply the DWR product (spray-on or wash-in), and allow it to dry. This should be done once a season for regularly used tents, or whenever you notice the fabric no longer beading water effectively. Combined with regular seam sealing, DWR maintenance keeps your tent performing like new for years.
For a complete guide to waterproofing your tent, including DWR application and seam sealing techniques, see our detailed article on how to make a tent waterproof.
Dulepax Tent Repair Tape
Transparent, multi-surface tape perfect for preventive maintenance patches.
View on AmazonComplete Camping Gear Maintenance Beyond Your Tent
A tent repair kit is just one part of a broader approach to gear maintenance that every camper should embrace. Your tent, sleeping system, and other gear all work together to keep you safe and comfortable in the outdoors. Taking care of the complete system ensures that everything performs when you need it most.
Sleeping Pad Care and Repair
Sleeping pads are just as vulnerable to punctures as tent floors, and a deflating pad in the middle of the night is one of the most miserable camping experiences. Many of the same repair products that work on tents can also repair sleeping pads. The Dulepax transparent tape is particularly effective on the nylon and polyester fabrics used in inflatable sleeping pads, and the KING MOUNTAIN tape works well on self-inflating pads with fabric surfaces.
For winter campers who use insulated sleeping pads, maintaining the pad’s integrity is especially important. A punctured pad loses its insulating properties along with its air, which can create a dangerous situation in cold conditions. Check out our guide to the best sleeping pad for winter camping for options that balance warmth, comfort, and durability.
Sleeping Bag Maintenance
While sleeping bags don’t typically need the same kind of repair as tents, they do benefit from regular maintenance. Down sleeping bags should be stored uncompressed in a large cotton or mesh bag. Synthetic bags are more forgiving but still benefit from loose storage. Both types should be washed periodically with a specialized cleaner (not regular detergent) and dried thoroughly before storage.
Small tears in sleeping bag shells can be repaired with the same adhesive tapes used for tent repair. The Dulepax transparent tape is ideal for this application because it’s thin, flexible, and doesn’t create a noticeable bump against your skin.
Camping Cot Maintenance
If you use a camping cot for side sleeping, regular inspection of the frame joints, fabric attachment points, and leg mechanisms will prevent failures. Tighten any loose bolts, lubricate squeaky joints, and check the fabric for wear at stress points. A small piece of adhesive tape applied to a worn area before it tears can prevent a more significant repair later.
Building a Complete Repair Kit
Beyond tent-specific repairs, consider building a comprehensive gear repair kit that addresses all your camping equipment. Here’s what we recommend:
| Item | Purpose | Weight |
|---|---|---|
| KING MOUNTAIN Nylon Tape | Tent and gear fabric repairs | ~1 oz |
| FixnZip FixATent Kit | Zipper repairs, seam sealing | ~3 oz |
| Lockport Duct Tape (small roll) | Emergency fixes, pole splints | ~1.5 oz |
| Needle and thread | Seam repairs, gear stitching | ~0.5 oz |
| Safety pins (3-4) | Temporary fabric holds, gear fixes | ~0.2 oz |
| Zip ties (4-6 assorted sizes) | Pole repairs, gear attachment | ~0.5 oz |
| Alcohol wipes (4-6) | Surface cleaning for adhesive repairs | ~0.5 oz |
| Multi-tool or small knife | Cutting, prying, general repairs | ~2 oz |
| Seam sealer (small tube) | Waterproofing seam repairs | ~1 oz |
Total weight: approximately 10 ounces. This kit handles virtually any gear emergency you might encounter in the field, from tent tears to broken zippers to snapped poles. It’s the kind of kit that you’ll hopefully never need to fully use, but when you do need it, you’ll be glad every item is there.
For campers who enjoy cold-weather adventures, maintaining your complete gear system is even more critical. Cold conditions stress every piece of equipment, and failures that are merely inconvenient in warm weather can become serious problems when temperatures drop. Our guides on how to keep a tent warm at night and how to keep a tent warm in winter cover the full range of cold-weather camping strategies.
The Science Behind Tent Repair Adhesives
Understanding how adhesive repair products work helps you use them more effectively and choose the right product for each situation. Not all adhesives are created equal, and the chemistry behind them explains why some products work better on certain materials than others.
Pressure-Sensitive Adhesives (PSAs)
Most tent repair tapes, including the KING MOUNTAIN and Cahomo products, use pressure-sensitive adhesives. PSAs are permanently tacky — they don’t need water, heat, or a chemical reaction to activate. Instead, they bond through a combination of surface wetting (the adhesive flows into the microscopic texture of the fabric) and molecular attraction (van der Waals forces between the adhesive and the surface).
The key to a strong PSA bond is intimate contact between the adhesive and the surface. This is why pressure is so important — pressing firmly forces the adhesive into the fabric’s texture, increasing the contact area and the bond strength. It’s also why surface cleanliness matters — dirt, dust, and moisture create a barrier between the adhesive and the fabric, reducing contact area and bond strength.
Silicone Adhesion Challenges
Silnylon — nylon fabric with a silicone waterproof coating — is notoriously difficult to bond with standard adhesives. Silicone has very low surface energy, which means most adhesives can’t “wet out” on its surface. Instead of flowing into the texture and bonding, the adhesive beads up on the silicone surface like water on a waxed car.
To repair silnylon, you need either a silicone-based adhesive (which bonds to the silicone coating through chemical compatibility) or a primer that modifies the surface to accept standard adhesives. Some campers use a thin layer of silicone sealant as a primer, let it cure, and then apply standard repair tape on top. This two-step approach works well but requires more time and materials.
Waterproof vs. Water-Resistant
There’s an important distinction between waterproof and water-resistant adhesives. Waterproof adhesives maintain their bond even when fully submerged. Water-resistant adhesives can handle rain and splashing but may weaken with prolonged water exposure. Most tent repair tapes are water-resistant rather than fully waterproof — they’ll hold through a rainstorm but may not survive being submerged in a puddle overnight.
For tent applications, water-resistant adhesives are usually sufficient. The repair is on the exterior of the tent, where it’s exposed to rain but not submersion. However, for tent floor repairs where the patch might be sitting in pooled water, a waterproof adhesive or an additional layer of seam sealer around the patch edges provides extra protection.
Temperature Effects on Adhesion
Adhesive performance varies significantly with temperature. In cold conditions, most adhesives become stiffer and less tacky, making it harder to achieve a strong initial bond. In hot conditions, adhesives become softer and more prone to flow, which can cause patches to shift or edges to lift.
The best practice is to apply repairs at moderate temperatures (50-80°F) when possible. If you must make a repair in cold weather, warm the adhesive before application and allow extra curing time. In hot weather, apply the repair in shade and avoid stressing it until the adhesive has fully set. Most modern tent repair adhesives are formulated to work across a wide temperature range, but extreme conditions always require extra care.
Understanding these adhesive principles helps explain why our testing methodology includes temperature cycling — it reveals how well each product handles the thermal stress that’s a normal part of camping life. Products that maintain their bond through freeze-thaw cycles are more reliable in the field than those that only work in ideal conditions.
Repairing Tents in Different Environments
The environment you camp in dramatically affects both the types of damage your tent experiences and the effectiveness of different repair approaches. A repair that works perfectly in a dry desert climate may fail in a humid rainforest. Here’s how to adapt your repair strategy to different environments.
Desert and Arid Environments
Desert camping presents unique challenges for tent maintenance. UV exposure is intense, which accelerates fabric degradation and adhesive breakdown. Sand and dust create a constant cleaning challenge — fine particles get into zippers, coat fabric surfaces, and interfere with adhesive bonds. Wind-driven sand can also abrade tent fabric, creating a sandpaper effect that wears through rainfly and wall material over time.
For desert repairs, surface preparation is especially critical. Carry extra cleaning supplies and take extra time to remove all sand and dust from the repair area before applying patches. The Dulepax transparent tape is a good choice for desert environments because its smooth surface sheds sand more easily than textured fabric tapes. Store your repair kit in a sealed bag to keep sand out of the adhesive surfaces.
Tropical and Humid Environments
High humidity is the enemy of adhesive repairs. Moisture in the air and on the fabric surface prevents adhesives from forming a strong bond. In tropical environments, tent fabric may never feel completely dry, which makes field repairs more challenging.
For humid-environment repairs, timing matters. Apply repairs during the driest part of the day — usually mid-afternoon when the sun has had time to evaporate morning moisture. Use alcohol wipes aggressively to remove surface moisture and oils. Consider carrying a small piece of chamois cloth for drying fabric surfaces before applying patches.
Mold and mildew are also concerns in humid environments. If you notice mold growing on your tent, clean it immediately with a mild solution of water and white vinegar. Mold can degrade fabric coatings and weaken adhesive bonds, so early intervention is important. Proper ventilation — opening tent vents and doors during dry periods — helps prevent mold growth in the first place.
Alpine and High-Altitude Environments
High-altitude camping combines several repair challenges: intense UV, extreme temperature swings, high winds, and often rough, rocky terrain. Tent fabric and poles are under constant stress from wind, and the rocky ground increases the risk of punctures and abrasion.
Cold temperatures at altitude make adhesive repairs more difficult. Keep repair materials warm inside your jacket or sleeping bag until you’re ready to use them. Apply repairs during the warmest part of the day when possible. The KING MOUNTAIN tape’s pressure-sensitive adhesive performs reasonably well in cold conditions, but it benefits significantly from being warmed before application.
Wind is a major factor at altitude. Strong, sustained winds put enormous stress on tent fabric, seams, and poles. Repairs in high-stress areas need to be especially robust — use wider patches, apply on both sides of the fabric, and allow maximum curing time before exposing the repair to wind stress. For tents that will be used regularly in windy alpine conditions, investing in quality tent stakes designed for rocky ground reduces overall tent stress and the likelihood of damage.
Winter and Snow Environments
Winter camping is the most demanding environment for tent repair. Cold temperatures make adhesives stiff and slow to bond. Snow loading puts constant downward pressure on the tent structure. Condensation from temperature differentials creates persistent moisture inside the tent. And the consequences of a failed repair are more severe — in winter, a compromised shelter can quickly become a safety issue.
For winter repairs, the FixnZip FixATent kit is particularly valuable because it includes seam sealer that can address the condensation-related seam leaks that are common in winter. The KING MOUNTAIN tape, warmed before application, provides reliable fabric repairs even in sub-freezing temperatures. Duct tape becomes less effective in extreme cold because its adhesive stiffens, but it can still work for emergency pole splints and temporary holds.
Winter campers should also pay extra attention to preventive maintenance. Regularly clearing snow from the tent roof prevents excessive loading. Proper ventilation reduces condensation. And choosing a sheltered campsite protected from the worst winds reduces overall tent stress. For comprehensive winter camping guidance, see our articles on how to keep a tent warm in winter and the best sleeping pad for winter camping.
DIY vs. Commercial Tent Repair Solutions
Some campers prefer to assemble their own repair kits from individual components, while others prefer the convenience of a pre-packaged solution. Both approaches have merits, and the best choice depends on your experience level, the types of camping you do, and how much customization you need.
Advantages of Commercial Kits
Commercial repair kits like the FixnZip FixATent offer convenience and tested compatibility. The manufacturer has already selected components that work well together and included instructions for common repair scenarios. For campers who don’t want to research individual products or who are new to tent repair, a commercial kit removes the guesswork.
Commercial kits also tend to include specialized components that are hard to source individually. The FixnZip zipper slider, for example, is a proprietary product that you can’t replicate with off-the-shelf materials. If zipper repair is a priority, a commercial kit that includes this component is the practical choice.
Advantages of DIY Kits
Building your own repair kit lets you tailor it to your specific needs. If you’ve never had a zipper failure but frequently deal with fabric tears, you can allocate more of your kit’s weight budget to tape and patches. If you camp in wet environments, you can add extra seam sealer. If you’re an ultralight backpacker, you can strip the kit down to just the essentials.
A DIY kit also lets you choose the specific products that performed best in our testing. Instead of accepting the manufacturer’s choices, you can select the KING MOUNTAIN tape for fabric, the FixnZip slider for zippers, and the Lockport duct tape for emergencies — our recommended combination that outperforms any single commercial kit.
Cost Comparison
Surprisingly, a DIY kit assembled from our top-rated products costs about the same as — or even less than — a comparable commercial kit. The KING MOUNTAIN tape, a small roll of Lockport duct tape, and a basic seam sealer tube together cost roughly the same as the FixnZip FixATent kit, and you get more of each individual component. The trade-off is that you need to assemble and package the kit yourself, and you don’t get the FixnZip zipper slider (which would need to be purchased separately).
For most campers, we recommend the hybrid approach: start with the FixnZip FixATent kit for its zipper repair capability and comprehensive component selection, then supplement it with a roll of KING MOUNTAIN tape for superior fabric repairs. This gives you the best of both worlds — the specialized components from a commercial kit and the best-performing individual products from our testing.
When to Seek Professional Repair
While the products in this guide can handle most tent repairs, some damage is beyond the scope of field or home repair. If your tent has structural damage — a broken main pole, a torn load-bearing seam, or extensive fabric degradation — it may be worth sending it to a professional tent repair service. Professional repair services have industrial sewing machines, specialized fabrics, and the expertise to restore a tent to like-new condition.
As a general rule, if a repair would compromise the tent’s structural integrity or waterproofing in a way that affects safety, seek professional help. A small tear in a wall panel is a straightforward DIY fix. A failed ridge seam in a tent you plan to use in exposed, windy conditions is worth getting professionally repaired.
Cahomo Nylon Repair Patch
Wide, durable patches perfect for building your own custom repair kit.
View on AmazonSeasonal Tent Care: A Year-Round Maintenance Guide
Your tent care routine should change with the seasons. Different times of year present different challenges, and adapting your maintenance approach ensures your tent stays in peak condition no matter when or where you camp.
Pre-Season Preparation
Before your first trip of the season, set up your tent at home and give it a thorough inspection. Check all seams for peeling or deterioration. Test every zipper for smooth operation. Look for pinholes by shining a light inside the tent in a dark room. Inspect the poles for cracks, bends, or worn shock cord. Check stakes for bends and ensure guy lines are in good condition.
This pre-season inspection is the ideal time to make preventive repairs. Reseal any suspect seams, patch any pinholes, and lubricate zippers. Addressing small issues before they become big problems is the essence of good gear maintenance. A tube of seam sealer and a few patches applied at home can prevent the need for emergency repairs in the field.
Mid-Season Maintenance
During your camping season, basic maintenance after each trip keeps your tent performing well. Shake out the tent and sweep the interior before packing up. Allow the tent to dry completely before storing it — even a few hours of packed-up moisture can start mold growth. If the tent is dirty, spot-clean with a damp cloth rather than washing the entire tent.
Inspect your tent after trips in challenging conditions. High winds, heavy rain, rocky ground, and UV exposure all take a toll. A quick post-trip inspection takes five minutes and can catch problems before they worsen. Pay special attention to the tent floor (where abrasion damage accumulates), the zippers (which wear with use), and the seams (which can weaken from repeated wetting and drying).
End-of-Season Care
At the end of your main camping season, give your tent a more thorough cleaning and maintenance session. Set it up, clean it gently with lukewarm water and a tent-specific cleaner (or mild soap), and allow it to dry completely in the shade. Inspect every component and make any needed repairs. Apply fresh DWR coating if the fabric is no longer beading water effectively.
For storage, loosely fold or roll the tent (don’t stuff it into its compression sack) and store it in a cool, dry place in a large, breathable bag. Avoid storing in attics, garages, or other spaces that experience extreme temperatures. A closet or under-bed storage area is ideal. The tent should be stored uncompressed to prevent permanent creasing and coating damage.
Off-Season Periodic Checks
Even during the off-season, it’s worth checking on your tent every few months. Look for signs of moisture, mold, or pest damage. If you store your tent in a basement or other potentially damp area, consider adding a desiccant packet to the storage bag to absorb excess moisture. A quick visual inspection every month or two ensures that your tent will be ready to go when the next camping season arrives.
For campers who enjoy winter adventures, the off-season maintenance period is shorter — winter camping extends the usable season significantly. If you camp year-round, your maintenance routine should be more frequent, with inspections and repairs after every trip. The demands of winter camping make a well-maintained tent even more important for safety and comfort.
Maximizing Your Tent’s Lifespan: Long-Term Strategies
A quality camping tent is a significant investment, and with proper care, it can last for many years of regular use. The products in this guide — from repair tapes to comprehensive kits — are tools for extending your tent’s life, but they work best as part of a broader strategy for long-term tent care.
Understanding Tent Lifespan
A well-maintained tent can last anywhere from 5 to 15 years or more, depending on how frequently it’s used and how well it’s cared for. The most common reasons tents are retired are fabric degradation (from UV exposure and waterproof coating breakdown), zipper failure, pole failure, and seam deterioration. All of these can be addressed or delayed with proper maintenance and timely repairs.
The waterproof coating on tent fabric is typically the first component to degrade. PU (polyurethane) coatings, which are used on most tents, break down over time through hydrolysis — a chemical reaction with moisture. This process accelerates in warm, humid conditions. When the coating breaks down, the fabric becomes sticky, then starts to flake, and eventually loses its waterproofing. At this point, the tent can be re-coated with a new waterproof treatment, which is a straightforward DIY project.
When to Repair vs. Replace
There’s a point where continued repair becomes less cost-effective than replacement. Here are some guidelines for making that decision:
- Repair when: The damage is localized (a tear, a broken zipper, a worn floor area), the overall fabric is still in good condition, and the tent meets your current needs.
- Consider replacing when: The fabric is degraded across large areas (sticky, flaking coating, thin fabric), multiple components are failing, or the tent no longer meets your needs (wrong size, insufficient weather protection, too heavy).
- Definitely replace when: Repairs would compromise the tent’s structural integrity or waterproofing in a way that affects safety, especially for use in challenging conditions.
If you do decide to replace your tent, our best camping tents guide covers options across all price points and camping styles. Choosing a durable tent from the start — with quality fabrics, robust zippers, and well-sealed seams — reduces the need for repairs and extends the time before replacement becomes necessary.
The Economics of Tent Care
Let’s put some numbers to this. A quality 3-season tent costs between $150 and $400. A comprehensive repair kit costs $15-30. Annual maintenance supplies (seam sealer, DWR treatment, zipper lubricant) cost $15-25. Over a tent’s 10-year lifespan, you might spend $50-100 on repairs and maintenance — a fraction of the tent’s purchase price.
Compare that to the cost of replacing a tent every 3-4 years because of neglected maintenance. At $200-300 per replacement, you’d spend $600-900 over the same 10-year period. The math is clear: investing in maintenance and repair saves money in the long run.
Beyond the financial argument, there’s also an environmental one. Tents are made from synthetic materials that don’t biodegrade quickly. Extending your tent’s life through proper care and repair reduces waste and the environmental impact of your camping hobby. It’s a small but meaningful contribution to sustainability.
Building a Maintenance Mindset
The most important thing isn’t which repair products you buy — it’s the habit of regular inspection and maintenance. Campers who check their gear before and after trips, address small issues promptly, and store their equipment properly rarely need emergency repairs. The repair kit is the safety net; the maintenance routine is the primary defense.
Make tent inspection part of your pre-trip and post-trip routine. It takes five minutes and can prevent hours of frustration. Keep your repair kit stocked and accessible. And when you do need to make a repair, take the time to do it right — a careful repair with proper surface preparation and curing time will outlast a rushed field fix every time.
Lockport Heavy Duty Duct Tape — 5 Pack
Keep emergency repair capability in every bag, car, and kit.
View on AmazonFrequently Asked Questions About Tent Repair Kits
Here are answers to the most common questions about tent repair kits, based on our testing and years of camping experience.
For beginners, we recommend the FixnZip FixATent Repair Kit. It’s a comprehensive, all-in-one solution that includes everything you need for the most common tent repairs — fabric patches, seam sealer, and a zipper replacement slider. The instructions are clear, no tools are required, and the compact carrying case keeps everything organized. As you gain experience, you can supplement it with specialized products like the KING MOUNTAIN tape for superior fabric repairs.
You can, and it will work as a temporary emergency fix. However, regular duct tape has several limitations for tent repair: it’s stiff and doesn’t flex well with tent fabric, it’s not breathable (which can trap moisture), and it leaves a sticky residue that’s difficult to remove. The Lockport Heavy Duty Duct Tape is a better option because it’s reinforced with fabric mesh for extra strength and flexibility. For permanent repairs, purpose-made tent repair tapes like the KING MOUNTAIN or Dulepax products are significantly better choices.
If the zipper slider is worn but the teeth are still intact, you can often fix the problem by replacing just the slider. The FixnZip is a universal zipper replacement slider that installs in seconds without tools or sewing. Simply remove the old slider (or the top stop if needed), slide the FixnZip onto the track, and test it. If the zipper teeth themselves are damaged, you may need to replace the entire zipper, which is best done by a professional repair service.
Yes, quality tent repair tapes like the KING MOUNTAIN and Dulepax products are designed to be water-resistant and will hold up through rain. The key is proper application: the surface must be clean and dry when the tape is applied, and the adhesive needs time to fully cure before being exposed to water. For best results, apply repairs at least 2-4 hours before rain exposure. The Dulepax tape creates a particularly effective waterproof seal due to its continuous film construction.
Standard adhesive tapes have difficulty bonding to silnylon because the silicone coating has very low surface energy. The Dulepax transparent tape works better on silnylon than most fabric-faced tapes, but for the strongest bond, you should first apply a thin layer of silicone sealant to the repair area as a primer, let it cure, and then apply the tape on top. Alternatively, use a silicone-based adhesive specifically designed for silnylon repair.
A well-applied repair using a quality product can last for years — often the remaining life of the tent. The KING MOUNTAIN tape and Cahomo patches, when applied to clean, dry surfaces with proper pressure and curing time, maintained their bond through our multi-week testing protocol that included rain, temperature cycling, abrasion, and repeated folding. Field repairs made in less-than-ideal conditions (wet, cold, dirty surfaces) may not last as long and should be inspected and potentially reinforced when you get home.
A comprehensive DIY tent repair kit should include: adhesive repair tape (KING MOUNTAIN or Dulepax), a zipper replacement slider (FixnZip), a small roll of duct tape (Lockport), seam sealer, alcohol wipes for surface cleaning, a few needles and heavy thread, safety pins, zip ties, and a small pair of scissors or thread snips. This covers fabric tears, punctures, seam failures, zipper problems, pole breaks, and general emergency repairs. Total weight is about 10 ounces — a small price for complete peace of mind.
Prevention starts with campsite selection — clear the ground of sharp objects, avoid pitching under hazardous branches, and use a ground sheet to protect the tent floor. During setup and takedown, take your time and avoid forcing zippers or poles. Store your tent properly between trips: clean, dry, and loosely folded in a breathable bag. Perform regular maintenance including seam sealing, DWR reapplication, and zipper lubrication. These habits dramatically reduce the frequency and severity of tent damage.
Most quality repair patches, including the KING MOUNTAIN tape and Cahomo patches, can withstand gentle hand washing. Use lukewarm water and a mild, non-detergent soap. Avoid scrubbing directly on the repaired area. Never machine wash a tent — the agitation and spin cycle can damage both the tent fabric and the repairs. After washing, set the tent up to dry completely before storing. The Dulepax tape’s waterproof film construction makes it particularly wash-resistant.
It depends on the tent’s overall condition. If the damage is localized (a tear, a broken zipper, a worn floor area) but the rest of the tent — fabric, coating, poles, seams — is still in good shape, repair is almost always worthwhile. A $15-20 repair kit can extend a tent’s life by several years. However, if the waterproof coating is degrading across large areas, the fabric is becoming thin and weak, or multiple components are failing, it may be time for a replacement. Our best camping tents guide can help you choose a durable replacement.
Based on our testing, the KING MOUNTAIN Self Adhesive Nylon Fabric Repair Tape has the strongest adhesion to standard nylon and polyester tent fabrics. Its pressure-sensitive acrylic adhesive creates a bond that withstood 15 pounds of direct tension in our stress test without peeling. For multi-surface versatility, the Dulepax tape is equally strong on most materials and has the added benefit of working on silnylon and vinyl. For sheer brute-force holding power on any surface, the Lockport Heavy Duty Duct Tape has the most aggressive adhesive, though it’s not ideal for permanent fabric repairs.
The standard field repair for a broken tent pole is a splint. If your tent came with a pole repair sleeve (a short aluminum tube), slide it over the break and secure it with duct tape wrapped tightly around both ends. If you don’t have a repair sleeve, a tent stake, a sturdy stick, or even a pen can serve as a temporary splint. Wrap the Lockport duct tape tightly around the joint, overlapping each wrap by half the tape’s width. This creates a functional repair that holds until you can replace the pole section at home.
Final Verdict: Which Tent Repair Kit Should You Buy?
After extensive testing and real-world evaluation, our recommendation is clear: the best tent repair strategy is a combination approach that covers all the types of damage you’re likely to encounter.
For most campers, we recommend pairing the KING MOUNTAIN Self Adhesive Nylon Fabric Repair Tape with the FixnZip FixATent Repair Kit. Together, these two products handle fabric tears, punctures, seam failures, and broken zippers — the four most common tent problems. Add a small roll of Lockport Heavy Duty Duct Tape for emergency quick fixes, and you have a complete repair system that weighs under 7 ounces and fits in a pocket.
If you only buy one product, go with the FixnZip FixATent Repair Kit. It’s the most comprehensive single product, covering zippers, fabric, and seams in one package. Its zipper repair capability alone makes it worth carrying — it’s the only product in our roundup that can fix a broken zipper in the field.
If budget is your primary concern, the KING MOUNTAIN tape offers the best performance per dollar for fabric repairs, and the Lockport duct tape provides emergency capability at the lowest price point.
No matter which products you choose, the most important thing is that you carry something. A repair kit that weighs a few ounces and costs less than a restaurant meal can save a trip that’s worth hundreds or thousands of dollars in gear, travel, and irreplaceable memories. Don’t leave home without one.