
How to Make a Tent Waterproof: The Complete Step-by-Step Guide
From seam sealing to DWR reproofing, here’s exactly how to keep your tent bone-dry through downpours, drizzle, and everything in between.
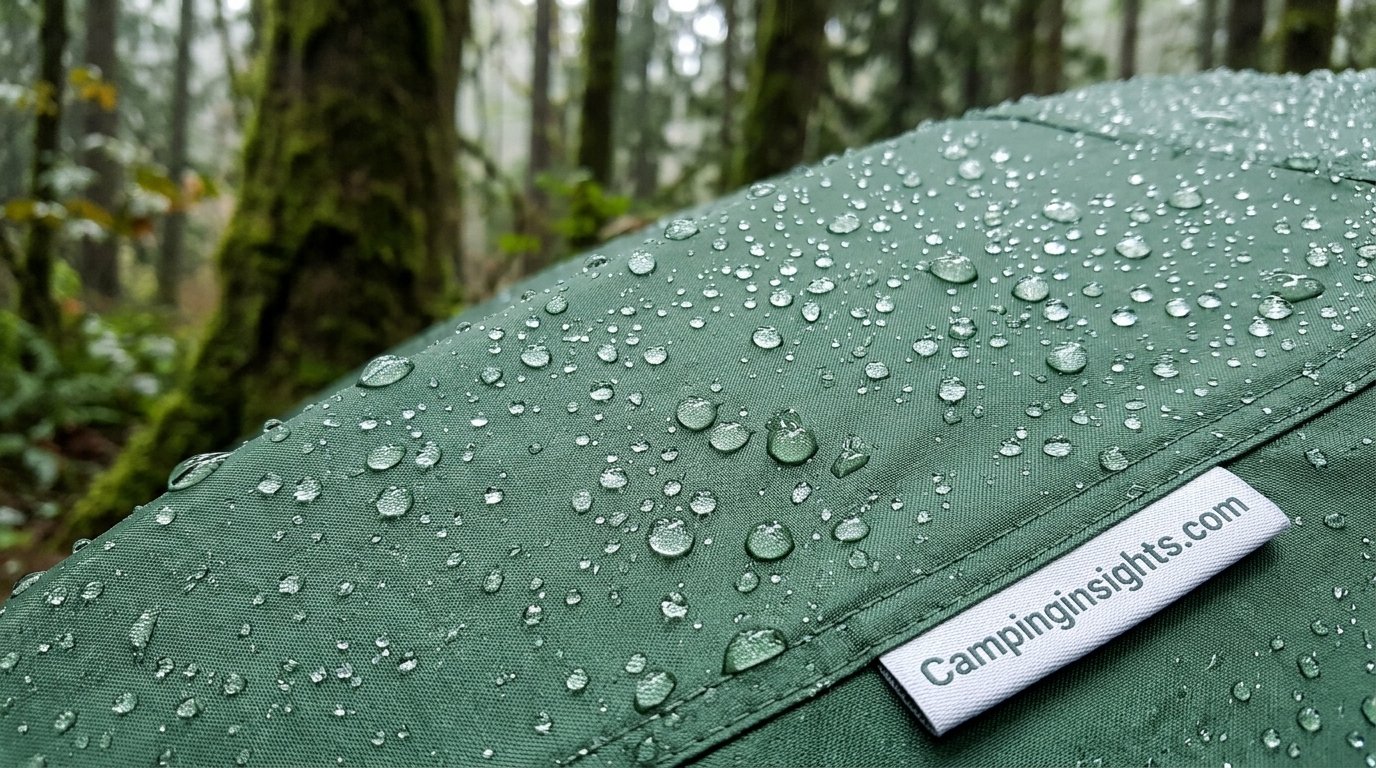
A properly treated rainfly beads water instead of soaking it in — that’s the difference a few hours of maintenance makes.
There’s nothing quite like waking up at 3 a.m. to the sound of rain hammering the rainfly, reaching out, and feeling a cold, damp patch spreading across your sleeping bag. If that’s ever happened to you, you already know that “waterproof” tents don’t stay waterproof forever, no matter how good the original factory coating was or how much the tent cost when you bought it. The good news is that restoring — or even improving on — factory-level waterproofing is a weekend project that costs far less than a new tent and takes only basic tools you likely already have around the house.
This guide walks through every stage of the process: understanding why tents leak in the first place, sealing seams, reproofing the fabric’s water-repellent coating, protecting the floor, and locking down the small weak points like zippers and guy-out points. Each major step below includes a simple visual so you can see exactly what’s happening before you pick up a bottle of sealant.
None of this requires sewing skills, a workshop, or a big weekend commitment. Most of the active work — cleaning, brushing on sealer, spraying a DWR treatment — adds up to two or three hours of hands-on time, split across the different areas of the tent. The rest is simply waiting for products to cure, which happens while the tent sits flat in a garage or spare room. If you’ve been putting off dealing with a leaky tent because it sounds like a bigger project than it actually is, this is a good place to start.
Why Tent Waterproofing Matters
Every tent, no matter how expensive, ships with a waterproof rating that starts degrading the moment it’s exposed to UV light, abrasion, dirt, and body oils. Manufacturers apply a polyurethane (PU) coating to the underside of the fabric and a durable water repellent (DWR) finish to the outer surface. The PU coating stops water from physically passing through the fabric weave, while the DWR finish makes water bead up and roll off instead of soaking into the material. Over time, both of these break down — and once they do, a tent that used to shrug off a storm will start “wetting out,” meaning the fabric absorbs water like a sponge instead of shedding it.
A tent that wets out doesn’t necessarily leak in sheets right away. Often the first sign is condensation-like dampness on the inside walls, or the fabric feeling noticeably heavier and colder to the touch after rain. If you’re also fighting condensation buildup on cold mornings, it’s worth reading our guide on how to stop condensation in a tent, since the two problems often get confused with each other.
Keeping a tent properly waterproofed isn’t just about comfort — it’s a safety issue on multi-day trips, especially in shoulder-season or winter conditions where a wet sleeping bag can genuinely become dangerous. If you’re planning a colder outing, pairing solid waterproofing with the tips in our how to keep a tent warm at night guide will make a much bigger difference than either fix on its own.
There’s also a cost angle worth considering. A quality backpacking or family tent typically runs anywhere from $150 to $600, and replacing one every couple of seasons because the waterproofing failed adds up fast. A basic reproofing kit, by contrast, usually costs somewhere between $15 and $40 and can extend a tent’s usable life by several years when applied correctly. From a pure cost-per-night-camped standpoint, waterproofing maintenance is one of the highest-value things you can do for your gear closet.
It’s also worth separating “waterproof” from “water-resistant” in your own head, since manufacturers sometimes blur the line in marketing copy. A truly waterproof fabric resists water penetration under sustained pressure — the kind you get from rain pooling against a pitched wall or your body weight compressing the floor against wet ground. Water-resistant fabric might shrug off a light drizzle but fail under exactly those conditions. Knowing which one your tent actually has helps set realistic expectations for how often maintenance is needed.
How Tents Actually Fail (And Why)
Before grabbing a bottle of seam sealer, it helps to understand exactly where water gets in. It’s tempting to assume a leaking tent simply means the fabric itself is “bad” or that the product was defective from the start, but in the overwhelming majority of cases the fabric is fine — it’s one of a handful of predictable maintenance points that has worn down with normal use. Knowing which one you’re dealing with means you treat exactly the right spot instead of over-treating the whole tent and wasting product on areas that were never the problem. In almost every case, tent leaks come from one of four places:
- Stitched seams — every needle hole punched during manufacturing is a potential entry point unless it’s taped or sealed.
- Degraded DWR coating — once the outer fabric stops beading water, the fabric saturates and pressure pushes moisture through.
- Worn floor coating — the floor takes the most abrasion of any part of the tent and is usually the first area to delaminate.
- Hardware and closures — zippers, guy-line attachment points, and pole sleeves are common overlooked leak sources.
Understanding your fabric’s hydrostatic head (HH) rating also matters here. This number, usually listed in millimeters, tells you how much water pressure the fabric can withstand before leaking. A rainfly rated around 1,500mm handles light-to-moderate rain, while a floor rated 3,000–5,000mm+ is built to resist standing water and the pressure of your body weight pressing down on wet ground. When a fabric’s coating degrades, its effective HH rating drops dramatically — even if the tag still says 3,000mm.
UV exposure deserves special mention here because it’s the most underrated cause of coating failure. Ultraviolet light breaks down the chemical bonds in both PU coatings and DWR finishes, which is why a tent left set up in direct sun for an entire summer will typically need waterproofing maintenance sooner than one that’s only pitched overnight and packed away each morning. Storage conditions matter almost as much — a tent stored in a hot car trunk or attic degrades faster than one kept in a cool, dry closet, since heat accelerates the same chemical breakdown that sunlight causes.
Understanding Tent Fabric & Coating Types
Not all tent fabrics are treated the same way, and using the wrong waterproofing product on the wrong material is one of the fastest ways to waste time and money. Broadly, most modern tents fall into one of three coating categories.
Polyurethane (PU) Coated Fabrics
This is the most common coating on budget-to-mid-range tents. A layer of polyurethane is bonded to the inside of the fabric to block water penetration, while a separate DWR finish is applied to the outside to encourage beading. PU coatings are durable but do break down over time, sometimes developing a sticky or tacky feel as the polymer degrades — a process campers often call “hydrolysis” or simply the coating “going gummy.”
Silicone-Impregnated Fabrics (Silnylon/Silpoly)
Common on lighter backpacking and ultralight tents, silicone-treated fabric is impregnated with silicone on both sides rather than coated on just one. It tends to resist UV degradation better than PU coatings and doesn’t get sticky with age, but it requires silicone-specific sealers — standard PU-based seam sealer won’t bond properly to silnylon.
Polyethylene (PE) Coated Fabrics
Often used on budget tent floors and tarps, PE coatings are inexpensive and genuinely waterproof when new, but tend to be less flexible and more prone to cracking at fold lines over time compared to PU or silicone treatments.
If you’re not sure which coating your tent has, check the manufacturer’s spec sheet or the care tag sewn into a seam — it usually notes the fabric denier and coating type. When in doubt, a small test patch of sealer in an inconspicuous spot (like an interior seam allowance) is a safe way to confirm compatibility before treating the whole tent.
Tools & Materials You’ll Need
Gathering everything up front saves you from stopping mid-project with a half-treated tent sitting outside, especially since some products have cure windows where the tent needs to stay flat and undisturbed for hours at a stretch. Having every item on hand before you start also means you can treat all three problem areas — seams, fabric coating, and floor — in a single session rather than spreading the project across several weekends. Here’s the full kit:
| Item | Purpose | Needed For |
|---|---|---|
| Seam sealer (brush-on or tape) | Closes stitching holes | Method 1 |
| Isopropyl alcohol & rag | Cleans seams before sealing | Method 1 |
| DWR spray-on or wash-in treatment | Restores water-beading on fabric | Method 2 |
| Mild non-detergent soap | Removes dirt/oils before reproofing | Method 2 |
| Floor sealant / seam grip | Reinforces high-wear floor coating | Method 3 |
| Soft sponge or cloth | Even product application | Methods 2 & 3 |
| Zipper lubricant/wax | Protects and seals zipper teeth | Zippers section |
| Tarp or clean towel | Lay tent flat for treatment | All methods |
If any part of your tent’s poles, stakes, or fabric is already damaged rather than just worn, patch it first. A tent repair kit handles rips, torn mesh, and pole splints before you move on to waterproofing — sealing over a hole just traps the problem instead of fixing it.
Budget matters here too. A minimal kit — one bottle of general-purpose seam sealer and one spray-on DWR treatment — covers the essentials for around $25–$30 and is enough for most seasonal maintenance. A more complete setup that adds floor sealant, zipper wax, and a dedicated tech wash typically runs closer to $50–$70 but covers every failure point discussed in this guide and will usually last through two or three full treatment cycles depending on tent size. Neither route requires any specialized skill — the main difference is convenience and how many separate purchases you’re making.
One more practical tip before you start: work on a warm, dry, low-humidity day if at all possible. Most sealers and DWR treatments cure fastest and bond most reliably between roughly 65–80°F with low humidity. Cold, damp conditions slow curing dramatically and can leave the treatment tacky or unevenly bonded for days.

Shop Seam Sealer Kits
Method 1: Sealing the Seams
Seams are the single most common leak source on tents that are otherwise in good condition. Most tents come from the factory with taped or lightly sealed seams, but that tape peels with age and UV exposure. Re-sealing seams is inexpensive, doesn’t require any special skill, and typically only needs to be redone every one to three seasons depending on how hard you use the tent.
Before you start, walk the entire tent and mark any seam that shows visible tape lifting, cracking, or gaps with a strip of painter’s tape or a light pencil dot nearby. It’s easy to lose track of which seams actually need attention once you’re partway through the process, especially on a tent with a lot of panel seams around vents and guy points. This quick inspection pass usually takes ten minutes and saves you from either missing a problem seam or wasting product resealing sections that are still perfectly fine.
Clean and Dry the Seams
Pitch the tent (or lay the rainfly flat) somewhere clean and dry, ideally indoors or in a garage out of direct sun. Wipe every stitched seam — rainfly, floor perimeter, and any taped seams — with a rag lightly dampened in isopropyl alcohol. This strips away dirt, body oils, and old flaking sealant so the new sealer actually bonds to the fabric instead of sitting on top of grime.
Wipe a two-inch band on either side of the stitch line so sealer bonds cleanly.
Apply the Seam Sealer
Using the small brush that typically comes with seam sealer, apply a thin, even coat directly over the stitching, extending about a quarter-inch past the needle holes on each side. Work in short sections rather than trying to cover a whole seam in one long stroke — this keeps the layer even and stops it from pooling. If you’re using seam tape instead of liquid sealer, press it firmly along the seam with a hard, rounded object (the back of a spoon works well) to eliminate air bubbles.
A thin, continuous bead works better than a thick, uneven layer — thick sealer cracks faster.
Cure Fully Before Packing
Most liquid seam sealers need 8–24 hours to cure fully, though tack-free time is often much shorter. Leave the tent pitched or flat in a well-ventilated space and resist the urge to fold or pack it early — sealer that hasn’t cured will stick to itself and peel right back off the seam. Check the product label for exact cure times, since silicone-based and polyurethane-based sealers behave differently.
Resist packing the tent early — uncured sealer will transfer and peel.
If you find a seam that keeps failing in the same spot no matter how many times you reseal it, check for a stress point nearby — a guy-out attachment, a pole grommet, or a high-tension corner. Repeated failure at one specific location is often a sign of structural strain rather than simple product wear, and it may point to a pitching habit worth adjusting, such as over-tensioning that seam during setup.
Method 2: Restoring the DWR Coating
If water is soaking into the fabric instead of beading up and rolling off, the DWR finish has worn away — this is separate from the waterproof PU coating underneath, and it’s the single most common reason a “waterproof” tent starts to feel wet during a storm. Restoring it is straightforward and can be done with either a spray-on or wash-in treatment.
Spray-on treatments give you more control and are generally better for targeted touch-ups or when you only want to treat the rainfly rather than the whole tent body. Wash-in treatments are more convenient for full-coverage jobs since the fabric moves freely in the wash water and every fiber gets even exposure, but they use more product and require a washing machine large enough to fit the tent without cramming it in tightly. For most seasonal maintenance on a single rainfly, spray-on is the more practical and economical choice; for a tent that’s uniformly worn all over, wash-in often gives more consistent results.
Wash the Fabric
Set up the tent (or its rainfly) and gently clean it with a non-detergent tech-wash and a soft sponge. Regular laundry detergent leaves residue that actually blocks new DWR from bonding, so stick to a purpose-made cleaner. Rinse thoroughly and let the fabric dry most of the way before moving to the next step.
Skip fabric softeners and standard detergents; both leave residue that repels new DWR.
Apply the DWR Treatment
While the fabric is still slightly damp (for most spray-on products) or during the wash cycle (for wash-in products), apply the DWR treatment evenly across the entire outer surface. Spray-on formulas should be applied in slow, sweeping passes about six inches from the fabric, covering every panel — don’t skip seams, guy-out points, or the underside of vents, since these areas wet out first.
Even, overlapping passes prevent the patchy “half-beading” effect common with rushed applications.
Heat-Activate for Maximum Durability
Many modern DWR formulas bond more securely with a little warmth. Once the coating is dry to the touch, a low, indirect heat source — a warm (not hot) hair dryer held six inches away, or a few hours in indirect sunlight — helps the treatment cure into the fabric fibers rather than just sitting on the surface. Skip this step for tents with reflective or PU-heavy coatings, since excess heat can damage those layers; check your specific product’s instructions first.
Heat activation isn’t mandatory, but it noticeably extends how long the new DWR lasts.
Give the treatment a real test before considering the job done. Splash a full cup of water onto a treated panel from about a foot up and watch what happens — it should bead into distinct droplets and roll off within a second or two. If it spreads into a dark, wet patch instead, the coverage was likely uneven or the fabric needed a second coat; it’s fine to repeat the process on any panels that fail this quick check.

Shop DWR Sprays
Method 3: Waterproofing the Floor
The floor takes more physical abuse than any other part of the tent — rocks, roots, grit, and the constant pressure of your body weight all wear down its coating faster than the walls or rainfly. A worn floor coating is also the reason many campers wake up with a damp sleeping pad even when the rain never touched the tent walls directly.
Unlike the rainfly, which mostly deals with water falling from above, the floor is fighting hydrostatic pressure from below — your body weight pressing down on ground that’s already saturated effectively pumps water upward into any weak point in the coating. This is exactly why floor fabrics carry a much higher hydrostatic head rating than wall or rainfly fabric on most well-designed tents, and why the floor deserves dedicated attention rather than an afterthought pass with whatever sealant is left over from the seams.
Inspect and Clean the Floor
Flip the tent inside out or lay the floor face-up and check for the telltale signs of coating breakdown: a tacky, peeling, or flaking texture, or a slightly sticky residue (common with older PU coatings breaking down chemically). Wipe the entire floor down with a damp cloth to remove dirt and grit before applying any sealant — trapped debris will bubble under a new coating.
Dark shading represents the floor’s underside coating — flaking sections need extra sealant.
Apply Floor Sealant to High-Wear Areas
Focus extra coats on the corners, the area under your hips and shoulders, and anywhere you noticed flaking during inspection. Apply a thin, even layer with a foam brush or old credit card, feathering the edges so there’s no hard ridge where treated meets untreated fabric. Let it cure fully — usually overnight — before folding the tent for storage.
Corners flex and drag against the ground constantly — they wear out long before the center panel.
If the floor coating has fully delaminated in large sections rather than just a few worn spots, sealant alone may not be enough — at that point a groundsheet or footprint is the more reliable fix, along with checking whether your sleeping pad setup is adding unnecessary pressure points on cold ground.
A footprint is also worth using proactively rather than only as a fix for a failing floor. A properly sized groundsheet takes the brunt of ground abrasion — sharp gravel, roots, and grit — so the tent’s own floor coating lasts significantly longer between treatments. The key detail is sizing: a footprint cut slightly smaller than the tent’s actual footprint stays tucked underneath, while an oversized one can catch rain and funnel it directly under the floor, working against you instead of protecting you.
Zippers, Guy Lines & Small Weak Points
Even a perfectly sealed rainfly and floor won’t keep you dry if water is sneaking in through the hardware. Zippers are a particularly common culprit — the coil itself isn’t waterproof, and stitching around the zipper flap is another set of needle holes that needs the same seam-sealing attention as the main panels. Most tent designs account for this by routing a storm flap over the zipper track specifically to shed water before it ever reaches the coil, which is why a flap that’s been folded the wrong way, snagged, or simply not re-laid flat after use is a surprisingly common and easy-to-miss source of leaks.
What Helps
- Storm flaps sealed and lying flush over the zipper
- Zipper wax or silicone lubricant applied every few trips
- Guy-out points re-sealed where webbing meets fabric
- Vestibule zippers kept closed during rain, not just zipped partway
What Causes Leaks
- Forcing a dirty, gritty zipper (grinds the coating off the coil)
- Ignoring small holes at stake-out loops and guy points
- Leaving a zipper “cracked open” for airflow during rain
- Storing the tent wet, which accelerates coating breakdown everywhere
If you’re camping somewhere with hard, rocky ground, unstable stakes put extra strain on guy-out points and can tear the fabric around them over time — our guide to the best tent stakes for rocky ground covers hardware that reduces that stress considerably.
Pole sleeves and clip attachment points deserve a quick check too, especially on tents that route poles through fabric sleeves rather than external clips. Repeated pole insertion wears a small channel into the sleeve fabric over years of use, and that channel can eventually thin out enough to let moisture through during driven rain. A light coat of seam sealer along the most-used sleeve sections, applied the same way as a standard seam, adds meaningful protection here.
Vents are another spot that’s easy to forget. Mesh vent panels themselves don’t need waterproofing, but the stitched seam where the vent flap attaches to the rainfly does. Since vents are usually angled to shed water by design, a failure here often shows up as a slow drip rather than an obvious soaked patch, which makes it easy to miss during a quick inspection.
Comparing Waterproofing Products
Not every waterproofing product does the same job, and using the wrong one in the wrong spot is a common mistake — reaching for floor sealant on a seam, or DWR spray where you actually needed seam sealer, wastes both time and product without fixing the underlying issue. Here’s how the main categories stack up, side by side, so you can see at a glance which one applies to which part of the tent:
| Product Type | Best For | Typical Lifespan | Application Method |
|---|---|---|---|
| Liquid seam sealer | Stitched seams, patch edges | 1–3 seasons | Brush-on |
| Seam sealing tape | Factory-style seam coverage | 2–4 seasons | Iron-on / press |
| Spray-on DWR | Rainfly, outer walls | 1–2 seasons | Spray, wipe, heat-cure |
| Wash-in DWR | Whole-tent even coverage | 1–2 seasons | Added to wash cycle |
| Floor/fabric sealant | Floor, high-wear panels | 1–2 seasons | Brush or applicator |
| Zipper lubricant/wax | Zipper coils and pulls | Every few trips | Rub or spray directly |
A reasonable rule of thumb when shopping: match the product to the specific fabric type discussed earlier in this guide rather than grabbing whatever’s cheapest or most prominently marketed as “universal.” A silicone-specific sealer on silnylon, a PU-compatible sealer on polyurethane-coated fabric, and a DWR spray labeled compatible with your tent’s outer material will consistently outperform a generic product that technically works on everything but excels at nothing.

Shop the Bundle
Common Mistakes That Ruin Waterproofing
Most waterproofing failures aren’t caused by a bad product — they’re caused by a handful of avoidable habits during application or storage. The frustrating part is that these mistakes often don’t show up as a problem until months later, on a trip, when there’s no easy way to fix them on the spot. Watch for these:
- Packing the tent wet. Storing a damp tent accelerates mildew growth and breaks down coatings far faster than normal wear.
- Using the wrong sealer on the wrong material. Silicone-treated fabrics need silicone-based sealer; PU-coated fabrics need PU-compatible products. Mixing them can cause peeling.
- Skipping the cleaning step. Sealant and DWR both need clean fabric to bond properly — applying over dirt or old sealant residue leads to early failure.
- Machine-drying tent fabric. Heat from a dryer can warp seams and degrade coatings; air-dry only.
- Ignoring the floor until it’s soaked through. Reactive maintenance is far more work than a five-minute yearly inspection.
- Applying sealant too thick. A heavy, uneven layer cracks and flakes off far sooner than a thin, even coat — more product isn’t better here.
- Treating the tent while it’s still wet from cleaning. Most sealers and sprays need a dry or specifically damp (not soaked) surface, depending on the product — check the label rather than assuming.
- Folding the tent the same way every time. Repeated folding along identical crease lines stresses the coating at those exact points; varying your fold or rolling instead of folding helps distribute wear more evenly.
Maintenance Schedule
Waterproofing isn’t a one-and-done job — it’s ongoing maintenance, similar to reapplying sunscreen. Trying to treat it as a single permanent fix is one of the most common reasons campers end up frustrated with gear that “used to be waterproof” — the coatings involved are designed to wear down gradually with UV and use, and staying ahead of that curve with light, regular touch-ups is far less work in total than waiting for a full failure and doing a complete restoration all at once. Here’s a simple schedule that keeps most three-season tents performing like new:
| Task | Frequency |
|---|---|
| Wipe down and air-dry after every trip | Every use |
| Zipper lubrication | Every 3–5 trips |
| DWR reproofing | Once a season, or when beading stops |
| Seam sealer inspection/touch-up | Once a season |
| Floor sealant reinforcement | Every 1–2 seasons |
| Full deep clean | Once a year |
Off-season storage deserves its own mention, since it’s where a lot of otherwise well-maintained tents quietly lose their waterproofing. Store the tent loosely rolled or stuffed rather than tightly folded along the same creases every time, in a cool, dry place out of direct sunlight — a closet shelf works far better than a garage that swings between hot and freezing with the seasons. Never store a tent compressed in its stuff sack for months at a time if you can help it; the constant pressure on folded seams and coatings accelerates the exact breakdown this whole guide is aimed at preventing.
Troubleshooting Leaks
If you’re dealing with an active leak and trying to figure out where it’s actually coming from, resist the urge to reseal the whole tent blindly. Isolating the source first saves product, saves time, and actually fixes the problem instead of masking it temporarily. Use the symptoms below to narrow things down before reaching for the sealer.
Water is coming through the seams specifically
This almost always points to failed seam tape or sealer. Re-clean and re-seal the affected seams following Method 1 above — spot treatment is fine if only certain seams are affected.
The fabric feels soaked but there’s no visible drip inside
This is classic DWR failure. The fabric is absorbing water (wetting out) rather than leaking through it, which also makes the tent feel colder and heavier. Follow Method 2 to restore the water-repellent finish.
There’s a damp patch specifically under my sleeping pad
This points to the floor coating rather than the rainfly. Check the corners and center of the floor for flaking or tackiness and apply floor sealant per Method 3.
Water is pooling near the door or vestibule
Check zipper storm flaps first — they may not be lying flush — then inspect the stitching directly around the zipper track, which is a common overlooked seam.
I’ve resealed everything and it’s still leaking in the same spot
Rule out a pitching issue before assuming the product failed. A rainfly that’s touching the inner tent anywhere — often from insufficient tension or a slightly undersized fly — will transfer water straight through by capillary action even on a perfectly waterproof fabric. Re-pitch with extra attention to keeping a consistent air gap between fly and inner tent.
The leak only happens in heavy, wind-driven rain
Wind-driven rain hits fabric at an angle rather than straight down, which can force water past marginal seals that would otherwise hold up fine. This is usually a sign that a treatment is due for a refresh rather than a sign of a defect — angled rain is simply a harder test than vertical rain.
Extra Protection for Extreme Weather
For trips where sustained, heavy rain or freezing conditions are likely, a few extra precautions go a long way beyond standard waterproofing maintenance. None of these replace the core methods covered earlier in this guide — think of them as insurance on top of a properly treated tent, not a substitute for it:
- Pitch with a taut rainfly — sagging fabric pools water and stresses seams under weight.
- Dig a small trench or choose slightly elevated ground to prevent water from pooling under the floor.
- Use a footprint or groundsheet sized slightly smaller than the tent footprint so it doesn’t funnel runoff underneath.
- Double-check guy lines are properly tensioned; loose lines let the fly flap and rub against the inner tent, transferring moisture.
If your trip is happening in genuinely wet, prolonged conditions, our camping in the rain tips guide covers pitching strategy and gear organization that pairs directly with the waterproofing work here. And if the forecast includes a cold snap on top of the rain, layering in advice from how to keep a tent warm in winter will keep the whole system — warmth and dryness — working together instead of fighting each other.
Climate matters as much as storm intensity. In consistently humid environments, coatings and fabrics stay damp longer between uses even without direct rain contact, which speeds up mildew growth and coating breakdown — more frequent airing-out and slightly more frequent DWR touch-ups make sense in these conditions. In hot, dry, high-UV climates, the bigger threat is accelerated sun damage rather than moisture itself, so shade during setup (even a simple tarp overhead while car camping) meaningfully extends coating life between treatments.
Finally, if your current tent is simply past the point where waterproofing maintenance makes sense — chalky coating, brittle fabric, or seams that won’t hold sealant anymore — it may be more cost-effective to start fresh. Our breakdown of the best camping tents highlights current models with strong factory waterproof ratings so you’re not fighting the same battle again next season.
DIY Waterproofing vs. Professional Reproofing Services
For the vast majority of tents, everything covered in this guide is well within reach of a DIY weekend project — no specialized equipment or training is required, and the products involved are widely available and inexpensive. That said, professional gear repair and reproofing services do exist, typically through outdoor gear co-ops, specialty repair shops, or mail-in services offered by some tent manufacturers, and it’s worth knowing when they’re actually the better option rather than defaulting to them out of uncertainty.
Professional reproofing tends to make more sense in a few specific situations: expedition-grade tents with complex fabric blends where getting the product match wrong is costly, tents still under a manufacturer warranty that specifies authorized repair only, or situations where the coating has failed extensively enough that it needs to be fully stripped and reapplied rather than just touched up — a messier and more technical process than standard seasonal maintenance.
For everyday three-season backpacking and family camping tents, though, the DIY methods in this guide will get you the same practical result as a professional service at a fraction of the cost and turnaround time, and you’ll come away understanding your own gear better in the process.
Quick gut-check: if water beads and rolls off your rainfly when you splash it with a cup of water, your DWR is fine. If it darkens and soaks in within a few seconds, it’s time for Method 2 above.
Waterproofing Considerations by Tent Type
The core methods in this guide apply across the board, but a few details shift depending on what kind of tent you’re working with.
Ultralight Backpacking Tents
These typically use thin silnylon or silpoly fabric, which means silicone-specific sealer is non-negotiable — standard PU sealer won’t bond and can actually make the surface tackier without sealing anything. Because the fabric is so light and thin, it’s also more prone to pinholes from repeated stuff-sack compression, so a full-tent inspection under bright light before every season is worth the extra five minutes.
Family and Cabin-Style Tents
Larger tents have proportionally more seam length and more hardware — extra doors, windows, and room dividers — so budget more time and product for seam sealing specifically. These tents also tend to sit pitched in one spot for longer stretches at campgrounds, which means more cumulative UV exposure per trip and correspondingly more frequent DWR touch-ups.
Four-Season and Mountaineering Tents
Built for sustained exposure to wind-driven snow and rain, these tents usually have heavier-denier fabric and more robust factory coatings, but they also see harsher conditions overall. Pay particular attention to zipper waterproofing and guy-out reinforcement here, since these tents are more likely to be pitched in genuinely severe weather where every weak point gets tested.
Pop-Up and Budget Tents
Entry-level tents often ship with thinner factory coatings to hit a lower price point, and their seams are sometimes only lightly taped rather than fully sealed. If you’re working with one of these, don’t be surprised if it needs a full seam-sealing pass right out of the box rather than waiting for wear to set in — treating it proactively before the first big trip usually pays off.
Rooftop Tents
Rooftop tents face constant sun exposure since they’re often left semi-assembled on a vehicle roof between trips, which accelerates DWR breakdown compared to a tent that’s only out for a weekend at a time. A breathable cover used during transport and storage meaningfully extends time between reproofing sessions.
Frequently Asked Questions
How often should I waterproof my tent?
Most three-season tents benefit from a DWR reproofing once a year and a seam sealer check every one to two seasons, depending on how often you camp and how much sun and abrasion the tent sees. Frequent campers who use their tent thirty or more nights a season should lean toward the more frequent end of that range, while occasional weekend campers can often stretch treatments out a bit longer as long as they’re storing the tent properly between trips.
Can I use silicone spray on a polyurethane-coated tent?
It’s not recommended. Silicone treatments bond best with silicone-coated fabrics (often called “silnylon”), while PU-coated tents need PU-compatible sealers and sprays to avoid peeling or poor adhesion.
Why does my tent leak even though it’s rated for 3,000mm hydrostatic head?
A hydrostatic head rating reflects the fabric’s original coating performance, tested when the material was brand new under lab conditions. Once that coating wears down through UV exposure, abrasion, and age, the effective waterproof rating drops well below the number on the tag — even though the fabric itself hasn’t changed. This is exactly why a two-year-old tent with a “3,000mm” spec can leak in conditions a brand-new tent with the same rating would handle without issue.
Do I need to waterproof a brand-new tent?
Usually not immediately, but it’s worth testing. Splash a cup of water on the rainfly — if it beads and rolls off cleanly, the factory DWR is intact. Some budget tents ship with a thinner factory coating that benefits from an extra treatment before the first big trip.
Is it okay to machine-wash my tent before reproofing?
Front-loading machines on a gentle cycle with non-detergent tech wash are generally safe, but always check the manufacturer’s care label first. Avoid top-loading machines with a center agitator, which can stress seams and poles left in pockets.
How long does seam sealer need to dry before I can pack the tent?
Most liquid sealers need 8–24 hours to fully cure, though this varies by brand and humidity. Always check the specific product’s instructions, and err on the side of extra drying time before folding.
My tent smells musty even though it looks dry — is that related?
Yes, often. A musty smell usually means mildew has started growing, frequently from being packed away slightly damp. This doesn’t just smell bad — it actively degrades fabric coatings, so a deep clean is worth doing alongside your waterproofing maintenance.
Can I waterproof just the rainfly and skip the inner tent?
For most three-season double-wall tents, yes — the inner tent’s job is breathability, not waterproofing, and heavy sealant on the inner canopy can trap condensation. Focus waterproofing effort on the rainfly and floor.
What’s the difference between seam sealing and reproofing?
Seam sealing closes the small holes left by stitching. Reproofing (DWR restoration) treats the fabric’s surface so water beads and rolls off instead of soaking in. They solve different problems and most tents eventually need both.
How do I know if my tent floor needs resealing?
Look for flaking, a sticky or tacky texture, or a visible loss of the shiny coating layer on the floor’s underside. A damp sleeping pad after a dry night, with no rain contact, is also a common early warning sign.
Does DWR treatment affect tent breathability?
A properly applied DWR treatment shouldn’t meaningfully reduce breathability, since it treats the fabric surface rather than clogging the weave. Overapplying spray-on treatments can slightly reduce airflow, so stick to the recommended coverage.
Can I speed up curing time with a hair dryer instead of waiting overnight?
Gentle, indirect warm air can help some DWR treatments bond, but it won’t safely speed up seam sealer curing, which relies on a chemical cure process rather than just evaporation. Rushing seam sealer typically leads to it peeling later.
Will waterproofing spray work on the mesh panels of my tent?
Mesh panels are designed for airflow and shouldn’t be treated with waterproofing spray — doing so can clog the weave and reduce breathability without meaningfully improving weather protection, since mesh sits under the rainfly anyway on most double-wall tents.
How can I tell the difference between a leak and condensation?
Leaks typically show up as isolated wet spots tracing back to a specific seam, seam allowance, or hardware point, and often correlate directly with rain intensity. Condensation tends to appear as a general film across the entire inner tent ceiling, forms even without rain, and is worse on cold, still nights — it’s a ventilation issue rather than a waterproofing one.
How to Pressure-Test Your Tent Before a Trip
The cup-of-water test mentioned earlier is a good quick check for DWR performance, but it doesn’t tell you much about how the tent handles sustained rain or how the seams are holding up under real conditions. A more thorough pre-trip test takes about twenty minutes and catches problems while you’re still at home with easy access to more sealer, instead of discovering a leak on night one of a trip.
The Garden Hose Method
Pitch the tent fully in the yard, including the rainfly, and set up a garden hose on a fine mist or shower setting rather than a hard jet, which can force water in ways real rain never would. Run it over the rainfly and roof seams for five to ten minutes while someone stays inside with a flashlight, watching the ceiling and seams closely. Any point where water beads through rather than beading on the surface is worth marking and treating before you pack.
The Standing Water Method
For the floor specifically, pitch the tent on a hard, flat surface like a driveway or patio, then pour a shallow layer of water — about a quarter inch — across the floor from inside and let it sit for fifteen to twenty minutes. Check from underneath for any damp spots working through. This test simulates the kind of standing water a poor pitch site can create far better than rain alone does.
Reading the Results
A tent that passes both tests cleanly is genuinely ready for wet-weather conditions. A tent that shows any point of moisture intrusion just found you a problem area on your own schedule instead of at 2 a.m. in a storm — which is exactly the outcome this whole process is designed to produce. Re-treat any flagged spots, let them cure fully per the instructions above, and retest before considering the job complete.
Final Takeaway
Waterproofing a tent isn’t a single task so much as a light maintenance habit — a few hours spent sealing seams, restoring the DWR coating, and reinforcing the floor will consistently outperform buying a new tent every couple of seasons. Work through the three methods above in order, keep an eye on the small hardware details like zippers and guy points, and check in on your tent’s water-beading performance at the start of every season.
With a properly maintained shelter, the sound of rain on the rainfly goes back to being one of the best parts of camping instead of a warning sign. Bookmark this guide, keep a small waterproofing kit in your gear closet year-round, and treat the whole process as routine gear care rather than an emergency fix — that mindset shift alone is what separates campers who replace tents every couple of years from the ones getting a decade or more out of the same shelter.
Shop Tent Waterproofing Essentials
Pingback: 50+ Camping Food Ideas: Easy Meals & Recipes