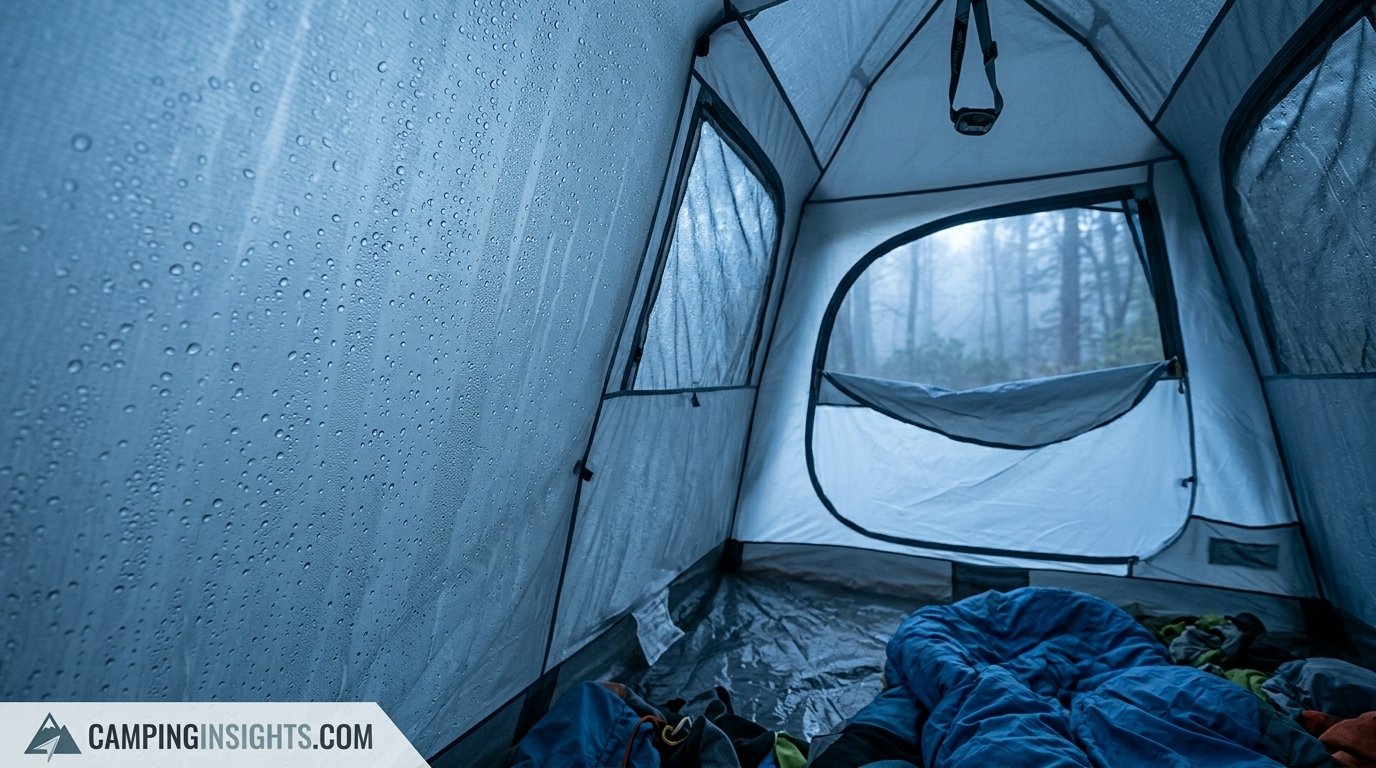
How to Stop Condensation in a Tent (Once and For All)
Wake up to dry gear, not a damp sleeping bag. Here’s exactly why your tent is sweating overnight and the field-tested fixes that actually work — in cold, warm, and wet-weather camping alike.
Why Tents Get Condensation
If you’ve ever unzipped your tent in the early morning only to find the inner walls beaded with water, you already know how frustrating condensation can be. It soaks sleeping bags, drips onto gear, and makes packing up a cold, wet chore. The good news is that condensation is almost always preventable once you understand what’s actually causing it.
Every person sleeping in a tent releases a surprising amount of water vapor overnight through breathing and skin. A single sleeper can release close to a pint of moisture over an eight-hour night, and two people easily double that. That moisture has nowhere to go except into the tent’s air, and when it hits the cold inner surface of the fly or fabric, it condenses into liquid water — the same way a cold drink sweats on a warm day.
Add in wet gear, damp ground, humid air, or rain, and you have the perfect recipe for a soggy tent by sunrise. The goal of everything in this guide is to reduce moisture at the source, move humid air out before it condenses, and keep your tent’s interior surfaces from getting cold enough for water to form in the first place.
By the end of this guide, you’ll have a full, practical toolkit for tackling condensation from every angle — site selection, pitching technique, ventilation habits, gear management, and long-term care — so you can spend more time enjoying your trips and less time wringing out a soggy sleeping bag at sunrise.
The Science in Plain English
Warm air holds more water vapor than cold air. When warm, moist air inside your tent touches the cooler inner surface of the rainfly or tent wall, it cools rapidly and can no longer hold onto all that moisture, so the excess condenses into droplets. This is exactly what happens on a bathroom mirror during a hot shower.
Three factors control how bad your condensation will be on any given night:
- Humidity of the air inside the tent — driven by breathing, wet gear, and damp ground.
- Temperature difference between inside and outside — bigger swings mean worse condensation.
- Airflow — stagnant air condenses; moving air carries moisture out before it settles.
Every strategy below attacks one or more of these three variables. Ventilation attacks airflow directly. Choosing a dry campsite and using a footprint attacks humidity from the ground. Layering and gear management reduces the total moisture load you’re bringing into the tent in the first place.
It also helps to think about condensation the way you’d think about fogging on a car windshield in winter. Turning on the defroster doesn’t stop your breath from producing moisture — it simply moves enough air across the glass to keep that moisture from settling there long enough to condense. A tent works exactly the same way: you’re never going to stop a sleeping body from releasing water vapor, so the entire goal shifts to making sure that vapor has somewhere to go before it meets a cold surface and turns to liquid.
This reframing matters because it explains why some intuitive-seeming fixes don’t actually work. Wiping down a wet tent wall at 2 a.m. treats the symptom but does nothing about the ongoing moisture production, which means the walls will simply be wet again within the hour. Opening a vent, on the other hand, addresses the underlying airflow problem and tends to keep the walls drier for the rest of the night rather than requiring repeated intervention.
Step 1: Pick the Right Campsite
Where you pitch matters more than most campers realize. Low-lying areas near rivers, lakes, or in valley bottoms trap cold, humid air overnight — a phenomenon sometimes called a “frost pocket.” Camping even 20–30 feet higher, on a slight rise, can mean a noticeably drier tent by morning.
Avoid pitching directly under dense tree canopy that drips long after rain has stopped, and steer clear of meadows and grassy clearings that hold dew heavily. A site with some air movement — but not a full wind tunnel — helps push humid air away from your tent walls all night.
If you’re comparing shelters before your trip, our guide to the best camping tents breaks down which designs handle moisture and airflow best across different climates.
Step 2: Maximize Ventilation
Ventilation is the single most effective condensation fighter you have. Every modern tent includes some combination of mesh panels, vents, and adjustable rainfly openings — and most campers under-use them out of habit or a mistaken fear of the cold.
Crack the rainfly vents on both the windward and leeward sides to create cross-flow, and leave interior mesh doors unzipped from the fly whenever weather allows. Even a two-inch gap at the top of a vestibule door can meaningfully drop overnight humidity inside the tent.

Keep vents propped open securely with reliable stakes and guyline tensioners, even in wind.
Check Price on AmazonRocky or hard-packed sites make it harder to keep guylines taut for stable venting — our roundup of the best tent stakes for rocky ground covers stakes that hold in tough soil.
Step 3: Manage Ground Moisture
Moisture doesn’t just come from the air — it rises up from the ground beneath your tent floor. Damp soil, morning dew, and even your own body heat pulling moisture upward through the ground all add to the humidity trapped inside your shelter.
A footprint or ground tarp placed under your tent — cut slightly smaller than the tent’s floor so it doesn’t collect rainwater underneath — creates a vapor barrier that keeps ground dampness from soaking in. Avoid pitching on grass right after rainfall if you can help it; damp organic ground holds moisture far longer than sandy or rocky soil.
Step 4: Pitch Your Rainfly Correctly
A loose or improperly staked rainfly is a major hidden cause of condensation. If the fly sags and touches the tent’s inner canopy, any moisture that beads on the fly’s underside transfers directly onto your inner walls instead of dripping harmlessly to the ground.
Pitch the fly drum-tight with even tension on all guylines, keeping a consistent air gap between the fly and the inner tent body. That air gap is what allows humid air to escape and circulate rather than getting trapped against a cold, damp barrier.
If your fly seams or coating have started to fail, moisture can seep through directly rather than just condensing — see our walkthrough on how to make a tent waterproof for reseal and reproofing steps.
Step 5: Manage Gear and Body Moisture
Everything wet that comes inside your tent adds to the humidity load. Wet boots, damp jackets, and rain-soaked packs left in the vestibule or tent body all evaporate slowly overnight, feeding condensation from the inside out.
Store wet gear in the vestibule, outside the inner tent body, whenever possible, and use a dedicated dry bag or stuff sack for anything that must come inside. Changing out of damp clothing before bed also reduces the moisture your body adds to the tent’s air over the following hours.

Keep a lightweight patch kit handy in case wet-weather use causes any wear on your fly or floor.
Check Price on AmazonFor extended trips, our guide to the best tent repair kits covers patch options that hold up in damp, high-use conditions.
Step 6: Never Cook Inside the Tent
Cooking or boiling water inside a tent or even in a fully enclosed vestibule releases a large burst of water vapor almost instantly, along with carbon monoxide risk from stove fumes. That moisture has nowhere to go and settles directly onto cold tent walls within minutes.
Cook outside the tent whenever conditions allow, or at minimum in a vestibule with both doors cracked for airflow. This single habit change prevents one of the fastest and most severe sources of overnight condensation.
Step 7: Use Moisture Absorbers
Silica gel packs, a small chamois or “PackTowl,” and even a bag of activated charcoal can passively pull ambient moisture out of the air overnight. These won’t replace ventilation, but they help on nights when weather forces you to keep vents more closed than you’d like.
Wipe down interior condensation with an absorbent cloth before it drips onto sleeping bags, and wring it out in the vestibule rather than shaking water directly onto your gear.
Step 8: Morning Damp-Down Routine
Even with perfect technique, some condensation is normal on cold, humid nights. A quick morning routine limits the damage: open all vents and doors first thing to let overnight humidity escape, wipe the fly and inner walls dry with a microfiber cloth, and let the tent air out for 10–15 minutes before packing.
If you’re breaking camp in the rain and can’t dry the tent fully, pack the wet fly separately from the dry inner body so moisture doesn’t transfer between the two while stored.
On multi-day trips where a full dry-out isn’t possible each morning, prioritize at least a few minutes of airing time over speed. Even five minutes with both doors and all vents open, while you handle other packing tasks, meaningfully reduces how much trapped humidity travels with you to the next campsite. Over a week-long trip, this small daily habit compounds into a noticeably drier tent by the final night compared to skipping it entirely.
Camping through a multi-day storm system? Our guide on camping in the rain has a full rundown of routines for keeping gear dry across consecutive wet days.
Special Case: Winter Camping
Cold-weather camping makes condensation worse, not better, because the temperature gap between your warm breath and the freezing tent walls is much larger. That moisture often freezes into frost on the fly overnight, then melts and drips as soon as the sun hits the tent in the morning.
In winter, ventilation becomes even more critical, not less — resist the urge to seal the tent up tight against the cold. A slightly colder but drier tent beats a warmer one dripping with meltwater. Pairing good ventilation with a warm, well-insulated sleep system lets you keep vents open without sacrificing comfort.
| Condition | Condensation Risk | Key Fix |
|---|---|---|
| Calm, humid summer night | Moderate | Maximize cross-ventilation |
| Rain with wind | Low–Moderate | Crack vents on leeward side only |
| Clear, cold winter night | High | Insulate sleep system, keep vents open |
| Damp valley or lakeside | Very High | Relocate to higher, drier ground |
Cold nights also demand a sleep system that keeps you warm even with vents open — see our picks for the best sleeping pad for winter camping and tips on how to keep a tent warm in winter without sealing off airflow.
One often-overlooked detail in winter is the difference between the air temperature and your sleeping pad’s ground contact. Even with excellent tent ventilation, a poorly insulated pad lets your body heat escape directly into the cold ground below, which does nothing for condensation but does make you more likely to seal up vents in search of extra warmth. Solving the insulation problem at the pad level, rather than the tent-sealing level, tends to produce a much better outcome on both counts — you stay warm, and the tent stays ventilated.
Frost management is also worth planning for specifically. On very cold, clear nights, expect a thin layer of frost to form on the inside of the fly regardless of how well you’ve ventilated, since the fly’s outer surface can drop well below freezing even when the tent interior stays comfortable. The key is simply not letting that frost sit against the inner tent wall long enough to transfer moisture — the same air-gap principle from earlier in this guide applies directly here, just with ice crystals instead of liquid droplets.
If you’re off the ground on a cot rather than a pad, airflow dynamics change slightly too — our review of the best camping cot for side sleepers covers models that balance warmth and breathability. General nightly warmth strategies are covered in how to keep tent warm at night.
Tent Design Comparison: Which Styles Resist Condensation Best
| Tent Design | Ventilation | Condensation Tendency | Best For |
|---|---|---|---|
| Double-wall with mesh body | Excellent | Low | Most 3-season camping |
| Single-wall (ultralight) | Limited | High | Fast-and-light, dry climates |
| Four-season mountaineering | Adjustable vents | Moderate–High | Winter, alpine conditions |
| Cabin-style family tent | Good if vents used | Moderate | Car camping, groups |
Not sure which style suits your trips? Our full breakdown of the best camping tents compares ventilation design across categories in more depth.
Recommended Gear for Condensation Control
- Ground footprint sized slightly smaller than your tent floor
- Quick-dry microfiber towel for morning wipe-downs
- Reliable stakes to keep vents and guylines taut in wind
- Compact repair kit for fly and floor seams
- Insulated sleeping pad rated for your expected low temperatures
- Small packable camp towel or chamois dedicated only to condensation duty, kept separate from the towel you use for washing up
- Mesh gear loft or hanging organizer to keep small items off the tent floor and away from ground moisture
- A lightweight tarp for pitching over your cooking area, keeping steam and rain-driven moisture away from the tent itself
None of these items need to be expensive or heavy. In most cases the single highest-leverage upgrade is simply learning to use the ventilation features your current tent already has — most campers close vents far more often than they need to, largely out of habit from car camping or a mistaken belief that a sealed tent is automatically a warmer or safer one.

A properly insulated pad lets you keep vents open on cold nights without losing sleep to the chill.
Check Price on AmazonCommon Mistakes That Make Condensation Worse
- Zipping the tent up completely on a cold night — traps all your breath’s moisture inside.
- Pitching in a low, shaded hollow — collects cold, damp air overnight.
- Bringing wet boots and jackets into the sleeping area — adds hours of slow evaporation.
- Letting the rainfly sag against the inner tent — transfers moisture directly onto walls.
- Cooking a hot meal inside the vestibule with doors sealed — floods the air with steam instantly.
- Packing a wet tent tightly without airing it out first — locks moisture into the fabric fibers and can encourage mildew and unpleasant odors by your next trip.
- Ignoring the difference between condensation and a leak — many campers assume dripping water means a failed waterproof coating, then over-treat a tent that was never actually leaking in the first place.
- Overcrowding a small tent — squeezing more people into a shelter than it’s rated for multiplies the total moisture output from breathing without adding any extra air volume to absorb it.
- Setting up right after rain without checking drainage — low spots that look dry can still be sitting in a shallow water table just below the surface, which raises ambient humidity around the tent all night.
Most of these mistakes share a common thread: they either increase the moisture entering the tent or decrease the airflow available to carry it back out. Once you start thinking about condensation control as a balance between those two forces, it becomes much easier to diagnose what went wrong on a damp night and adjust your setup before the next one.
Understanding Humidity Sources You Might Be Missing
Beyond the obvious culprits like breathing and wet gear, there are a handful of subtler humidity sources that many campers never think to address. Recognizing these can be the difference between a tent that’s merely damp and one that stays genuinely dry through a full week of trail use.
Damp Sleeping Bags and Liners
A sleeping bag that wasn’t fully dried after its last outing carries residual moisture that releases slowly overnight, adding to the humidity load well before your body heat and breathing even come into play. Store bags loosely in a breathable stuff sack between trips rather than compressed tightly, since compression traps moisture against the insulation and slows drying between uses.
Wet Tent Fabric From the Previous Night
If you’re on a multi-day trip and pack a tent while it’s still damp from morning condensation, that moisture doesn’t disappear — it simply waits inside your pack until you pitch again, at which point it re-enters the tent’s interior air almost immediately. Whenever you get even a short window of sun or wind during a break, drape the fly and inner body over a rock or branch to shed as much residual moisture as possible.
Pets and Extra Bodies
A dog sharing the tent adds a surprising amount of additional moisture through panting, on top of its own body heat raising the interior temperature and, in turn, the amount of water vapor the air can hold before it condenses. If you regularly camp with a pet, budget for extra ventilation capacity the same way you would for an additional person.
Ambient Outdoor Humidity
Coastal campsites, rainforest environments, and river corridors often carry high ambient humidity even without active rainfall. In these environments, no amount of tent technique will get you to a bone-dry interior — the realistic goal shifts from eliminating condensation entirely to managing it so it never soaks your gear.
How Tent Fabric and Coatings Affect Condensation
Not all tent materials behave the same way when humid air meets a cold surface, and understanding the basics can help you choose gear that’s naturally less prone to trapping moisture.
| Fabric Type | Breathability | Typical Use | Condensation Behavior |
|---|---|---|---|
| No-see-um mesh | Very high | Inner tent body (upper walls) | Excellent airflow, minimal trapped moisture |
| Silnylon (silicone-coated nylon) | None | Rainfly | Condenses readily; needs external ventilation to manage |
| Polyurethane-coated polyester | None | Budget tent flies and floors | Similar to silnylon; coating can degrade and start leaking over time |
| DCF / Dyneema composite | None | Ultralight flies | Non-breathable and prone to interior condensation despite being very waterproof |
| Canvas (cotton or poly-cotton) | Moderate | Bell tents, canvas wall tents | Naturally breathable; sheds some moisture through the weave itself |
It’s worth noting that the fly material is almost always fully waterproof and therefore fully non-breathable by design — this is intentional, since a breathable fly would let rain through along with air. That’s exactly why the air gap between the fly and the inner tent body matters so much: it’s the only place where moisture-laden air actually has room to move before it hits that cold, waterproof layer.
Some manufacturers have experimented with genuinely breathable waterproof laminates, similar in concept to the membranes used in rain jackets, applied to tent flies. These can reduce condensation somewhat by allowing a small amount of vapor to pass directly through the fabric itself, but they tend to be heavier, more expensive, and less durable than traditional coated fabrics, which is why they remain a niche option rather than the industry standard. For the vast majority of campers, a well-ventilated design using conventional coated fabric will outperform a breathable-membrane tent that’s poorly vented, simply because the volume of air exchange through open vents and doors dwarfs what any fabric membrane alone can move.
Family and Car-Camping Tents vs. Backpacking Tents
The way condensation shows up can look quite different depending on whether you’re in a large cabin-style family tent or a small two-person backpacking shelter, and the fixes worth prioritizing shift accordingly.
Family and Cabin-Style Tents
Larger tents generally have more interior air volume per person, which helps dilute humidity somewhat, but they often come with fewer high-quality vents relative to their size, and many budget models skip a true double-wall design entirely in favor of a single water-resistant fabric layer. If you’re shopping for a family tent, look specifically for mesh panels near the roof combined with adjustable rainfly vents rather than judging ventilation by floor space alone. Our comparison of the best camping tents highlights which family-sized models handle this well.
Because family tents are also more likely to host cooking, wet umbrellas, and muddy shoes coming in and out throughout the day, moisture management often matters as much during the daytime as it does overnight. Keeping a simple rule — nothing wet touches the sleeping area — goes a long way in these larger, more heavily used shelters.
Family tents with room dividers add another wrinkle worth considering: dividing curtains can restrict airflow between sections just as effectively as an outer wall would, which sometimes surprises campers who assumed the interior was one open volume. If you’re using a divided tent and noticing condensation concentrated in one “room,” check whether that section has its own path to a vent or door rather than relying on air moving freely from the other side of the divider.
Backpacking and Ultralight Tents
Smaller backpacking tents have far less interior air volume, so the moisture from just one or two sleepers has a much bigger relative impact on humidity levels. This is precisely why lightweight double-wall designs with generous mesh panels tend to outperform single-wall ultralight shelters when condensation is a concern, even though single-wall designs often win on weight.
If you’ve committed to an ultralight, single-wall setup for weight savings, lean harder into the other strategies in this guide — site selection, minimizing what you bring inside, and diligent morning wipe-downs — since you won’t have the built-in air-gap advantage that double-wall tents provide.
Trekking-pole shelters and other minimalist designs common in ultralight backpacking often skip a bathtub floor or full inner mesh body entirely, which changes the condensation equation once more. Without a fully enclosed inner tent, moisture that condenses on the inside of the outer fabric can drip more directly onto your sleeping bag or pad rather than running down an inner wall away from your gear. If you’re using this style of shelter, a full-coverage bivy or a groundsheet with slightly raised edges can help intercept drips before they reach your insulation.
Troubleshooting: Match Your Symptom to the Fix
Condensation doesn’t show up the same way on every trip, and the right fix often depends on exactly what you’re seeing and when. Use the scenarios below to zero in on the most likely cause before you start changing your whole setup.
Scenario: Puddles Only Near the Foot of the Tent
This pattern usually points to poor site selection rather than a ventilation problem. Water vapor is heavier than the surrounding dry air and tends to settle toward the lowest point inside the tent, especially if the ground itself has a slight slope. Check whether your tent is pitched with any tilt, and next time, look for a flatter spot or orient your head toward the higher end of a gentle grade.
Scenario: Condensation Appears Within the First Hour of Sleep
A rapid onset like this is almost always tied to a sealed-up tent combined with a big outdoor-to-indoor temperature swing. Check that your vents are actually open and not just unzipped on the inside while still cinched shut on the fly. It’s an easy step to miss in the dark.
Scenario: One Side of the Tent Is Wet, the Other Is Dry
This lopsided pattern typically means wind is only providing airflow to one side. Try angling your tent’s low, more solid end into the prevailing wind and keep the vent on the opposite side cracked so air has a path all the way through the shelter rather than just pushing against one wall.
Scenario: Condensation Even With Vents Wide Open
If you’ve maximized ventilation and are still fighting heavy condensation, the issue is usually humidity load rather than airflow. Look hard at what’s coming into the tent with you — wet gear, a damp dog, unaired sleeping bags, or simply more people than the tent’s air volume comfortably supports. Reducing what you bring inside will often help more than any additional vent ever could at that point.
Scenario: Tent Was Dry Last Trip But Soaked This Time in Similar Weather
Small changes add up. A slightly lower campsite, one more person sharing the tent, a rainfly pitched a touch looser than usual, or simply higher humidity that day can all tip the balance. Rather than assuming something is broken, walk back through each of the fixes in this guide and identify which variable shifted.
Condensation by Climate and Region
The strategies in this guide apply everywhere, but how aggressively you need to apply them shifts a lot depending on where you’re camping.
Humid Subtropical and Coastal Climates
High ambient humidity means the air is already close to saturated before you even climb into your sleeping bag, so ventilation alone may not get you to a fully dry tent. Focus on keeping wet items outside the sleeping area and accept that some morning dampness is simply part of camping in these regions.
Arid and Desert Environments
Low humidity during the day can flip dramatically at night as temperatures drop sharply, a swing known for producing heavy dew. Even in the desert, a clear, calm night can produce surprising condensation, so don’t assume dry daytime air means a dry tent by morning.
Alpine and High-Elevation Camping
Thin air at altitude cools rapidly after sunset, creating a large temperature differential between your warm interior air and the frigid fly. Four-season tents built for these conditions typically include dedicated low vents specifically to manage this, and using them even when it feels counterintuitively cold is important.
Temperate Forest and Mountain Regions
Dense canopy cover traps humidity near the ground and blocks the breezes that would otherwise help dry out a campsite. Seek small clearings or slightly elevated, more open ground when you have the option, rather than pitching directly beneath heavy tree cover.
Pros & Cons of Each Fix
Ventilation-First Approach
- Free — no extra gear needed
- Works in almost every climate
- Improves air quality, not just dryness
Trade-offs
- Can let in more cold air on winter nights
- Requires a warmer sleep system to compensate
- Less effective in driving rain with wind-blown moisture
Frequently Asked Questions
Is tent condensation a sign of a defective tent?
No. Condensation happens in nearly every tent design under the right humidity and temperature conditions. It’s a management issue tied to ventilation and moisture load, not a manufacturing flaw.
Should I close all the vents to stay warmer at night?
Closing vents traps warmth but also traps moisture, which usually makes condensation worse and can leave your gear damp by morning. A slightly cooler, well-ventilated tent is generally the better trade-off.
Why does my single-wall tent get wetter than my friend’s double-wall tent?
Single-wall tents have only one moisture-permeable layer between you and the outside air, so warm, humid interior air condenses directly on that single layer. Double-wall tents create a separate air gap that helps moisture escape before it condenses on the inner wall.
Does breathing really cause that much moisture?
Yes — a sleeping adult can release a significant amount of water vapor over a full night through breathing and skin, and that number roughly doubles with two people sharing a tent.
Can a footprint alone solve condensation problems?
A footprint helps by blocking ground moisture, but it addresses only one of several causes. Pair it with good ventilation and gear management for the best results.
Is it normal to see frost inside the tent in winter?
Yes, this is common in cold conditions. Moisture from breathing freezes on contact with the cold fly or inner wall, then melts once temperatures rise, which is why winter campers often notice dripping in the morning sun.
What’s the fastest way to dry out a tent after a wet night?
Open every vent and door as soon as you wake up, wipe down wet surfaces with an absorbent cloth, and let the tent air out for at least ten minutes before packing it away.
Does tent color or material affect condensation?
Material matters more than color. Breathable fabrics and mesh panels allow more moisture exchange than fully coated, non-breathable fabrics, which tend to trap humidity inside.
Can I use a fan to reduce condensation in a tent?
A small battery-powered fan can help circulate air in calm conditions and may reduce localized condensation, though it won’t replace proper venting through the fly and doors.
Why is my tent wetter on clear nights than cloudy ones?
Clear skies allow more heat to radiate away from the tent surface overnight, cooling the fly further below the interior air temperature and increasing the temperature gap that drives condensation.
Should I bring a towel specifically for condensation?
A dedicated, quick-drying microfiber towel is one of the most useful lightweight items for wiping down condensation before it drips onto sleeping bags or gear.
Does tent size affect how much condensation forms?
Larger tents with more interior air volume relative to occupants often show less condensation per person, since the moisture from breathing is distributed across more air and surface area.
Will spraying my tent with a waterproofing treatment reduce condensation?
Waterproofing treatments restore a fly’s ability to shed rain from the outside, but they have little to no effect on interior condensation, which forms on the inside surface regardless of how water-resistant the outer coating is.
Is condensation worse in a tent with a bathtub floor?
A bathtub-style floor doesn’t cause more condensation on its own, but it does trap any water that does form or drip inside, so keeping the floor wiped down matters more with this design than with a flat floor that can shed water off the edges.
Condensation Myths, Debunked
Myth: “A More Expensive Tent Won’t Get Condensation”
Price has surprisingly little to do with it. High-end four-season tents from top brands still show heavy condensation under the wrong combination of humidity, temperature swing, and poor ventilation habits. What premium tents often do better is offer more adjustable, better-placed vents — but those vents still have to be used.
Myth: “Condensation Means the Tent Is Leaking”
This is one of the most common points of confusion for newer campers. A genuine leak typically shows a defined stream or drip pattern tracing back to a specific seam, stitch hole, or worn coating, whereas condensation appears as a broad, even film of tiny droplets across large sections of fabric. If you’re unsure which you’re dealing with, run a hand along the underside of the fly during light rain — condensation feels like a uniform damp film, while a leak feels like an active, localized trickle.
Myth: “Zipping Everything Shut Keeps You Warmer and Drier”
Sealing a tent tightly does trap warmth, but it traps humidity right along with it, which usually backfires by producing enough condensation to soak through a sleeping bag’s shell fabric, leaving you colder overall than if you’d left a vent cracked.
Myth: “You Can’t Do Anything About It in Humid Climates”
While you can’t eliminate condensation entirely in consistently humid regions, the gap between a well-managed tent and a poorly managed one is still enormous. Applying even half of the strategies in this guide typically cuts the amount of standing moisture dramatically compared to ignoring ventilation and site choice altogether.
Quick Pre-Bed Condensation Checklist
Before you settle in for the night, run through this short list. It takes less than a minute and addresses the majority of preventable condensation causes covered throughout this guide.
- Rainfly pitched drum-tight with no sagging contact against the inner tent
- At least one vent cracked on each side of the tent for cross-flow
- Wet boots, jackets, and packs left in the vestibule, not the sleeping area
- No active cooking or boiling happening inside the tent or sealed vestibule
- Damp clothing swapped for dry sleepwear before climbing into the bag
- Footprint or ground tarp confirmed to be tucked under the tent, not extending beyond its edges
Making this checklist a habit takes the guesswork out of condensation control. After a handful of trips, most of these steps become automatic, and you’ll likely notice a dry tent far more often than a damp one, regardless of the season.
It’s worth printing this list or saving it somewhere accessible on your phone for the first few trips after you commit to a new routine. Most experienced campers eventually stop thinking about these steps consciously, in the same way an experienced driver doesn’t consciously think through every mirror check — but getting there takes a bit of deliberate repetition first. Treat the first season of applying this checklist as training the habit, and treat every dry morning that follows as confirmation that the habit is paying off.
Long-Term Tent Care to Prevent Recurring Condensation Problems
What you do after a trip has just as much influence on future condensation as anything you do while camping. A tent that’s stored damp, dirty, or compressed tightly for months at a time tends to develop worse condensation behavior over time, independent of the weather or your on-trail technique.
Always Dry Before Storage
Never pack a tent away in its stuff sack while it’s still damp, even if you’re just moving it from the trailhead to the car. Once home, pitch it in a garage, spare room, or backyard and let it air out completely — including the floor, which often stays damp longest since it sits against the ground. Storing a tent even slightly wet for an extended period encourages mildew, which produces a musty smell that’s difficult to fully remove and can degrade waterproof coatings faster than normal wear would.
Store Loosely, Not Compressed
Long-term storage in a tight stuff sack keeps coated fabric folded along the same lines for months, which can crack polyurethane coatings over time and create micro-channels where moisture collects more readily on future trips. A large cotton storage sack, or simply hanging the tent loosely in a closet, helps the fabric and coatings last longer and perform more predictably.
Clean the Mesh Panels Periodically
Dust, pollen, and grime can build up in mesh ventilation panels over repeated trips, subtly reducing airflow even though the mesh still looks intact. A gentle rinse with plain water and a soft brush, followed by full air-drying, keeps those panels working at full efficiency.
Reproof the Fly When Beading Stops
Waterproof coatings degrade with UV exposure and repeated packing over time. When you notice rain no longer beads up and rolls off your fly the way it used to, and instead seems to soak into the fabric surface, it’s a sign the durable water repellent (DWR) finish needs refreshing. While this primarily affects rain resistance rather than condensation directly, a fly that’s absorbing rather than shedding water sits wetter for longer, which can indirectly increase the humidity trapped between the fly and inner tent. For step-by-step reproofing guidance, see our full walkthrough on how to make a tent waterproof.
Inspect Zippers and Vent Mechanisms Each Season
A vent that’s supposed to prop open with a small pole or toggle does no good if that hardware has broken or gone missing. Before each camping season, or before any extended trip, run through every vent, zipper, and guyline attachment point to confirm they still function as designed. A stuck vent zipper is a small, easy-to-miss problem that quietly undoes an otherwise solid condensation-control routine.
Conclusion
Condensation inside a tent feels like an unavoidable part of camping, but in almost every case it comes down to three fixable factors: how much moisture you’re bringing in, how big the temperature gap is between your breath and the tent walls, and how freely air can move through the space. Choose higher, drier ground, keep vents open even when it feels counterintuitive, manage wet gear outside the sleeping area, and skip cooking inside the tent entirely. Combine those habits with a properly pitched, taut rainfly and you’ll wake up to a noticeably drier shelter on the vast majority of nights, in nearly any season.

Ready to upgrade to a tent designed for better airflow and moisture control?
Shop Camping Tents on Amazon
Pingback: Best Camping Backpack: 7 Top Picks Tested