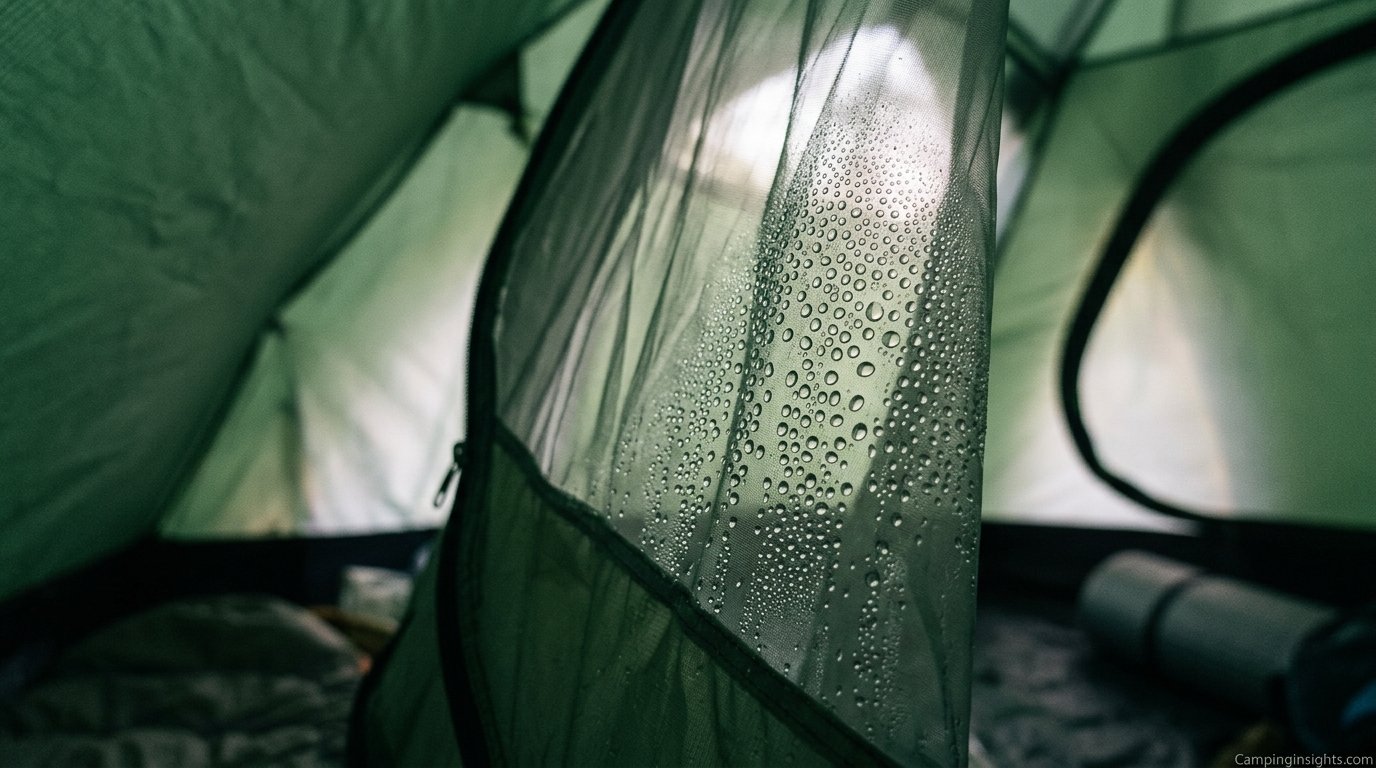
Why Is My Tent Wet Inside? The Real Causes (and How to Actually Fix It)
You zipped everything up tight, the rainfly was on, and it never rained a drop — so why does the inside of your tent look like it just went through a car wash? Here’s what’s actually happening, and what to do about it.
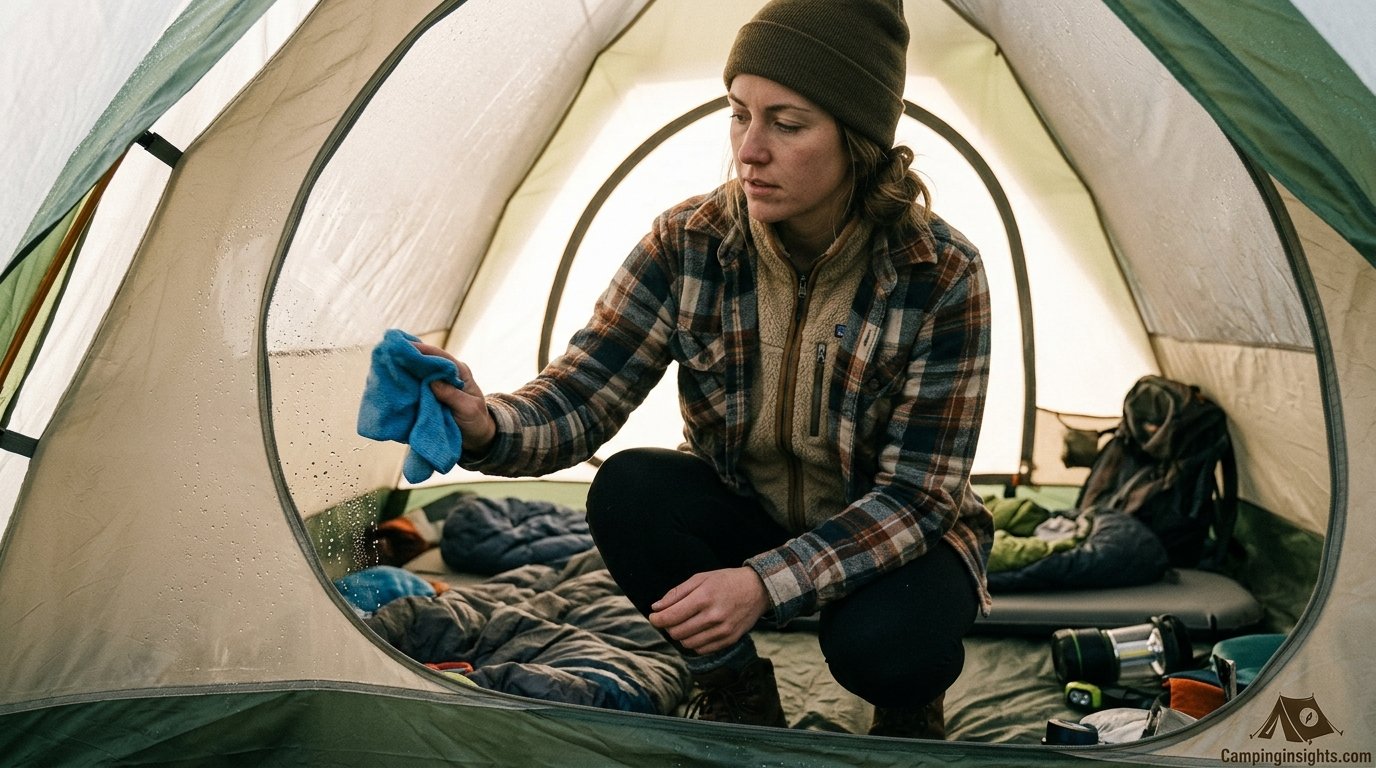
You wake up, unzip your sleeping bag, and touch the tent wall — and it’s dripping. Not damp. Dripping. Your pillow has a wet halo around it, your sleeping bag foot is clammy, and there wasn’t a cloud in the sky all night. If this sounds familiar, you’re dealing with one of the most common and most misunderstood problems in camping: interior tent moisture that has nothing to do with your tent actually leaking.
The good news is that this is almost always fixable, and it’s rarely a sign that you bought a bad tent. In the vast majority of cases, the water on your tent walls in the morning is condensation, not rain that snuck in through a seam or a pinhole. Understanding the difference — and understanding why your particular tent, campsite, and camping style are creating the perfect conditions for it — is the first step to waking up dry. If you’re also dealing with dampness that seems tied to cold nights specifically, it’s worth cross-referencing with how to keep a tent warm at night, since temperature management and moisture management are two sides of the same coin.
Below, we’ll walk through every major cause of a wet tent interior, how to tell them apart, and the specific fixes that work for each one — from a five-minute ventilation tweak to a full waterproofing refresh. We’ll also cover a simple at-home test you can run before your next trip to settle, once and for all, whether your tent actually has a leak or whether it’s simply doing what physics says every tent does under the right conditions.
1. Condensation vs. a Leak: How to Tell the Difference
Before you assume your tent is defective, it’s worth slowing down and diagnosing what’s actually happening, because the fix for condensation and the fix for a genuine leak are completely different. Trying to “waterproof” your way out of a condensation problem wastes time and money, and trying to “ventilate” your way out of an actual leak will leave you wet every single time it rains.
Condensation almost always shows up as a fine, even film of moisture — sometimes actual beads of water — spread across the entire inner surface of the tent wall or rainfly’s underside. It tends to be worst near the foot and head of the tent, on the ceiling directly above sleeping bags, and on any part of the tent wall that your gear or sleeping bag is touching. It builds gradually overnight and is usually at its worst right before dawn, when the outside air is coldest.
A leak, by contrast, tends to be localized. You’ll find a specific wet patch, a drip line running down from one point on the seam or fabric, or a puddle that’s clearly tracing back to a single spot — often a seam, a zipper flap, a guy-line attachment point, or a spot where the fabric has been pierced or abraded. Leaks also correlate directly with rainfall: no rain, no leak. Condensation, on the other hand, can soak a tent on a bone-dry, clear night, which is exactly what throws most campers off.
| Clue | Condensation | Leak |
|---|---|---|
| Pattern on fabric | Even film or beads across large areas | Localized wet spot or drip trail |
| Happens on dry, clear nights | Yes, often worse on clear nights | No, only during or after rain |
| Location | Ceiling, foot end, anywhere touching gear | Seams, zippers, stake-out points, tears |
| Timing | Builds slowly overnight, peaks near dawn | Appears during or shortly after rainfall |
| Feels like | Fine mist or dew on the inner wall | Running water or a growing puddle |
A quick way to confirm: run your finger along the inside of the tent wall in a dry spot. If the moisture is on the inner wall of a single-wall tent, or on the inside of the rainfly (not the inner tent body) of a double-wall tent, that strongly points to condensation. If moisture is actively coming through the inner tent body itself in a specific spot while it’s raining, that’s a leak, and you’ll want a proper waterproofing pass rather than a ventilation fix.

Check Price on Amazon
2. The Science: Why Warm, Moist Air Turns Into Water
Condensation is just physics doing what physics does. Air can only hold a certain amount of water vapor, and how much it can hold depends heavily on temperature. Warm air holds a lot of invisible moisture; cold air holds very little. When warm, moist air inside your tent comes into contact with the cold fabric of the tent wall or rainfly, it cools rapidly right at that surface. The moment it cools past a threshold called the dew point, the air can no longer hold all that water vapor, and the excess condenses out as liquid water directly on the fabric.
This is exactly the same process that puts dew on grass in the morning, fog on a cold glass of lemonade, or mist on a bathroom mirror after a hot shower. Your tent is simply a small, enclosed dome where you and your gear are constantly adding moisture to the air, while the fabric skin of the tent is exposed to the much colder outside air. The temperature gap between the humid air inside and the cool tent fabric is the engine driving the whole process.
Three variables control how bad it gets on any given night: how much moisture is being added to the air inside the tent, how big the temperature difference is between inside and outside, and how much fresh air is exchanging with the tent’s interior. Turn any of those three dials up, and condensation gets worse. Turn them down, and it gets better. Every fix later in this article is really just an attempt to adjust one of these three variables.
This is also why condensation is often worse on clear, calm, cold nights than on cloudy or windy ones. Clear skies let heat radiate away from the tent fabric faster, dropping its surface temperature below the dew point of the humid air trapped inside. A bit of wind, on the other hand, helps flush that moist air away before it has a chance to condense — which is part of why pitching in a spot with some airflow, discussed more in this dedicated guide to stopping tent condensation, makes such a measurable difference.
3. Your Breath and Body Are Bigger Culprits Than You Think
Most campers are surprised to learn just how much water vapor a sleeping human produces overnight. A single adult exhales and perspires roughly half a liter to a full liter of water through an average eight-hour sleep, depending on activity level, body size, and how hard they were working before bed. Put two people and a dog in a small backpacking tent, and you can easily be adding well over a liter and a half of moisture into a space that might only hold fifty or sixty cubic feet of air.
That moisture has nowhere to go in a sealed tent except onto the nearest cold surface, which is almost always the tent wall closest to your face and the ceiling directly above your head — which is exactly where campers most often report the worst dripping. It’s not a coincidence that solo campers in a two-person tent report less condensation than two campers crammed into the same tent; there’s simply less moisture being produced relative to the interior volume and surface area available to absorb it.
A few practical implications follow directly from this. Sizing your tent appropriately for your group (rather than always buying the smallest, lightest option) gives water vapor more air volume to disperse into before it hits a cold wall. Sleeping with your head near a ventilation point rather than tucked into a corner reduces the concentration of moist air right next to the fabric. And on nights when condensation is a known risk, it can genuinely help to crack a vent or door slightly even if it feels colder — a topic covered in more depth in keeping a tent warm in winter, where the balance between warmth and airflow is the whole challenge.
- A sleeping adult can release roughly half a liter of water vapor overnight through breath and skin alone.
- Two people plus a dog can push total overnight moisture output past a liter and a half.
- Smaller tents concentrate that moisture into less air volume, making condensation worse per person.
- Sleeping positioned near (not blocking) a vent reduces localized moisture buildup.

Shop Tents on Amazon
4. Cooking or Boiling Water Inside the Tent
Firing up a camp stove inside your tent or even just under the vestibule is one of the fastest ways to soak the interior — and it’s also genuinely dangerous, since it introduces a real carbon monoxide risk. Boiling a single liter of water for coffee or a dehydrated meal releases a surprising amount of water vapor directly into the air, and in the enclosed volume of a tent that vapor has almost nowhere to go except straight onto the nearest cold wall.
This is one of the more avoidable causes on this list, and also one of the most dramatic. Campers who cook inside a tent vestibule on a rainy night often report the tent interior looking noticeably wetter the next morning than campers who cooked the exact same meal outside under a tarp, even in identical weather. The stove itself adds combustion moisture on top of the moisture from the boiling water, compounding the effect.
If bad weather forces you to cook under cover, the vestibule is a better compromise than the tent body itself, but it should still be treated as a last resort, with the door to the sleeping area zipped and a vent cracked to let steam escape rather than drift inward. Better still, cook under a separate rain tarp or awning pitched a few feet from the tent, which keeps both the moisture and the carbon monoxide risk away from where you sleep. If rain is the reason you’re tempted to cook inside in the first place, these camping-in-the-rain strategies cover better ways to stay dry while cooking.
5. Poor or Blocked Ventilation
Every well-designed tent includes some combination of mesh panels, vents, or adjustable openings specifically to let humid air escape before it condenses. When those vents are zipped shut, covered by a poorly adjusted rainfly, or simply too small for the tent’s interior volume, moisture has no exit path and builds up fast.
A surprisingly common mistake is pitching the rainfly so tightly and low that it seals off the mesh vents on the inner tent body, effectively turning a well-ventilated tent into a sealed bag. Rainflies are designed to be pitched with a gap between the fly and the tent body, and with their own vents left open, so that air can still flow between the two layers even while rain is being kept out. If your rainfly is drooping onto the inner tent or its vents are cinched shut “to be safe,” you’ve likely eliminated the exact airflow path your tent was engineered around.
Weather anxiety is usually what drives people to over-seal their tent, but a rainfly that’s properly staked out, tensioned, and vented will still keep rain out while allowing air exchange. The fix here is almost always adjustment, not new gear: repitch the fly with proper tension, open every vent the tent has (even a couple of inches makes a measurable difference), and crack a door slightly on the downwind side if conditions allow.
- Check that the rainfly isn’t sagging onto or touching the mesh inner tent body.
- Open roof vents, high/low vent combinations, and door vents fully whenever rain allows.
- Crack a door or window a couple of inches on the side away from prevailing wind.
- Avoid pitching so tight that airflow between fly and body is eliminated.

See Options on Amazon
6. Wet Gear, Clothes, and Dogs Stored Inside
Every wet item you bring into the tent is effectively a small, slow-release humidifier working against you overnight. Rain jackets, wet boots, damp towels, a dog that just swam in the lake, or a sleeping bag that got dew on it the night before all continue releasing moisture into the tent’s air for hours after they come inside, even if they don’t look actively dripping.
This is one of the easiest causes to fix and one of the most overlooked, because it doesn’t feel like the “wet gear” is doing anything once it’s just sitting quietly in a corner. But a damp jacket can hold several hundred milliliters of water, and as the tent interior warms slightly from body heat, that moisture evaporates into the air, where it’s right back to the same dew-point problem described earlier — just with an extra moisture source added to the mix.
Whenever possible, wet gear should stay in the vestibule rather than the main sleeping compartment, ideally hung or laid out rather than balled up (a balled-up wet jacket releases moisture more slowly, but for longer, which can be worse across a full night). A dry bag or a simple stuff sack for wet items keeps the moisture contained rather than let loose in the tent’s air. If you camp regularly with a dog, a dedicated towel kept just for drying them off before they enter the tent makes a bigger difference than most campers expect.
Do
- Store wet gear in the vestibule, not the sleeping area
- Use a dry bag to contain damp clothing
- Towel off pets before they enter the tent
- Hang wet items so they can drip outside the tent, not inside
Avoid
- Balling up wet clothing inside the main tent body
- Drying boots or socks on the tent floor overnight
- Letting a wet dog shake off inside the sleeping compartment
- Bringing a soaked rainfly inside to “dry” before packing
7. Ground Moisture and Missing Footprints
It’s easy to focus entirely on the air inside the tent and forget that the ground underneath you is often just as significant a moisture source, especially on grass, near rivers or lakes, or after a recent rain that soaked the soil. Tent floors are usually made from a thinner, more flexible fabric than the walls, and while they’re waterproof, they’re also excellent conductors of cold, which means the floor is often the coldest surface in the entire tent — and therefore a prime spot for condensation to form on its underside or even seep through worn seam tape over time.
A footprint (a groundsheet cut slightly smaller than the tent’s floor dimensions) does two jobs here: it adds a layer of insulation and moisture blocking between the cold, damp ground and the tent floor, and it protects the floor fabric itself from abrasion that can eventually compromise its waterproof coating. Campers who skip the footprint to save weight often notice that the floor area, rather than the walls or ceiling, is where they find the most moisture and the coldest sleeping surface.
Site selection matters just as much as gear here. Pitching on damp low ground, right after rain, or in a natural drainage channel all but guarantees ground moisture will work its way toward your tent floor. Higher, well-drained ground with some natural cover from dew and wind exposure tends to stay noticeably drier. If ground moisture and cold have been a recurring issue for you specifically, it’s worth reading through sleeping pads built for winter camping, since a pad with a higher R-value does double duty: insulating you from cold ground and reducing the temperature differential that drives floor-level condensation in the first place.

Browse Footprints on Amazon
8. Rainfly Touching the Inner Tent Wall
Even with a well-designed double-wall tent, condensation can transfer straight through to the inner tent if the rainfly is sagging and making direct contact with the mesh or fabric body underneath. Water that condenses on the underside of the rainfly (which is normal and expected) is supposed to run down the outside of the fly and drip harmlessly onto the ground. But if the fly is touching the inner tent at any point, that moisture wicks straight across the contact point, leaving a wet patch on the inner wall that looks exactly like a leak, even though the fly itself never let a drop of rain through.
This usually happens for one of three reasons: guy lines weren’t used or tensioned properly, the fly was pitched slightly undersized or off-center relative to the poles, or wind and settling overnight gradually pulled the fly down onto the body. It’s worth doing a quick check before bed and again if you wake up in the night to strong wind, re-tensioning any guy lines that have gone slack.
Guy lines aren’t just for storm-proofing; on a still, clear night they’re often the single biggest factor in keeping the fly taut and off the inner tent, which directly prevents this specific type of “phantom leak.” A full guy-line setup, staked at a roughly 45-degree angle from each attachment point, pulls the fly away from the tent body evenly on all sides rather than just at the corners.
- Stake out and tension every available guy line, not just the corners.
- Re-check tension before bed and after any period of strong wind.
- Make sure the fly is centered evenly over the tent body, not pulled off to one side.
- If a specific spot keeps getting wet in the same place, check that exact point for fly-to-body contact first.
9. Aging Fabric and Failing Waterproof Coatings
Tent fabric doesn’t stay waterproof forever. Most rainflies and floors rely on a polyurethane (PU) or silicone coating applied to the fabric, and that coating breaks down gradually with UV exposure, repeated packing and unpacking, abrasion, and simple age. As the coating degrades, it can start to flake, peel, or become tacky (“hydrolysis”), and in advanced cases the fabric itself begins wetting out — meaning water no longer beads and rolls off but instead soaks into the fabric surface, making the whole fly feel damp and heavy rather than shedding water cleanly.
A wetted-out fly is easy to mistake for a straightforward leak, but it behaves differently: instead of a specific drip point, you’ll notice the entire fly feels cold and damp to the touch during rain, and condensation-like moisture appears more readily and more broadly than it used to on that same tent. If a tent that used to perform fine is suddenly soaking through in a diffuse way rather than at one clear point, aging waterproofing is a likely culprit, especially on tents that are several seasons old or have seen heavy sun exposure.
The fix is a re-waterproofing treatment: a fresh DWR (durable water repellent) spray-on treatment restores the fabric’s ability to bead water on the surface, while a separate PU-specific coating can restore the underlying waterproof barrier on fabric where the factory coating has genuinely broken down. Seam tape also degrades over time and is a common hidden leak source on older tents, since seams are stitched (creating small needle holes) and then taped over — when that tape lifts or peels, water can work through the stitching itself. A full walkthrough of this process, including how to test whether your fly still beads water and which products work best, is covered in how to make a tent waterproof.

Check Price on Amazon
10. Weather, Humidity, and Campsite Location
Even a well-ventilated, freshly waterproofed tent, pitched perfectly and occupied by a single well-behaved sleeper, will still fight a losing battle on certain nights simply because of where and when you’re camping. High ambient humidity, calm and windless air, and a big temperature swing between day and night are the three weather conditions most strongly associated with severe condensation, and camping near water (lakes, rivers, coastlines) or in low-lying valleys tends to stack all three against you at once.
Humid climates keep the outside air itself close to its dew point all night, which means it takes very little additional cooling for moisture to condense on any cold surface, tent or otherwise. Calm, windless nights remove the natural air exchange that would otherwise help flush humid air away from the tent. And a large day-to-night temperature swing, common in deserts and mountain valleys, means the tent fabric can drop well below the dew point of the humid air trapped inside, even if daytime conditions felt perfectly dry.
Campsite selection can meaningfully offset this. Slightly elevated ground away from water sources, open enough to catch a light breeze but not fully exposed to storm-force wind, tends to condense less than a site tucked into a low, still hollow right next to a river. This is part of why the same tent can feel bone-dry on one trip and soaked on another — the tent didn’t change, but the site and weather did. For campers dealing with this in cold-weather contexts specifically, staying warm at night without sacrificing ventilation is the balancing act worth reading up on.
| Condition | Effect on Condensation | What Helps |
|---|---|---|
| High humidity climate | Outside air already near dew point | Maximize airflow, minimize added moisture |
| Calm, windless night | No natural flushing of humid air | Use a battery fan or extra vents |
| Large day/night temp swing | Fabric cools well below dew point | Insulated sleeping pad, footprint, layered clothing |
| Low ground near water | Cold air pools, humidity is higher | Choose slightly elevated, drier ground |
11. A Simple At-Home Leak Test
If you’re still not sure whether you’re dealing with condensation, ground moisture, or an actual leak, a controlled test at home takes the guesswork out of it and only requires a garden hose and about twenty minutes. This is worth doing before a big trip, especially with an older tent or one you just bought secondhand.
Pitch the tent fully, fly and all, in your yard exactly as you would at a campsite, including staking it out and tensioning the guy lines. Go inside with a flashlight and have someone gently run a garden hose over different sections of the fly, one area at a time, starting with the seams and any areas that look worn, then covering the main fabric panels. From the inside, watch closely for any water actively coming through, particularly around stitched seams, the zipper flaps, and any stake-out or guy-line attachment points sewn into the fabric.
- Pitch the tent completely, including the rainfly, exactly as you would at a campsite.
- Go inside with a flashlight while a second person sprays water over one section at a time.
- Start with seams, zippers, and stake-out points, since these are the most common real leak points.
- Mark any spot that actively drips or wets through from the inside with tape or a marker.
- Let the tent dry fully, then compare marked leak points against the general condensation pattern from your last trip.
If nothing wets through after several minutes of steady spraying across the whole fly, you can be fairly confident your tent doesn’t have a leak problem, and the moisture you’ve been seeing on trips is condensation-driven, meaning the ventilation and moisture-source fixes in this guide are where to focus your energy rather than waterproofing.
12. The Full Fix: Prevention Checklist
Pulling every cause covered above together, here’s the complete list worth running through before and during any trip where a dry tent matters. None of these individually solves the problem completely on their own in tough conditions, but stacked together they dramatically reduce how often you’ll wake up to a wet interior.
Before You Leave
- Test the tent at home if it’s new, old, or secondhand
- Reproof the fly and floor if water no longer beads on the surface
- Pack a footprint sized to your tent’s actual floor dimensions
- Bring a dry bag or stuff sack for wet gear storage
At the Campsite
- Choose slightly elevated, well-drained ground over low, damp hollows
- Pitch the fly with full guy-line tension, keeping it clear of the inner body
- Open every available vent as far as weather allows
- Keep wet gear, boots, and pets in the vestibule, not the sleeping area
- Avoid cooking or boiling water inside the tent body
If you’re shopping for gear specifically to reduce this problem long-term rather than just managing it trip by trip, a tent with generous mesh paneling and dual high/low venting will outperform a budget model on this front every time — our best camping tents guide flags ventilation design specifically for exactly this reason.

View on Amazon
A Note on Single-Wall vs. Double-Wall Tents
It’s worth calling out that single-wall tents (common in ultralight backpacking and mountaineering setups) are inherently more prone to interior condensation than traditional double-wall designs, and this is a structural trade-off rather than a defect. In a double-wall tent, the inner body is a separate mesh or fabric layer, and any condensation that forms happens on the underside of the outer rainfly — a surface you’re not directly touching or sleeping against. Moisture there can drip down and away from you without ever soaking your gear.
In a single-wall tent, there’s only one fabric layer between you and the outside air, which means condensation forms directly on the same wall your sleeping bag, gear, and body are pressed against. There’s no buffer layer to catch it before it reaches you. Single-wall tents shave significant weight, which is why they’re popular for backpacking and alpine trips, but that weight savings comes with a real condensation trade-off that no amount of ventilation adjustment fully eliminates — only reduces.
If you consistently camp in humid, still, or cold-swing conditions and interior moisture is a recurring frustration, switching to a double-wall design (or accepting the condensation trade-off as the cost of a lighter pack) is a more permanent fix than any single technique covered above. For colder-weather trips specifically where both warmth and moisture management matter, our guide to keeping a tent warm in winter digs further into how tent design choices interact with both problems at once.
Tent Age, Storage Habits, and Long-Term Moisture Resistance
How a tent is stored between trips has a surprisingly large effect on how well it resists condensation and leaks down the line, independent of how carefully it’s pitched on any given night. Tents stored damp, even briefly, in a stuff sack are prone to mildew growth, and mildew doesn’t just smell bad — it can gradually degrade both the fabric coating and the seam tape adhesive, accelerating exactly the kind of coating breakdown discussed earlier in this guide. A tent that’s always packed away bone dry will typically hold its waterproof performance for many more seasons than one that’s occasionally stuffed away damp after a rushed morning breakdown.
Storage location matters too. A hot car trunk, garage, or attic subjects a stored tent to repeated heat cycling that can accelerate the same UV and thermal degradation that sun exposure causes during actual camping trips, even though the tent isn’t technically “in use.” A cool, dry closet, with the tent loosely packed rather than compressed into its stuff sack for long-term storage between trips, preserves both the fabric coating and the shape memory of the poles far better over multiple seasons. Campers who rotate through several tents or store gear for months between trips often find that the storage habits matter almost as much as the trips themselves when it comes to long-term waterproof performance.
It’s also worth periodically checking seam tape condition even on a tent that’s performed well historically, since seam tape can begin lifting at the edges well before it becomes an obvious leak point during a storm. Running a fingertip along interior seams during a routine gear check, feeling for any tape that’s starting to peel or feels brittle rather than flexible, catches this early enough to reseal before it becomes a trip-ruining problem.
Altitude and Fast-Moving Weather Fronts
Elevation changes the condensation equation in a way many campers don’t anticipate. Mountain and high-altitude campsites experience much sharper day-to-night temperature swings than lower-elevation sites, since thinner air holds onto daytime heat far less effectively once the sun goes down. A campsite that felt warm and dry at six in the evening can drop dramatically by two in the morning, pushing the tent fabric well below the dew point of the air trapped inside even if the site felt arid earlier in the day. This is part of why alpine and high-desert camping, despite often feeling dry overall, can still produce heavy condensation on clear nights.
Fast-moving weather fronts add another layer of unpredictability. A front passing through overnight can shift humidity and wind conditions substantially between the time you fall asleep and the time you wake up, which is why a tent can start the night dry and end it soaked, or vice versa, with no change in your own setup at all. Checking not just tomorrow’s forecast but the overnight humidity and wind trend specifically, when available, gives a more accurate read on condensation risk than a simple rain-or-no-rain forecast ever will.
Camping With Kids and Pets: Extra Moisture Considerations
Family and pet-inclusive trips add moisture sources that solo or adult-only setups don’t have to account for. Children, particularly younger kids, often run warmer and more active than adults heading into bedtime, which can mean more perspiration relative to their body size, and a family tent packed with two adults, two kids, and a dog can be producing several liters of combined water vapor overnight — several times what a solo backpacker’s tent handles. Sizing a family tent generously, beyond just fitting everyone’s sleeping bags, gives that extra moisture load more air volume to disperse into before hitting the walls.
Pets bring an additional wrinkle beyond their own breath and body heat: fur that’s damp from dew, swimming, or morning grass holds onto moisture far longer than human skin or clothing does, and a dog that curls up against the tent wall overnight is effectively pressing a slow-release moisture source directly against the coldest surface in the tent. A simple absorbent towel kept at the tent door specifically for pet paws and fur, used every single time before they come inside, pays for itself many times over across a multi-night trip. If your pet joins regularly, it’s also worth checking that your tent’s vestibule is large enough to give them (and their gear) a dry staging area separate from the main sleeping compartment.
How Sleeping Bag and Clothing Choices Affect Interior Moisture
What you sleep in matters more than most campers assume. Synthetic and down-fill sleeping bags both trap a layer of warm, humid air close to your body as you sleep, and some of that moisture inevitably migrates outward toward the bag’s outer shell and, from there, toward the tent wall it’s resting against or near. A sleeping bag pushed directly up against the tent wall overnight is one of the most common single points where condensation transfers directly onto gear, since the bag’s outer shell acts as a bridge between your body heat and the cold fabric.
Leaving a few inches of air gap between your sleeping bag and the tent wall, where tent size allows, reduces this direct transfer meaningfully. Breathable base layers, rather than heavier synthetic sleepwear that traps moisture against the skin, also reduce how much humid air builds up inside the sleeping bag itself overnight. None of this eliminates condensation on its own, but combined with proper ventilation and a footprint underneath, it closes off one of the more overlooked moisture pathways in an otherwise well-managed setup.
Frequently Asked Questions
Why is my tent wet inside even though it didn’t rain?
This is almost always condensation, not a leak. Your body heat and breath add a significant amount of water vapor to the air trapped inside the tent overnight, and when that warm, humid air touches the much colder tent fabric, the moisture condenses directly onto the walls and ceiling. Clear, calm, cool nights are actually the conditions most likely to produce heavy condensation, since clear skies let the tent fabric radiate heat away and cool below the dew point faster than on cloudy or windy nights. Check whether the moisture is spread evenly across the fabric (condensation) versus concentrated in one drip point tied to a seam or stake-out (a leak) to confirm which you’re dealing with.
Is it normal for a tent to be wet inside in the morning?
Yes, a light film of condensation on the inner rainfly surface or lower tent walls is genuinely normal, especially in cool, humid, or still conditions, and it doesn’t mean your tent is defective. What’s not normal is a fully soaked sleeping bag, standing water, or moisture that’s clearly tracing back to a specific seam or hole rather than being spread broadly across the fabric. If condensation is consistently heavy enough to wet your gear, the fixes in this guide (ventilation, moisture-source reduction, campsite selection) will meaningfully cut it down, even if a small amount of morning dew-like moisture never fully disappears in humid climates.
How do I stop my tent from getting wet inside?
Focus on the three variables that control condensation: reduce moisture sources (avoid cooking inside, keep wet gear in the vestibule, dry off pets before they enter), maximize airflow (open every available vent, don’t let the rainfly sag onto the inner body, consider a small battery fan), and manage the temperature gap where possible (an insulated sleeping pad and a footprint both help). For a full step-by-step walkthrough specifically focused on prevention techniques, see how to stop condensation in a tent.
Should I leave tent windows or vents open at night?
In most conditions, yes. Cracking a vent or window, even a couple of inches, allows humid air to exchange with the drier outside air before it has a chance to condense on the tent walls. The instinct to seal everything shut to stay warm usually backfires by trapping moisture instead. If it’s raining, keep vents that are protected by the rainfly’s design open, since a well-designed vent system is built to shed rain even while open. On genuinely cold nights, balance warmth and ventilation by cracking one vent rather than closing all of them completely.
Does breathing inside a tent cause condensation?
Yes, significantly. A sleeping adult releases roughly half a liter of water vapor overnight through breath and perspiration combined, and in the enclosed air volume of a small tent, that moisture has nowhere to go except onto the nearest cold surface. This is one of the biggest reasons two campers in a small two-person tent report noticeably more condensation than a solo camper in the same tent, and it’s also why sizing up your tent slightly, when practical, can measurably reduce overnight moisture buildup.
Why is the bottom of my tent wet but not the top?
Wetness concentrated at the floor level usually points to ground moisture rather than airborne condensation. Tent floors are thinner than the walls, conduct cold efficiently, and sit in direct contact with the ground, which is often the coldest, dampest surface around the whole tent. This is exactly the situation a footprint is designed to solve, by adding an insulating, moisture-blocking layer between the ground and your tent floor. Campsite drainage matters here too; low, damp, or recently rained-on ground will make this worse regardless of how well-ventilated the tent’s upper walls are.
Can a tent be waterproof and still get wet inside?
Absolutely, and this is the core misunderstanding behind most “my new tent leaks” complaints. A fully waterproof tent keeps outside rain from coming through the fabric, but it does nothing to stop condensation forming from moisture that’s already trapped inside the tent with you. Waterproofing and condensation are two entirely separate problems with two entirely separate fixes: waterproofing keeps rain out, while ventilation and moisture management keep condensation from forming in the first place.
Why does my tent get wet inside even with the rainfly on?
The rainfly’s job is to keep external rain off the inner tent body, not to prevent condensation, which forms from moisture generated inside the tent regardless of whether the fly is on or off. In fact, a rainfly can make condensation slightly worse if it’s pitched too tightly against the inner tent body, since that reduces the airflow gap between the two layers where moist air would otherwise escape. Check that your fly is staked out with guy lines properly tensioned and isn’t touching the inner tent anywhere.
Does tent condensation mean I need a new tent?
Rarely. Condensation is a near-universal camping phenomenon tied to physics, not a specific product flaw, and even premium, well-reviewed tents condense heavily under the wrong combination of humidity, stillness, and temperature swing. The exceptions are tents with genuinely failing waterproof coatings (fabric that has started wetting out rather than beading water) or ventilation designs that are unusually poor for their price point and category. Before assuming you need a replacement, run through the ventilation, moisture-source, and campsite fixes in this guide, since most “my tent is bad” complaints resolve with technique changes rather than new gear.
Is condensation worse in a smaller tent?
Generally, yes, for two compounding reasons. A smaller tent has less total air volume for the same amount of moisture (from breath, gear, or a pet) to disperse into before hitting a cold wall, and a smaller tent also tends to put you and your gear in closer physical contact with the fabric itself, which increases the chance of direct condensation transfer onto your sleeping bag or pad. This is part of why solo campers using a two-person tent, rather than a one-person tent, often report noticeably drier mornings for the same conditions.
Why is my tent wet inside in winter specifically?
Winter camping combines several condensation-worsening factors at once: a bigger temperature gap between your warm breath and body heat and the cold outside air, the instinct to seal every vent shut to conserve warmth, and often a smaller, more tightly packed tent interior. The same physics apply, just amplified. The practical answer is to resist fully sealing the tent even when it’s tempting, since some airflow is usually still better than none, and to pay close attention to ground insulation, since cold ground is an even bigger factor in winter conditions. Our guide on keeping a tent warm in winter goes deeper into balancing these two competing needs.
How can I dry out a wet tent quickly after a trip?
Pitch the tent fully (or at minimum hang the fly and body separately) in a dry, shaded, well-ventilated area as soon as possible after returning home, since packing a damp tent away for days encourages mildew and can degrade the waterproof coating over time. Avoid direct, prolonged sun exposure during drying, since UV breaks down the same coatings that keep the tent waterproof. A few hours of full pitch-out airflow is usually enough for a tent that’s damp from condensation; a tent that got genuinely soaked may need a full day, with the floor and any thicker seam-taped areas checked last since they hold moisture longest.
Common Mistakes That Make Tent Condensation Worse
Beyond the twelve core causes above, a handful of small, easy-to-miss habits tend to quietly undo all the good work of an otherwise well-ventilated setup. Recognizing them is often the difference between a tent that’s merely damp and one that’s genuinely soaked by morning.
Packing a Damp Tent From the Night Before
If you’re on a multi-day trip and pack up a tent that’s still damp with condensation from the previous night, that trapped moisture doesn’t just disappear — it re-enters the tent’s interior environment as soon as you pitch it again the following evening, effectively giving you a head start on moisture buildup before you’ve even added your own breath and body heat to the mix. Whenever the schedule allows, even fifteen or twenty minutes of open-air time before packing up makes a real difference over the course of a multi-night trip.
Setting Up Camp Too Close to Water
A lakeside or riverside site is scenic, but it’s also one of the most humid microclimates available at any given campground, since evaporation off the water surface keeps the immediate air saturated with moisture well into the night. Moving even a modest distance back from the water’s edge, onto slightly higher and more open ground, often produces a measurably drier tent interior without sacrificing much in the way of convenience or view.
Ignoring the Difference Between Humidity and Rain Risk
Many campers check the forecast purely for rain probability and stop there, missing relative humidity and overnight low temperature, both of which predict condensation risk far better than rain chance does. A dry, clear forecast with high overnight humidity and a big temperature drop is actually a strong condensation warning sign, even though it looks like “perfect” camping weather on the surface.
Over-Relying on a Tent’s “Waterproof Rating” Alone
A tent’s hydrostatic head rating measures how much water pressure the fabric can resist before leaking, which is a genuinely useful spec for rain performance, but it says nothing about the tent’s ventilation design or how prone it is to interior condensation. Two tents with identical waterproof ratings can behave completely differently on a still, humid night depending on how much mesh paneling, vent area, and airflow design each one includes.
Quick Reference: Diagnosing Your Wet Tent in Under a Minute
| What You’re Seeing | Most Likely Cause | Fastest Fix |
|---|---|---|
| Even film across walls/ceiling, no rain | Condensation from breath/body moisture | Open vents, avoid overcrowding the tent |
| One drip point at a seam or zipper | Genuine leak | Seam seal or patch the specific spot |
| Wet floor, dry walls and ceiling | Ground moisture | Add a footprint, check campsite drainage |
| Damp patch where fly touches inner wall | Rainfly contact transfer | Re-tension guy lines, re-center the fly |
| Whole fly feels wet/cold during rain, no clear drip point | Failing waterproof coating | Reproof with DWR spray or PU coating |
| Worse after cooking or boiling water inside | Added moisture from cooking | Cook outside or in vestibule only, vented |
Most campers dealing with a wet tent interior are actually facing a combination of two or three of these causes at once, rather than a single isolated problem — a slightly undersized tent, pitched near a lake, with a vent left closed out of habit, for example, stacks three separate moisture factors on top of each other. Working through the checklist in this dedicated condensation-prevention guide one item at a time, rather than trying to fix everything at once, is usually the fastest way to isolate which factor matters most for your specific setup.
The Bottom Line
A wet tent interior feels alarming the first time it happens, especially on a night when it never even rained, but in the overwhelming majority of cases it’s condensation, not a defective tent or a mysterious leak. The physics are straightforward once you see them: warm, moist air from your breath, body, gear, and cooking meets cold tent fabric, and the excess moisture has to go somewhere. Your job is simply to control the three variables that drive the process — how much moisture you’re adding, how much airflow you’re allowing, and how big a temperature gap the tent fabric has to bridge.
Start with the free fixes: open every vent you have, keep wet gear and pets in the vestibule instead of the sleeping area, and resist the urge to cook or boil water inside the tent body. Layer in a footprint and a properly tensioned rainfly for the next tier of improvement, and if your fabric has stopped beading water the way it used to, a reproofing treatment will handle the rest. Run the simple garden-hose test at home if you’re still unsure whether you’re dealing with condensation or an actual leak, and you’ll walk into your next trip already knowing exactly what to expect and how to prevent it.
None of this requires an expensive gear overhaul to start seeing results. Most of the improvement comes from small, repeatable habits: cracking a vent before bed instead of sealing everything shut, towelling off a wet dog before it flops down against the tent wall, and giving a damp tent a short airing-out window before it gets packed away for the night. Treat condensation as a predictable, manageable part of camping rather than a mystery malfunction, and it stops being the thing that ruins an otherwise great trip.
Shop Tent Ventilation & Waterproofing GearWhichever cause turned out to be the culprit for your tent, the underlying goal is always the same: less trapped moisture, more airflow, and a smaller gap between the temperature inside and outside your tent walls. Keep that framework in mind on your next trip, and a wet tent interior stops being a mystery and becomes just one more thing you know how to handle before it happens.