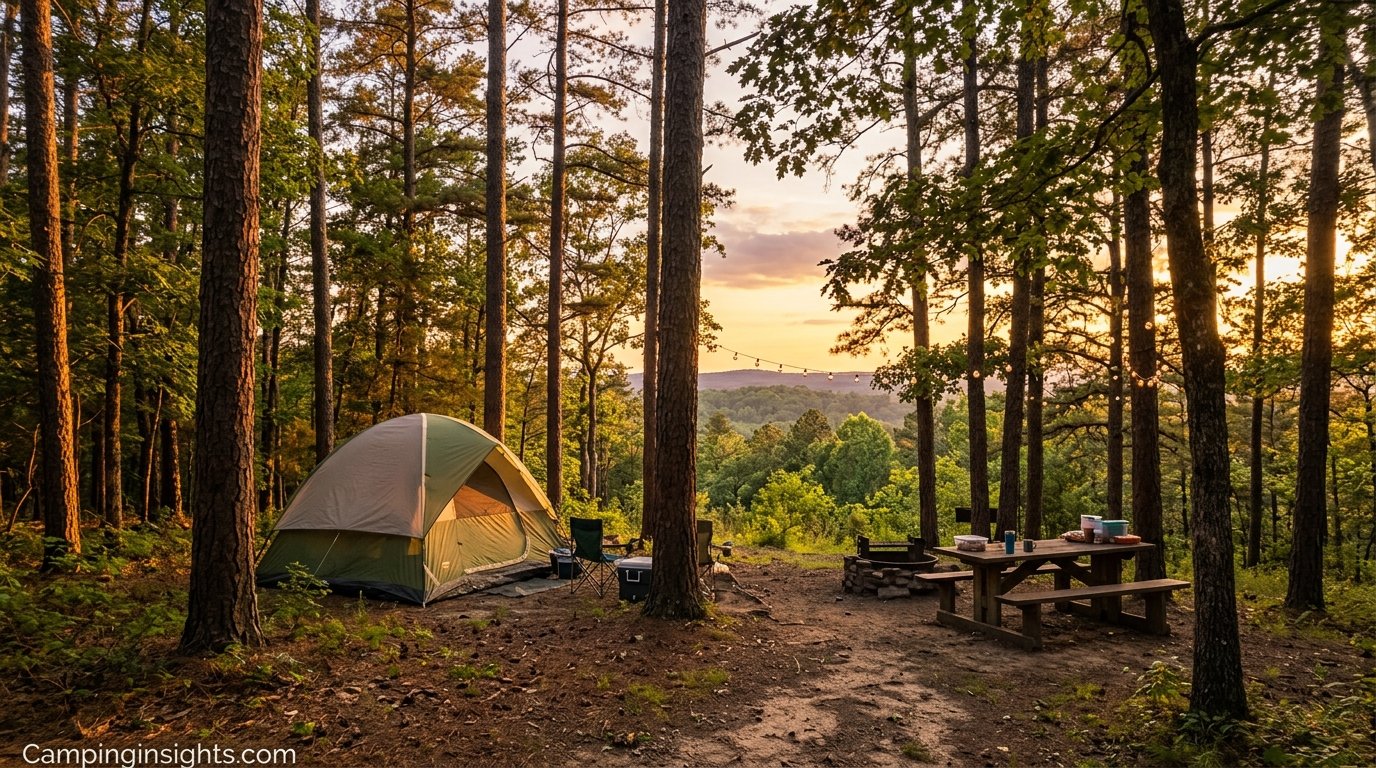
The Ultimate Camping Checklist for Beginners
Everything you need to pack for your first camping trip — organized by category, explained in plain language, and impossible to forget.
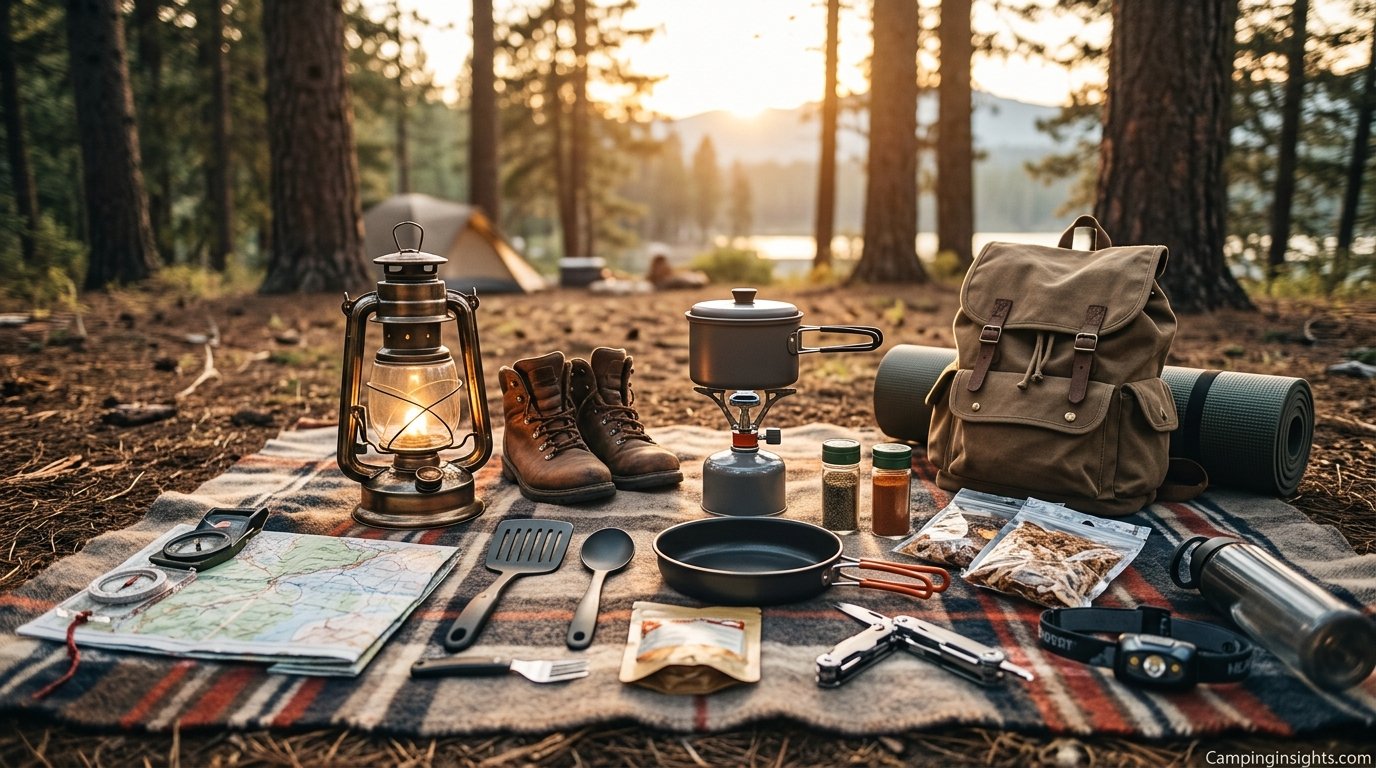
You’ve picked the campsite, cleared your calendar, and convinced a friend to come along. Now comes the part that separates a great first trip from a miserable one: knowing exactly what to bring. A forgotten headlamp, an undersized sleeping bag, or no rain gear at all — these small oversights have a way of turning an exciting weekend into a long, cold lesson in what not to do next time.
This guide was built for people who have never camped before or who have camped once and realized they were missing half of what they needed. It covers every category of gear — from the tent overhead to the shoes on your feet — and explains not just what to pack but why each item matters. Whether you’re planning a single overnight at a drive-up campground or a full week in the backcountry, this is the checklist that keeps you prepared, comfortable, and safe.
You can explore more general camping advice on our camping hub page, or read on for the complete, section-by-section breakdown.
Why a Camping Checklist Matters for Beginners
There is a particular kind of regret that only hits at 10 p.m. in the woods — the moment you realize you left the bottle opener at home, or worse, that your “waterproof” jacket is neither waterproof nor, technically, a jacket you actually packed. Beginners tend to underestimate how many small items contribute to a comfortable night outdoors. It is not just the big-ticket gear like tents and sleeping bags that matter; it is the ziplock bags, the extra stakes, the spare socks, and the duct tape wrapped around a pencil that can make the difference between a minor inconvenience and a trip-ending problem.
Experienced campers often develop their own personalized packing systems over years of trial and error. They know from painful experience that forgetting a ground cloth means waking up to a damp tent floor, that running out of fuel halfway through cooking dinner is avoidable, and that a headlamp with dead batteries after dark is essentially no headlamp at all. A good checklist compresses all those hard-won lessons into a single, reliable document you can consult every time you pack.
Common First-Timer Mistakes
Ask any campground host or park ranger about the mistakes they see from beginners, and the same patterns appear again and again. People bring cotton clothing that stays wet for hours after a rain. They sleep directly on the tent floor without a pad and wonder why they are freezing by midnight. They pack enough food for a small army but forget a can opener. They arrive after dark without a flashlight and try to set up camp by the glow of a phone screen.
The most dangerous mistakes, though, involve safety essentials. Heading out without a first aid kit, leaving bear country without proper food storage, or ignoring weather forecasts and wearing inadequate layers — these are the oversights that can turn a fun weekend into a genuine emergency. This checklist is organized to make sure the critical items never get left behind.
How to Use This Guide
The following eleven sections break down every major gear category you will encounter. Each section explains the purpose of the gear, what features to look for, and what to avoid. Comparison tables help you choose between options, and product recommendations are linked where appropriate. At the end, you will find a comprehensive master checklist organized for easy printing or screenshot. You do not need to buy everything on this list for your first trip — many items can be borrowed, rented, or substituted — but you should at least account for every category.

Coleman Sundome Camping Tent
One of the best-selling beginner tents on Amazon. Easy setup, WeatherTec system, and available in multiple sizes.
Check Price on AmazonChoosing Your Shelter: Tents, Tarps, and Ground Protection
Your tent is your home for the duration of the trip, and choosing the right one is arguably the single most important decision on this entire checklist. A tent that leaks, flaps violently in the wind, or takes forty-five minutes to assemble will color every other aspect of your experience. For beginners, the goal is not to find the lightest or most advanced shelter — it is to find one that is easy to set up, weatherproof for the conditions you expect, and sized appropriately for the number of people sleeping inside.
Tent Types: What Works for Beginners
For a first-time camper heading to a drive-up campground, a three-season dome tent is almost always the right answer. These tents use a simple two-pole design that goes up in minutes, they shed rain effectively, and they provide enough ventilation to reduce condensation on warm nights. The term “three-season” means they are designed for spring, summer, and fall — not for heavy snow loads or sustained sub-freezing temperatures. That is perfectly fine for the vast majority of beginner camping trips.
If you think you might eventually camp in colder weather, it is worth understanding the full range of tent options. Our guide to the best camping tents covers models across every category, from ultralight backpacking shelters to heavy-duty basecamp designs. For now, here is a quick comparison:
| Tent Type | Best For | Setup Ease | Weight | Price Range |
|---|---|---|---|---|
| 3-Season Dome | Car camping, festivals, casual trips | Very easy | Moderate | $50–$200 |
| Cabin Tent | Large groups, families, drive-up sites | Moderate | Heavy | $100–$400 |
| Backpacking Tent | Hiking to a remote site | Easy | Very light | $150–$500 |
| Extended 3-Season | Shoulder seasons, cooler temps | Moderate | Moderate | $200–$400 |
| 4-Season | Winter, snow, high wind | Complex | Heavy | $300–$700+ |
Sizing Your Tent Correctly
Tent capacity ratings assume people are sleeping shoulder-to-shoulder with zero gear inside. In practice, a “two-person” tent fits one person comfortably with room for a backpack, while a “four-person” tent fits two adults and their stuff without everyone feeling claustrophobic. The golden rule for beginners: subtract one from the listed capacity for a comfortable fit, or subtract two if you want room to move around, change clothes, or wait out rain inside the tent.
Essential Shelter Accessories
The tent itself is only part of the shelter equation. A footprint — a ground cloth cut to the shape of your tent floor — protects against abrasion, punctures, and moisture wicking up from the ground. It is far cheaper to replace a footprint than to repair a torn tent floor. You can buy a fitted footprint from the tent manufacturer or simply cut a tarp to size, making sure it does not extend beyond the tent’s edges (which would channel rain underneath rather than away).
Tent stakes and guylines are the other accessories beginners frequently overlook. The stakes included with budget tents are often thin, bend easily in rocky soil, and pull out of soft ground. Upgrading to a set of aluminum Y-stakes or V-stakes dramatically improves your tent’s stability in wind. If you camp on rocky or hard ground, check out our guide to the best tent stakes for rocky ground.
Waterproofing your tent before your first trip is also a smart preventive measure. Even factory-sealed tents can develop leaks at the seams after exposure to UV and wear. Our step-by-step guide on how to make a tent waterproof walks you through the seam-sealing process in about thirty minutes.
And if you have ever woken up to find the inside of your tent dripping with moisture, you are not alone. Condensation is one of the most common complaints from new campers. Understanding why your tent gets wet inside and learning how to stop condensation in your tent will save you from that soggy morning surprise.
What to Look For: Feature Checklist
- Full-coverage rainfly that extends to the ground
- Sealed or factory-taped seams on the floor and rainfly
- Vestibule space for muddy boots and gear storage
- Multiple ventilation points (mesh panels, vents near the peak)
- Color-coded poles and clips for intuitive setup
- Reflective guyline loops for nighttime visibility
- Interior pockets for small items (phone, headlamp, glasses)

Kelty Cosmic 20 Sleeping Bag
An affordable mummy bag rated to 20°F with hydrophobic down fill. Great for three-season camping and a favorite among first-time buyers.
Check Price on AmazonSleep Systems: Sleeping Bags, Pads, and Camp Bedding
After your tent, the sleep system is the gear category that most directly determines whether you enjoy your camping trip or endure it. A cold, uncomfortable night on the ground is the number one reason beginners say they will “never camp again.” The good news is that a few right choices here can make your tent sleep genuinely restful — not just tolerable, but actually pleasant.
Sleeping Bags: Types and Temperature Ratings
Sleeping bags come in three basic shapes. Mummy bags taper toward the feet and fit closely around the body, which makes them thermally efficient but can feel restrictive if you move a lot in your sleep. Rectangular bags are roomy and comfortable — closer to sleeping under a blanket — but they are heavier, bulkier, and less thermally efficient because all that extra air space needs your body heat to fill it. Semi-rectangular (or “modified mummy”) bags split the difference, offering a contoured hood and slightly tapered shape without the tight squeeze.
The temperature rating on a sleeping bag tells you the lowest temperature at which the bag will keep a “standard” sleeper warm. The industry uses EN/ISO 13537 testing, which produces three numbers: Comfort (the temperature at which a cold sleeper stays warm), Lower Limit (the temperature at which a warm sleeper stays warm), and Extreme (survival-only, do not plan on this). For beginners, the Comfort rating is the number to pay attention to. If you plan to camp in temperatures around 40°F, choose a bag rated to at least 30°F Comfort — a buffer of 10 to 15 degrees accounts for unexpected cold snaps, altitude differences, and individual variation.
| Bag Type | Warmth | Weight | Packability | Best For |
|---|---|---|---|---|
| Mummy | Excellent | Light | Excellent | Cold weather, backpacking |
| Rectangular | Good | Heavy | Poor | Car camping, warm nights |
| Semi-Rectangular | Very Good | Moderate | Good | Versatile, side sleepers |
| Quilt | Good | Very Light | Excellent | Warm weather, ultralight |
Sleeping Pads: Your Most Underrated Piece of Gear
Many first-time campers skip the sleeping pad entirely, reasoning that a tent floor is flat enough. This is a mistake. The ground is a massive heat sink — even on a mild 50°F night, the soil temperature can be in the low 40s, and lying directly on it will pull heat from your body far faster than the cold air above. A sleeping pad provides both cushioning and insulation, and the insulation factor is measured by the pad’s R-value.
| R-Value | Insulation Level | Season Use |
|---|---|---|
| 1.0–2.0 | Minimal | Warm summer nights only |
| 2.0–4.0 | Moderate | Three-season camping |
| 4.0–6.0 | High | Cold weather, late fall |
| 6.0+ | Maximum | Winter, snow camping |
Foam pads are inexpensive, lightweight, and virtually indestructible — you can strap them to the outside of a pack without worrying about punctures. They provide consistent insulation regardless of conditions. Inflatable pads are more comfortable (especially for side sleepers), pack down smaller, and offer higher R-values per ounce of weight, but they are vulnerable to punctures and require a few breaths of air to set up. Self-inflating pads combine foam and air chambers for a middle ground, though they tend to be heavier than either option alone.
For a deeper look at cold-weather sleeping pad options, see our guide to the best sleeping pads for winter camping. Even if you are not planning a winter trip, the R-value information there applies year-round.
Camp Pillows and Extra Bedding
A camp pillow might sound like a luxury, but after your first night of wadding up a sweatshirt into a lumpy ball, you will appreciate having a dedicated one. Inflatable camp pillows weigh just a few ounces and compress to the size of a fist. Compressible pillows filled with foam scraps are heavier but feel closer to a real pillow. Either option is inexpensive and makes a noticeable difference in sleep quality.
If you tend to sleep cold, consider bringing a fleece blanket or a sleeping bag liner. A liner can add 5 to 15 degrees of warmth to your existing bag and also keeps the bag’s interior clean, reducing the number of times you need to wash it over its lifetime.
For campers who struggle with sleeping on the ground altogether, a camping cot designed for side sleepers can be a game-changer, lifting you off the ground entirely and providing a flat, consistent surface. Cots pair well with a sleeping pad on top for maximum comfort and insulation.
And remember — warmth at night starts with your sleep system but is influenced by your entire shelter setup. Our guide on how to keep your tent warm at night covers the techniques that bring all these elements together.
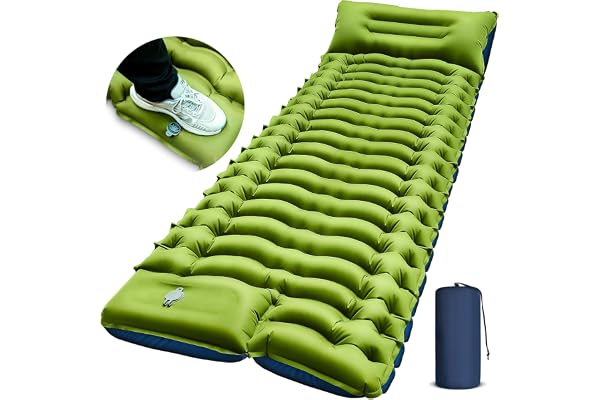
Self-Inflating Sleeping Pad (R-Value 4.5)
Three inches of cushioning with a built-in pump. Rolls up tight and weighs under 3 lbs — ideal for beginner car campers.
Check Price on AmazonClothing and Layering: What to Wear at Camp
Cotton kills. You will hear this phrase from experienced campers so often it starts to sound like a mantra, and there is real science behind it. Cotton absorbs moisture — sweat, rain, river splashes — and holds it against your skin, where evaporation pulls away body heat at an alarming rate. In cool or cold conditions, a wet cotton shirt can drop your core temperature faster than wearing nothing at all. This is why every camping checklist worth its salt insists on synthetic or wool base layers instead.
The clothing system for camping is built around layering, which means assembling multiple thin, functional layers rather than relying on one thick, heavy garment. The advantage of layering is versatility: temperatures at camp can swing 30 degrees or more between a sunny afternoon and a cold pre-dawn morning, and layering lets you add or remove pieces to stay comfortable through all of it.
The Three-Layer System
Base layer: This is the layer against your skin. Its job is moisture management — wicking sweat away from your body so it can evaporate without chilling you. Merino wool is the gold standard here: it wicks moisture, resists odor for days, regulates temperature in both warm and cold conditions, and feels soft against the skin. Synthetic polyester blends are a more affordable alternative that dries faster but tends to hold odor after one or two wears.
Mid layer: This is your insulation layer. A fleece jacket, a down vest, or a synthetic puffy jacket traps warm air close to your body. Fleece is durable, breathable, and still insulates when damp. Down offers the best warmth-to-weight ratio but loses its insulating ability when wet (unless treated with hydrophobic coating). Synthetic insulation works even when damp and dries faster than down, though it is bulkier.
Outer layer (shell): This is your defense against wind and rain. A good rain jacket with sealed seams and a hood is non-negotiable — even on trips where the forecast shows clear skies. Weather in the mountains or near large bodies of water can change quickly, and getting caught without rain protection is one of the fastest ways to ruin a trip. For tips on camping in wet conditions, our guide on camping in the rain covers everything from tent placement to gear drying strategies.
Camp Clothing Checklist
| Item | Material | Quantity | Why It Matters |
|---|---|---|---|
| Base layer top | Merino wool or synthetic | 1–2 | Moisture-wicking, odor-resistant |
| Base layer bottoms | Merino wool or synthetic | 1 | Sleep layer and cold-morning warmth |
| Mid-layer jacket | Fleece or synthetic puffy | 1 | Primary insulation at camp |
| Rain jacket | Waterproof-breathable membrane | 1 | Wind and rain protection |
| Hiking pants | Nylon or polyester blend | 1–2 | Quick-drying, abrasion-resistant |
| Warm hat | Wool or fleece | 1 | Retains up to 10% of body heat |
| Sun hat | Breathable nylon | 1 | Sun protection during the day |
| Gloves | Fleece or wool | 1 pair | Essential for cold mornings/evenings |
| Wool socks | Merino wool | 2–3 pairs | Warm, cushioned, moisture-wicking |
| Camp shoes | Slip-on sandals or crocs | 1 pair | Give your feet a break from boots |
| Hiking boots/shoes | Waterproof leather or synthetic | 1 pair | Ankle support and traction |
| Sleepwear | Clean base layers or fleece | 1 set | Dry clothes for sleeping = warmth |
Winter-Specific Clothing Considerations
If you are camping in cold or winter conditions, the layering principles stay the same but the stakes go up. You will want heavier insulation — a thick down puffy rather than a lightweight fleece — and additional accessories like insulated boots, gaiters, hand warmers, and a balaclava. Our detailed guide on how to keep a tent warm in winter covers the full range of clothing and shelter strategies for sub-freezing trips.

Merino Wool Base Layer Set
Top and bottom set in 100% merino wool. Temperature-regulating, naturally odor-resistant, and incredibly comfortable against skin.
Check Price on AmazonCamp Kitchen Essentials: Stoves, Cookware, and Food Planning
One of the great pleasures of camping is eating outdoors — the smell of bacon on a camp stove, coffee brewed in the open air, a simple meal that tastes extraordinary after a day of hiking. But camp cooking requires a specific set of gear that is quite different from what you have at home, and forgetting even one piece (the fuel canister, the lighter, the spatula) can leave you eating cold granola bars for dinner.
Camp Stove Options
For beginners, a two-burner propane stove is the most practical choice. It operates exactly like a gas range at home, runs on standard 16 oz propane canisters available at any hardware store or campground shop, and provides enough cooking surface to prepare a real meal for two to four people. The setup time is zero — you unfold it, connect the fuel, and light it.
Canister stoves (small, lightweight screw-on burners) are better suited for backpackers who need to boil water quickly for dehydrated meals. They are extremely compact but offer less cooking control and stability for larger pots. Liquid fuel stoves (white gas) perform better in cold weather and at altitude but require priming and maintenance that most beginners will find fiddly.
| Stove Type | Fuel | Weight | Cooking Control | Best For |
|---|---|---|---|---|
| Two-Burner Propane | 16 oz propane canisters | Heavy (10+ lbs) | Excellent | Car camping, families |
| Canister Stove | Isobutane/propane mix | Ultralight (3–8 oz) | Fair | Backpacking, solo |
| Liquid Fuel | White gas, kerosene | Moderate | Good | Cold weather, international |
| Wood Burning | Twidigs, wood pellets | Moderate | Fair | Ultralight, survivalists |
Cookware and Utensils
A basic camp cookware kit includes a pot (1–2 quart for boiling water or heating soup), a skillet or frying pan, a spatula, a large spoon or ladle, a sharp knife, and a cutting board. Nesting cookware sets designed for camping save space by stacking the pot, pan, and lids together with the utensils tucked inside. Hard-anodized aluminum is the most common material — it heats evenly, is lightweight, and cleans easily.
For utensils, skip the flimsy plastic and bring real silverware or a dedicated set of camp utensils made from stainless steel or titanium. You will also need plates or bowls (enamelware is durable and nostalgic, or use lightweight plastic), mugs for coffee and hot chocolate, and a can opener if your menu includes canned goods.
Food Planning for Beginners
Plan your meals before you leave home. Write out every meal — breakfast, lunch, dinner, and snacks — for each day of the trip, plus one extra day’s worth of food in case you stay longer than planned or weather delays your departure. The simplest approach for a first trip is one-pot meals: chili, pasta with sauce, soup, oatmeal, or stir-fry. These require minimal cookware, minimal cleanup, and are nearly impossible to mess up.
A cooler with ice is essential for any perishable food. Block ice lasts significantly longer than cubed ice — you can freeze water in a large Tupperware container a few days before your trip. Place items you need last (day two and three meals) at the bottom of the cooler and first-day items on top so you are not rummaging through the ice repeatedly.
Don’t forget: trash bags for packing out all waste, aluminum foil for wrapping and cooking over a campfire, paper towels for cleanup, and a small bottle of biodegradable dish soap with a sponge or scrubber.

Coleman Classic Propane Camp Stove
The industry standard for car camping. Two burners, wind-blocking panels, and up to 22,000 BTUs of cooking power across both burners.
Check Price on AmazonHydration and Water Purification
Water is the single heaviest item you will carry and the one thing you absolutely cannot do without. The general recommendation is to plan for one gallon (about 4 liters) per person per day for drinking, cooking, and basic cleanup. In hot weather or at altitude, you may need more. If your campground has potable water spigots, you can refill containers on site. If it does not — or if you are backpacking — you will need to carry everything in or bring a purification system to treat water from natural sources.
Water Containers
For car camping, a collapsible water jug (5 to 7 gallons) is ideal — it takes up almost no space when empty and provides a camp “faucet” via its built-in spigot. A hard-sided water cooler (like the kind construction workers use) is more durable but bulky. For personal drinking water, reusable Nalgene-style wide-mouth bottles are the camp standard: they are virtually indestructible, have clear volume markings, and can handle boiling water for hot drinks or instant meals.
Avoid relying solely on single-use plastic water bottles. They create unnecessary waste, are easy to lose in camp, and cannot handle hot liquids. Bring at least two 32-ounce reusable bottles per person.
Water Filtration and Purification
If you need to treat water from streams, lakes, or rivers, there are several options, each with tradeoffs:
Gravity filters (like the Platypus GravityWorks) hang from a tree and filter water through a hollow-fiber membrane as it flows from a dirty reservoir to a clean one. They require no pumping and produce large volumes of clean water, making them excellent for group camping. Pump filters require manual pumping but allow you to fill bottles directly from a water source. Straw filters (like the LifeStraw) let you drink directly from a water source — ultralight and simple, but impractical for collecting water for cooking. Chemical treatment (iodine tablets or chlorine dioxide drops) kills viruses that filters miss, but takes 30 minutes to 4 hours to work and can leave an aftertaste.
For beginners, a gravity filter or a simple squeeze filter strikes the best balance between ease of use and versatility. Boiling water for one minute (three minutes above 6,500 feet elevation) is the oldest and most reliable purification method if you have a stove and fuel to spare.

LifeStraw Personal Water Filter
Filters 99.99% of bacteria and parasites. Weighs just 2 ounces and fits in your pocket — an essential emergency backup for any camping trip.
Check Price on AmazonLighting: Headlamps, Lanterns, and Camp Illumination
The transition from daylight to darkness at a campsite happens faster than most beginners expect. In a city, you are surrounded by streetlights, screens, and ambient light pollution. At a campsite, especially one away from other campers, the darkness is absolute. Without a light source, you cannot find your tent, cook dinner, use the bathroom, or even locate the zipper on your sleeping bag. Lighting is not optional — it is among the top five most important items on any camping checklist.
Headlamps: Your Most Important Light
A headlamp is more useful at camp than a handheld flashlight because it keeps both hands free. You can cook, set up gear, find things in your tent, and walk to the bathroom without juggling a light source. Look for a headlamp with at least 200 lumens of maximum output (enough for trail walking), a red-light mode (which preserves night vision and does not blind your campmates), and a comfortable, adjustable headband. Rechargeable models with USB-C charging are convenient, but headlamps that run on AAA batteries have the advantage of being replaceable in the field.
Bring at least one headlamp per person, plus a spare set of batteries or a portable charger. It is remarkably common for groups to share a single flashlight and then discover at 9 p.m. that everyone needs light simultaneously.
Lanterns: Ambient Camp Light
While a headlamp is directional, a lantern provides 360-degree ambient light that illuminates an entire picnic table, cooking area, or tent interior. LED lanterns are the modern standard — they are bright, efficient, and many models are rechargeable or double as power banks. Hang a lantern from a tree branch or the tent’s ceiling loop for hands-free overhead lighting.
A string light strung between two trees or along a picnic shelter adds a surprising amount of usable light and creates a warm, inviting atmosphere at camp. Solar-powered versions charge during the day and turn on automatically at dusk.
Backup and Emergency Lighting
Always carry a backup light source. A small keychain flashlight or a pack of glow sticks costs almost nothing and weighs next to nothing, but can be a lifesaver if your primary headlamp fails. Glow sticks are also useful for marking the path to the bathroom at night, marking guy lines to prevent tripping, and entertaining kids at camp.

PETZL Tikkina Headlamp
300 lumens, red-light mode, and up to 60 hours of battery life. Simple, reliable, and the go-to recommendation for new campers.
Check Price on AmazonFirst Aid, Safety, and Emergency Gear
Accidents at camp tend to be minor — cuts, blisters, insect stings, sunburns, splinters — but even small injuries become serious problems when you are an hour from the nearest pharmacy. A well-stocked first aid kit handles 95% of the situations you are likely to encounter and costs less than a single urgent care visit. Beyond the kit, there are a handful of safety and emergency items that every camper should carry, especially when venturing away from well-trafficked campgrounds.
Building a First Aid Kit
You can buy a pre-made camping first aid kit (often excellent for beginners) or build your own. A complete kit should include:
| Category | Items |
|---|---|
| Wound Care | Adhesive bandages (assorted sizes), gauze pads, medical tape, butterfly closures, antiseptic wipes, antibiotic ointment |
| Blister Care | Moleskin, blister bandages, athletic tape |
| Medications | Ibuprofen, antihistamine (Benadryl), hydrocortisone cream, antidiarrheal, electrolyte packets |
| Tools | Tweezers, small scissors, safety pins, nitrile gloves |
| Environmental | Sunscreen (SPF 30+), insect repellent, after-bite treatment, lip balm with SPF |
| Emergency | Emergency blanket (mylar), CPR face shield, whistle |
Customize your kit based on your destination and personal needs. If you have allergies, bring an EpiPen. If you wear contacts, bring backup glasses. If you are prone to motion sickness, pack Dramamine. The goal is to handle problems at camp without needing to drive to civilization.
Emergency and Safety Essentials
Beyond the first aid kit, a few items belong in every camper’s pack for safety:
- Whistle: Three blasts is the universal distress signal. A whistle carries farther than a voice and requires no batteries.
- Emergency shelter: A lightweight mylar bivy or space blanket weighs an ounce and can prevent hypothermia if you become stranded.
- Fire-starting backup: Waterproof matches plus a ferro rod and striker — redundant ignition sources are critical in emergencies.
- Multi-tool or knife: For cutting cordage, preparing food, making repairs, and dozens of other camp tasks.
- Duct tape: Wrap 10 feet around a pencil or water bottle to save space. Patches torn tents, secures splints, fixes broken poles.
- Tent repair supplies: A small repair kit with fabric patches, seam sealer, and pole splint sleeve addresses the most common field emergencies. Our guide to the best tent repair kits covers what to look for.
For campers heading into areas with wildlife, additional precautions apply. Bear spray is required in grizzly country (and wise in any bear habitat). A bear canister or hang kit protects your food. Research the specific wildlife risks of your destination before you go.
Communication and Navigation
A fully charged cell phone is useful but not sufficient. Many campgrounds and wilderness areas have limited or no cell service. At minimum, tell someone at home exactly where you are going, your planned route, and when you plan to return. For backcountry trips or areas without service, a personal locator beacon (PLB) or satellite messenger (like the Garmin inReach) can send SOS signals and short text messages via satellite — potentially lifesaving in an emergency.
A physical map and compass are lightweight, never lose signal, and never run out of batteries. Even at a front-country campground, knowing how to read a trail map is a valuable skill.

Be Smart Get Prepared First Aid Kit (250 Pieces)
Comprehensive kit organized in labeled compartments. Includes everything from bandages and gauze to an emergency blanket and cold compress.
Check Price on AmazonCamp Comfort: Chairs, Tables, and Furniture
There is a common misconception among first-time campers that comfort items are luxuries — things you bring when you have already covered the essentials. In reality, a comfortable place to sit, eat, and relax transforms the entire campsite experience. After a day of hiking or exploring, the difference between sitting on a damp log and settling into a proper camp chair is enormous. And when it comes to sleeping, a well-chosen cot or sleeping surface can mean the difference between waking up refreshed and waking up with a back that protests for the rest of the weekend.
Camp Chairs
A good camp chair should be sturdy enough to support your weight comfortably, packable enough to fit in your car alongside everything else, and simple enough to set up in seconds. The most popular style is the classic quad chair — four legs, armrests, a cup holder, and a carrying bag. These start around $20 and go up to $80+ for models with padded seats, headrests, and reclining features.
For backpackers or minimalists, ultralight chairs like the Helinox Chair Zero weigh under a pound and pack down to the size of a water bottle — but they cost significantly more and are less stable on uneven ground. For beginners who are primarily car camping, a standard quad chair from a reputable brand offers the best value.
Pros of Camp Chairs
- Keeps you off wet, cold, or dirty ground
- Reduces back strain after long hikes
- Provides a designated “home base” at camp
- Useful beyond camping (sporting events, beach, backyard)
Cons to Consider
- Takes up cargo space in the car
- Heavier chairs are cumbersome to carry far from the vehicle
- Cheap chairs can collapse or tear under heavier users
- Adds setup/teardown time to your camp routine
Camp Tables
A folding camp table elevates food preparation, eating, and gear organization off the ground. Look for one that is height-adjustable (some models can shift between coffee-table and dining-table height), has a flat, stable surface, and folds compactly. Roll-top aluminum tables pack down small and are easy to clean. Hard-top folding tables are more stable for cooking but bulkier to transport.
If your campsite has a picnic table, you may not need a separate camp table at all. Many established campgrounds provide one. But having a smaller side table for your stove, lantern, or personal items is still handy even in sites with picnic tables.
Sleeping Cots and Elevated Surfaces
For campers who struggle with sleeping on the ground — side sleepers, people with back issues, or anyone who simply prefers a real bed experience — a camping cot elevates you off the tent floor entirely. This creates airflow underneath your body, which can actually make you warmer in cool weather (when paired with a sleeping pad) by preventing cold ground conduction. If this interests you, our guide to the best camping cots for side sleepers covers the most comfortable options available.
Other comfort extras worth considering: a camp hammock for daytime lounging (bring tree straps to protect bark), a small outdoor rug for the tent vestibule (keeps mud and dirt out of the sleeping area), and a clothesline for drying towels and wet gear.

Coleman Portable Quad Camping Chair
Cushioned seat and back with a built-in cooler pouch, cup holder, and mesh pocket. Supports up to 325 lbs and folds into a carry bag.
Check Price on AmazonPersonal Hygiene and Camp Toiletries
Camping does not mean abandoning hygiene — it just means adapting it to a setting without running water and bathroom tile. The good news is that a few compact items keep you clean, comfortable, and feeling human throughout your trip. More importantly, good hygiene practices at camp protect the environment and the campers who will use the site after you.
Essential Toiletries
Start with the basics: toothbrush and toothpaste in a travel-size tube, biodegradable soap (such as Campsuds or Dr. Bronner’s) for hands, dishes, and — sparingly — body washing, hand sanitizer for quick cleanup before meals, and quick-dry camp towels (microfiber towels absorb several times their weight in water and dry in a fraction of the time as regular towels).
Toilet paper is a must even at campgrounds with vault toilets — those facilities sometimes run out. Carry a partial roll in a ziplock bag to keep it dry. For campgrounds without any toilet facilities, you will need to follow Leave No Trace principles: dig a cathole 6 to 8 inches deep, at least 200 feet from any water source, trail, or campsite. Pack out used toilet paper in a sealed bag — do not bury it, as animals dig it up. A small garden trowel works well for digging catholes.
Showering at Camp
Many campgrounds offer shower facilities, but hours and cleanliness vary. A solar camp shower — a black plastic bag that heats water in the sun — provides a warm rinse at primitive sites. Fill it in the morning, hang it from a tree branch or your car’s roof rack in direct sunlight, and by mid-afternoon you will have five gallons of warm water for a gravity-fed shower. Pair it with a pop-up privacy shelter for a proper camp shower experience.
If showering is not practical, baby wipes are the camper’s best friend. A thorough wipe-down of your face, armpits, and feet before bed removes the day’s grime and helps you feel refreshed. They are not biodegradable, however, so pack every used wipe out in your trash bag.
Waste Management and Leave No Trace
Everything you bring into camp must leave with you. Bring more trash bags than you think you need — at least two per day. Separate recyclables if your campground has collection points. Never burn trash in a campfire (plastics release toxic fumes), and never dump dishwater or food scraps near a water source. Strain dishwater and scatter it at least 200 feet from lakes and streams.

Campsuds Biodegradable Camping Soap
Concentrated, biodegradable, and works on everything — dishes, hands, hair, and laundry. A single 4 oz bottle lasts an entire camping season.
Check Price on AmazonFire-Starting Tools and Camp Tools
A campfire is more than a heat source — it is the social center of camp, the place where stories are told, marshmallows are roasted, and the day’s adventures are replayed. But starting and maintaining a fire requires preparation, practice, and the right tools. It also requires awareness of local fire regulations: many areas restrict campfires during dry seasons, and some campgrounds only allow fires in designated rings. Always check current fire conditions and obtain any required permits before your trip.
Fire-Starting Methods
Waterproof matches are the simplest option for beginners. They light reliably even when damp and require no technique beyond striking and holding the flame to tinder. Store them in a waterproof case. Butane lighters (disposable or refillable) are convenient and work in a wider range of conditions, but they can fail in extreme cold and the fuel eventually runs out. A ferrocerium rod (ferro rod) throws a shower of 5,000°F sparks when scraped with a steel striker and works in rain, snow, and at any altitude — making it the most reliable option in truly adverse conditions.
The real secret to a successful campfire is not the ignition source — it is the fuel preparation. Gather three types of material: tinder (dry leaves, grass, birch bark, cotton balls coated in petroleum jelly, or commercial fire starters), kindling (pencil-thin dry twigs and small sticks), and fuel wood (wrist-thick logs and branches). Build a small tinder bundle, light it, feed kindling gradually as the flame grows, then add progressively larger pieces of wood. Patience is key — throwing a large log onto a weak flame is the most common reason fires go out.
Essential Camp Tools
- Multi-tool: Pliers, knife, screwdriver, bottle opener, and scissors in one compact package. Carry it on your belt or in a pocket at all times.
- Folding saw or hatchet: For processing firewood. A folding saw is safer and more efficient than a hatchet for most campers.
- Paracord (550 cord): 50 feet of paracord weighs almost nothing and is endlessly useful — clotheslines, bear bag hanging, gear repairs, emergency shelters.
- Tarp: An 8×10 tarp with grommets provides rain coverage over a cooking area, a shade shelter, a ground cloth, or an emergency rain barrier. One of the most versatile items you can carry.
- Repair tape: Tenacious Tape or Gear Aid patches fix torn tents, ripped rain jackets, and punctured sleeping pads in seconds.
- Lighter + waterproof matches + ferro rod: Redundancy is not excess when it comes to fire. Carry at least two methods.
Campfire safety is non-negotiable. Keep the fire small and manageable — large bonfires throw sparks farther and are harder to control. Never leave a fire unattended. Keep a bucket of water or a shovel of dirt nearby to extinguish flames quickly. Before bed or before leaving camp, douse the fire completely: pour water, stir the ashes, pour more water, and test with the back of your hand (held several inches away) for residual heat. The fire should be cold to the touch before you walk away.

bayite Ferro Rod Fire Starter Kit
5/16″ ferrocerium rod with a steel striker and paracord lanyard. Throws showers of sparks in any weather — rain, snow, or wind.
Check Price on AmazonPacking Strategy and the Master Checklist
Having the right gear means nothing if you cannot find it when you need it. Packing strategy is the unglamorous art of organizing everything into logical, accessible groups so that setting up camp is fast and frustration-free. The goal is to never stand at your campsite wondering, “Which bag is the headlamp in?” while the sun drops below the horizon.
How to Organize Your Gear
Use stuff sacks, dry bags, or clear plastic bins to group items by category. A common system:
- Shelter bag: Tent, footprint, stakes, guylines, mallet
- Sleep bag: Sleeping bag, sleeping pad, pillow, ground cloth
- Kitchen bin: Stove, fuel, cookware, utensils, dish soap, sponge, trash bags
- Food cooler: Perishables, ice, condiments
- Dry food bag: Non-perishable snacks, canned goods, coffee, spices
- Clothing bag: All camp clothes in waterproof compression sacks
- Hygiene kit: Toiletries, toilet paper, towel, wipes
- Safety bag: First aid kit, emergency blanket, repair supplies, fire starters
- Electronics pouch: Headlamps, batteries, phone charger, power bank
Label each bag or bin with a strip of tape or a tag so you can identify it at a glance. Pack the items you need first (tent, headlamp, stove) last in the car so they come out first at camp.
Pre-Trip Timeline
| When | Task |
|---|---|
| 1–2 Weeks Before | Research campsite, check weather forecast, make reservations, inventory gear, order anything missing |
| 3–5 Days Before | Plan meals, create grocery list, test tent setup in the yard, check all batteries and fuel levels |
| 1–2 Days Before | Grocery shopping, freeze water bottles for cooler, charge all electronics, pack gear into labeled bags |
| Morning Of | Final weather check, pack perishable food, load car using checklist, fill water containers |
| At Camp | Choose site carefully (flat ground, shade, wind protection), set up shelter first, then organize kitchen and sleeping area |
The Complete Master Camping Checklist
Below is the full checklist, consolidated from every section above. Print it, screenshot it, or copy it into your notes app — then check off each item as you pack.

AmazonBasics Large Duffel Bag
A roomy, durable duffel with reinforced handles and a zipper closure. Available in multiple sizes to fit all your camping gear in one organized bag.
Check Price on AmazonFrequently Asked Questions
What is the bare minimum gear for a first camping trip?
At an absolute minimum, you need a shelter (tent or tarp), a sleeping bag, a sleeping pad, a water bottle, a headlamp or flashlight, food, and appropriate clothing for the weather. Everything else improves comfort and safety, but these six items keep you dry, warm, hydrated, fed, and able to see in the dark. If your campground has potable water and a restroom, you can start with even less and add gear over time as you learn what you personally need.
How much does a basic camping setup cost for beginners?
A functional beginner setup can range from $150 to $500, depending on quality and whether you buy new or borrow. A budget tent runs $50–$80, a synthetic sleeping bag $30–$60, a foam sleeping pad $15–$30, and a basic headlamp $10–$25. Add a camp stove ($30–$50), cookware ($20–$40), and a chair ($20–$35), and you have a complete camp for under $250. You can reduce costs significantly by borrowing gear from friends, renting from outdoor stores, or buying used equipment at gear swaps and online marketplaces.
Should I buy a tent or borrow one for my first trip?
If you are not sure camping is for you, borrowing is a perfectly good strategy for the first trip. Many experienced campers have extra tents they are happy to lend. However, if you think you will camp more than once, buying your own tent is a worthwhile investment because you can practice setting it up at home, familiarize yourself with its features, and know that it is in good condition. A reliable three-person dome tent costs $60–$120 and will last for years of casual camping.
What temperature rating should I look for in a sleeping bag?
Choose a sleeping bag rated to a Comfort temperature that is at least 10 to 15 degrees Fahrenheit below the lowest nighttime temperature you expect. If the forecast says 45°F overnight, choose a bag rated Comfort 30°F or lower. Sleeping bag ratings are tested under ideal conditions with a pad and warm layers — real-world comfort often feels colder than the rating suggests, especially for new campers who are not yet acclimatized to sleeping outdoors. When in doubt, go warmer.
Do I really need a sleeping pad, or can I sleep directly on the tent floor?
You really need a sleeping pad. The tent floor provides almost no insulation from the ground, and the ground will continuously conduct heat away from your body throughout the night. Even on a mild evening, the soil temperature can be 15 to 20 degrees colder than the air. A basic closed-cell foam pad costs $15–$25, weighs almost nothing, and provides enough insulation and cushioning to make a dramatic difference in comfort and warmth. It is the single most cost-effective upgrade to any camping sleep system.
What kind of food should I bring for my first camping trip?
Keep it simple and choose foods you already know how to prepare. For breakfast: oatmeal, granola, or eggs and bacon on a camp stove. For lunch: sandwiches, wraps, or cheese and crackers. For dinner: one-pot meals like pasta, chili, hot dogs, or foil-packet meals cooked over a fire. Bring plenty of snacks — trail mix, granola bars, fruit, jerky, and peanut butter. Pre-prep as much as possible at home: chop vegetables, marinate meats, and measure out dry ingredients so camp cooking is mostly assembly and heating.
How do I keep food safe from animals at camp?
In bear country, all food, coolers, and scented items (toothpaste, deodorant, sunscreen) must be stored in a bear-proof container or hung from a bear pole or tree at least 10 feet above the ground and 4 feet from the nearest branch or trunk. Never store food in your tent. In areas without bears, raccoons, squirrels, and other wildlife will still investigate your food — keep coolers closed and sealed, clean up all food scraps immediately, and store food in your car with the windows up when you are not at the campsite.
What should I do if it rains during my camping trip?
Rain does not have to ruin a camping trip if you prepare for it. Set up your tent on slightly elevated ground with the door facing away from the prevailing wind. Make sure your rainfly is fully staked out and guylines are taut. Bring a tarp to create a covered area outside the tent for cooking and hanging out. Pack quick-drying clothing and extra dry layers sealed in waterproof bags. Our guide on camping in the rain covers detailed strategies for staying dry and comfortable in wet conditions.
Is camping safe for solo beginners?
Solo camping can be safe and deeply rewarding, but it requires extra preparation. Choose a well-established campground with other campers nearby and a camp host on duty for your first solo trip. Tell someone at home your exact plans, including the campground name, site number, and expected return date. Bring a fully charged phone, a backup power bank, and consider a satellite communicator if you will be out of cell range. Start with a single overnight close to home so you can test your gear and comfort level without a long drive back if things do not go as planned.
How do I choose a good campsite once I arrive at the campground?
Walk the campground before you commit to a site (if possible). Look for flat, slightly elevated ground that drains well — avoid low spots where water collects in rain. Check for overhead hazards like dead branches (“widow-makers”). Sites with morning sun exposure dry dew off your tent faster and warm the site in cool weather. If you are a light sleeper, choose a site away from the campground entrance, bathrooms, and sites with large groups. Proximity to water is pleasant but be aware that rivers and lakes amplify cold air at night and attract insects.
What is the best way to stay warm at night in a tent?
Layer your sleep system: a sleeping pad with an R-value of at least 3.0 underneath you, a sleeping bag rated 10–15 degrees below the expected low, and dry base layers on your body. Wear a warm hat — you lose significant heat through your head. Place a hot water bottle (fill your metal water bottle with hot water from the stove) at the foot of your sleeping bag. Eat a snack before bed; digestion generates body heat. For comprehensive cold-weather strategies, read our full guide on how to keep your tent warm at night.
Should I waterproof my tent before the first use?
Most quality tents come with factory-sealed seams and a waterproof coating on the rainfly and floor, so you do not need to waterproof them out of the box. However, a light application of seam sealer on the floor seams is inexpensive insurance, especially on budget tents where factory seam taping may be inconsistent. If your tent has been in storage or has seen several seasons of use, the waterproof coating may have degraded — our guide on how to make a tent waterproof walks you through the full re-waterproofing process.
You Are Ready. Go Camp.
A checklist is only as useful as the trip it supports. You have read through every gear category, from the tent overhead to the flashlight in your pocket. You know what to bring, why each item matters, and how to organize it all. The only thing left is to do it.
Start small. Pick a campground close to home, book a single overnight, and use this checklist to pack. You will learn more from one night in a tent than from a hundred articles online — and most of what you learn will be that camping is far more comfortable and enjoyable than you expected, as long as you come prepared.
For more camping guides, gear reviews, and tips for every season, visit Camping Insights.
Explore All Camping Guides
Pingback: 50+ Camping Food Ideas: Easy Meals & Recipes
Pingback: Best Camping Backpack: 7 Top Picks Tested