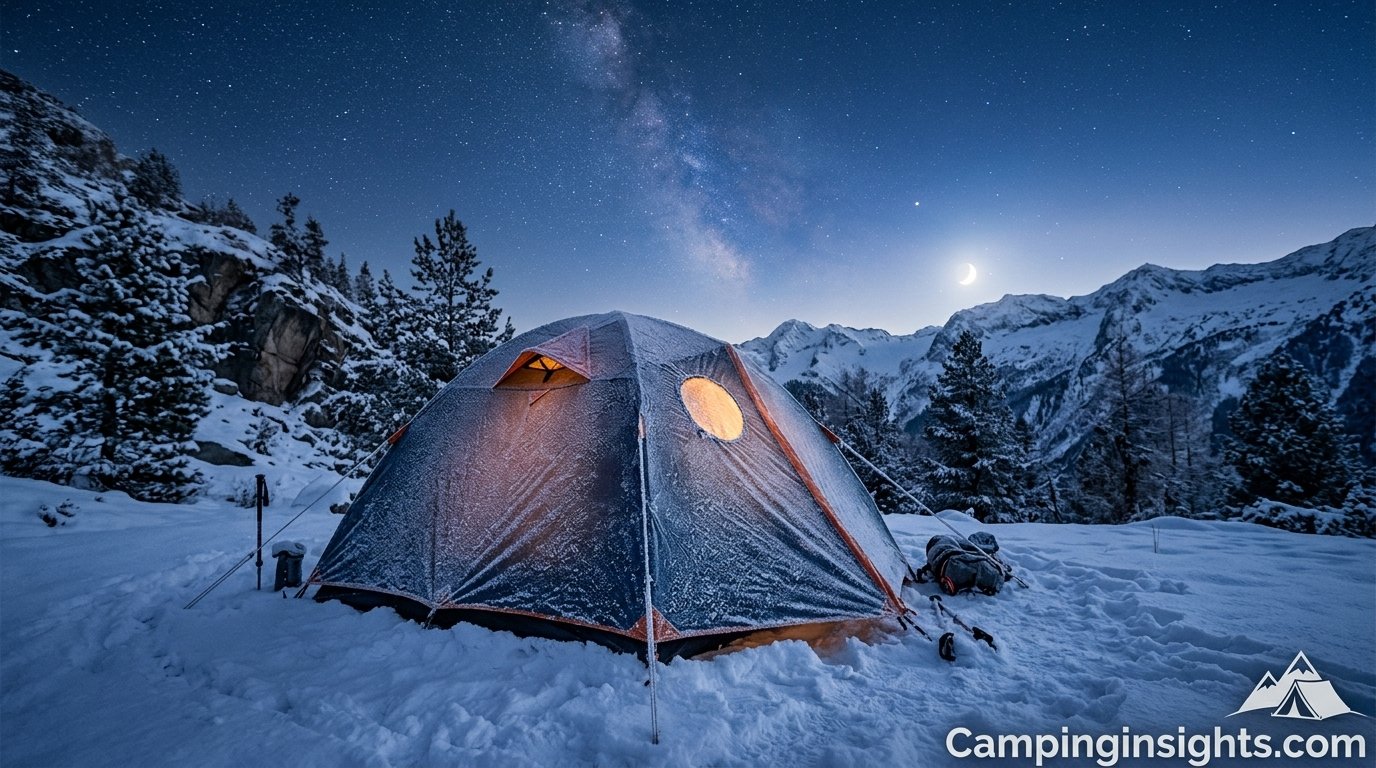
How to Keep a Tent Warm in Winter: The Complete Cold-Weather Camping Guide
From insulated floors and vapor barriers to heater safety and layering systems — everything you need to turn a freezing tent into a genuinely warm shelter, without waking up shivering at 3 a.m.
Why Tents Get Cold So Fast
A tent is not a house. It has no insulation, thin fabric walls, and a floor that sits directly on cold ground — which is exactly why winter nights inside one can feel far colder than the air temperature outside suggests. Most of the heat loss actually happens through three paths: conduction into the ground beneath you, convection from drafts moving through gaps and vents, and radiant heat escaping upward through thin nylon walls. Understanding which of these is stealing your warmth is the first step to fixing it, because the solution for a cold floor is completely different from the solution for a drafty door zipper.
The good news is that keeping a tent warm in winter doesn’t require expensive gear or a generator-powered heater. It requires layering the right techniques — floor insulation, draft sealing, a proper sleep system, and smart site choice — so that each one compounds on the last. Below, we’ll walk through every method in order of impact, starting with the one most people skip: what’s underneath you.
1. Start With the Right Tent
Not every tent is built for cold weather, and no amount of insulation tricks will fully compensate for a summer-only mesh tent in a snowstorm. If you’re shopping before your trip, look at our guide to the best camping tents for models rated for three- or four-season use, since these typically use fewer mesh panels, sturdier poles for wind and snow load, and better-sealed seams.
| Tent Type | Best For | Cold-Weather Rating | Notes |
|---|---|---|---|
| 3-Season Tent | Spring–fall camping | Fair | Lots of mesh; needs added insulation for winter |
| Extended 3-Season / “3+” | Shoulder-season cold snaps | Good | Less mesh, sturdier poles, still not built for heavy snow load |
| 4-Season Mountaineering Tent | Snow, high wind, deep cold | Excellent | Solid fabric walls, geodesic pole structure, smaller vents |
| Hot Tent (with stove jack) | Basecamp winter trips | Excellent | Allows a wood stove; heaviest and priciest option |
If you already own a 3-season tent, don’t worry — most of this guide is written for exactly that situation, since replacing your tent isn’t always practical before a cold trip.

Upgrading for winter? A dedicated 4-season tent makes every step below easier and more effective.
Check Prices on Amazon2. Insulate the Floor First
Cold ground pulls heat out of a tent faster than almost anything else, since bare soil, snow, or frozen dirt sits in direct, constant contact with the tent floor. Fixing this is the single highest-impact change you can make, and it only takes two simple steps.
1Add a Footprint or Groundsheet Barrier
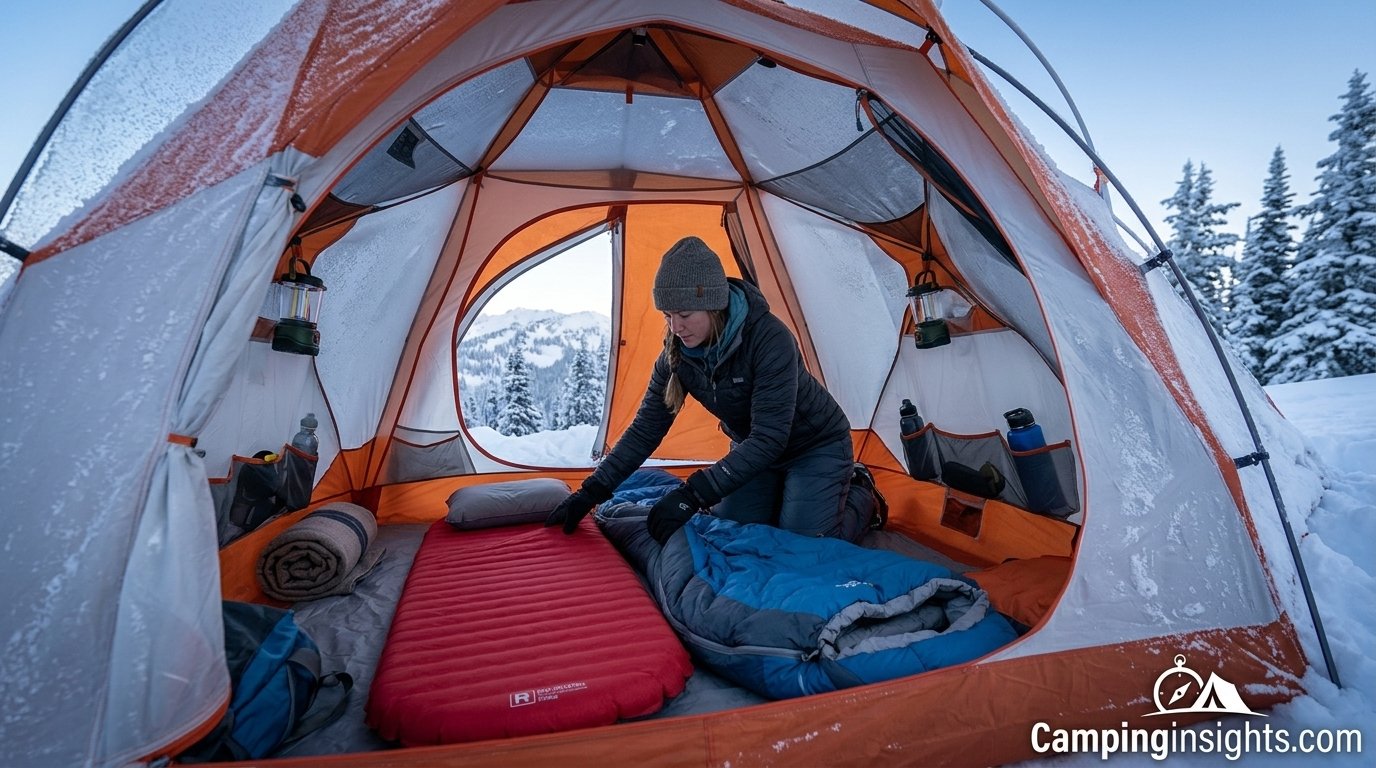
Lay a footprint or heavy-duty tarp beneath the tent, then add a second insulating layer — a foam groundsheet, closed-cell foam tiles, or even a wool blanket — directly on the interior floor. This creates a dead-air barrier between the cold ground and your tent floor.
2Layer Your Sleeping Pad on Top
Your groundsheet handles the tent floor; your sleeping pad handles the space directly under your body, where pressure compresses insulation and heat loss is worst. For winter camping, stack a closed-cell foam pad underneath an inflatable pad rated for cold temperatures — see our best sleeping pads for winter camping roundup for R-value recommendations.
If you’re camping with a cot instead of sleeping directly on the ground, know that cots typically feel colder because air circulates underneath you — our camping cot guide covers insulated cot options and underquilt add-ons that solve this.
3. Seal Drafts and Gaps
Even a well-insulated floor won’t help if cold air is pouring in through the door zipper, vestibule gap, or a loose rainfly. Drafts work through convection, constantly replacing the warm air you’re generating with fresh cold air, so sealing them is just as important as insulating the floor.
1Check and Seal the Rainfly Perimeter
Stake out the rainfly fully and snugly, leaving no gaps between the fly and the ground where wind can funnel underneath. Use a full waterproofing and seam-sealing pass beforehand — our how to make a tent waterproof guide walks through reapplying seam sealant and DWR coating, both of which also help block wind infiltration through stitching holes.
2Close Vents Partially and Use a Vestibule Buffer
Close mesh vents most of the way (leaving a small gap for airflow to control condensation), and use the vestibule as an unheated buffer zone — store boots and gear there rather than letting the main door open directly to outside air every time you go in or out.
4. Use a Tent Heater Safely
A portable heater can make a genuine difference on very cold nights, but tent heaters carry real carbon monoxide and fire risks, so safety rules here are not optional. Only use heaters explicitly labeled safe for enclosed or tent use, always keep a vent cracked open, never leave a heater running while you sleep unless it has an automatic low-oxygen shutoff and tip-over protection, and never bring a charcoal or unventilated fuel-burning device inside any tent.
Good Options
- Electric heaters (if you have shore power or a generator at a safe distance)
- Catalytic propane heaters with low-oxygen shutoff, used only while awake
- Battery-powered heated blankets or heating pads inside your sleep system
Avoid Entirely
- Charcoal or wood fires inside a tent without a proper stove jack
- Running any combustion heater while sleeping
- Unvented propane heaters in a fully sealed tent
If your tent isn’t heater-friendly, keeping a tent repair kit on hand also matters in cold weather, since cold, brittle fabric and zippers are more prone to cracking or splitting than they are in summer.

Considering a heater? Look specifically for models with a built-in low-oxygen shutoff and tip-over safety switch.
See Tent-Safe Heaters5. Build a Layered Sleep System
Your sleeping bag alone isn’t your whole heat retention system — it’s one layer in a stack that starts at the tent floor and ends at your skin. For details on nighttime-specific tricks (bag orientation, liners, and pre-heating), pair this section with our dedicated guide on how to keep a tent warm at night.
1Choose a Bag Rated Below Your Expected Low
Pick a sleeping bag temperature rating at least 10°F below the coldest temperature you expect, since manufacturer ratings tend to be optimistic and everyone sleeps at a different metabolic rate.
2Add a Liner and Pre-Warm the Bag
A fleece or silk liner adds several degrees of extra warmth, and pre-warming the bag with a hot water bottle a few minutes before you climb in means you’re never sliding into a cold shell.
6. Body-Heat and Hot-Water Tricks
Small, low-effort tricks add up quickly on a cold night. A hot water bottle placed near your core or between your thighs (where major blood vessels sit close to the skin) can warm your whole body faster than trying to heat your extremities directly. Eating a calorie-dense snack before bed also helps, since digestion generates metabolic heat through the night. Doing a few minutes of light exercise — like jumping jacks or squats — right before getting into your bag raises your core temperature so you start warm instead of cold.
Worth Doing
- Hot water bottle in a sock, placed near your core
- High-fat, high-calorie snack before sleep
- Brief warm-up exercise right before bed
- Wearing a dry hat to sleep (heat loss through the head is significant)
Skip These
- Alcohol before bed (it feels warming but lowers core temperature)
- Sleeping in sweaty base layers from the day’s activity
- Overfilling the tent with moisture-heavy gear
7. Manage Condensation
Cold tents and condensation go hand in hand: the warmer, moist air from your breathing meets the cold tent walls and immediately turns to water droplets, which then soak into bedding and gear and make everything feel colder. Cracking a vent slightly (even in the cold) actually helps more than it hurts, since trapped humidity is worse for warmth than a small amount of airflow. Our full how to stop condensation in a tent guide covers double-wall setups, moisture-wicking groundsheets, and drying strategies in more depth.
If your trip involves wet weather on top of cold temperatures, also check our camping in the rain tips, since wet gear dries far more slowly — and steals far more heat — in freezing conditions.
8. Dress in the Right Layers
What you wear to sleep matters almost as much as your gear. The classic three-layer system works well inside a tent too: a moisture-wicking base layer, an insulating mid layer (fleece or down), and — if it’s especially cold — a light outer layer. Avoid cotton entirely, since it holds moisture against skin and accelerates heat loss once damp. Dry wool or synthetic socks, a warm hat, and even lightweight gloves can noticeably improve comfort through the night.
9. Choose a Wind-Sheltered Site
Wind chill can undo hours of careful insulation work in minutes, so site selection matters more in winter than any other season. Look for natural windbreaks — tree lines, boulders, or terrain depressions — while avoiding low valley floors where cold air pools overnight. Pitching the tent’s smallest, most aerodynamic side toward the prevailing wind direction reduces both heat loss and structural stress on the tent poles.
10. Helpful Cold-Weather Gear
A few accessories consistently make winter camping meaningfully more comfortable. Beyond a solid sleeping pad and repair kit (both linked above), sturdy stakes matter more in winter, since frozen or rocky ground can bend standard stakes and compromise your rainfly’s tight seal — see our best tent stakes for rocky ground picks for options that hold in frozen soil.

Frozen or rocky campsite? Standard stakes often bend on impact — heavy-duty steel stakes hold far better.
Browse Winter Tent Stakes11. Vapor Barrier Liners Explained
Most winter campers eventually run into a frustrating paradox: the harder you work to insulate your sleep system, the wetter that insulation gets over multiple nights out. The culprit is your own body. An adult sleeper releases a surprising amount of water vapor overnight through breathing and skin, and in freezing temperatures, that moisture doesn’t just evaporate away — it migrates outward through your clothing and sleeping bag insulation until it hits a cold enough layer to condense or freeze. Over one night this is a minor issue. Over three or four nights on a multi-day winter trip, it can leave a down bag noticeably heavier, damper, and less able to loft, which means less warmth exactly when you need it most.
A vapor barrier liner, or VBL, solves this by doing something that sounds counterintuitive: it deliberately stops moisture from moving through your sleep system at all. A thin, non-breathable liner — typically a lightweight coated nylon or polyethylene sack — is worn directly against a base layer or placed inside the sleeping bag shell, between your body and the insulation. Because it’s essentially waterproof, moisture from your skin can’t pass through it and reach the insulation beyond. Instead, that moisture stays trapped in a thin layer of humid air right next to your skin.
1Understand the Trade-Off
A VBL keeps your insulation bone-dry over multiple days, which is a genuine advantage on extended winter trips where you can’t dry gear between nights. The trade-off is comfort: because moisture can’t evaporate away from your skin, you’ll feel clammy rather than dry, and some people find this sensation unpleasant, especially on the first night before they adjust to it. Most experienced winter campers consider this a reasonable exchange for a bag that stays functional after day four instead of losing significant loft.
2Layer It Correctly
The typical order, from skin outward, is: a thin moisture-wicking base layer, the vapor barrier liner, then your insulating mid layers and the sleeping bag itself. Wearing the VBL directly against bare skin tends to feel worse and can cause skin irritation on longer trips, so a thin synthetic layer underneath is worth the extra step. Some campers also use a VBL sock system for their feet inside winter boots, which keeps boot insulation dry across multi-day trips in exactly the same way.
Vapor barrier liners aren’t necessary for a single overnight trip in moderate cold, where any moisture buildup is minor and your bag has time to dry out at home afterward. They earn their place on extended winter expeditions, deep-cold trips well below freezing, and any situation where drying gear during the trip isn’t realistic.
12. Hot Tenting With a Wood Stove
For basecamp-style winter trips where you’re not moving camp every day, a hot tent setup changes the entire warmth equation. Instead of relying purely on insulation and body heat to survive the cold, a hot tent uses a purpose-built canvas or technical-fabric shelter with a reinforced, fire-resistant stove jack — a small opening near the roof designed to let a wood stove’s flue pipe pass through safely. With a small titanium or steel stove burning inside, interior temperatures can climb from well below freezing to comfortable shirt-sleeve conditions within minutes, which is a dramatically different experience from any insulation-only approach.
| Consideration | Standard Tent | Hot Tent With Stove |
|---|---|---|
| Setup complexity | Low | Higher — stove, pipe, and jack alignment required |
| Peak comfort | Limited by insulation and body heat | Can reach shirt-sleeve warmth |
| Weight | Light to moderate | Heavy — stove and pipe add significant pack weight |
| Fire risk | None (no open flame) | Real — requires constant attention and a fire-safe base |
| Best use case | Backpacking, mobile trips | Basecamp trips, sled-hauled or vehicle-supported camps |
Hot tenting is never a fit for a standard nylon backpacking tent. The stove jack is a reinforced, heat-resistant panel that has to be manufactured into the tent from the start; cutting a hole in an ordinary tent wall for a stove pipe is a serious fire hazard and will also destroy the tent’s waterproofing at that seam. If you’re drawn to the idea, it’s worth treating it as a dedicated setup — a canvas or hybrid hot tent, a properly sized titanium stove, and a spark-resistant base layer under the stove’s feet — rather than trying to retrofit existing gear.
The other major consideration is that a stove needs fuel and tending. Someone has to stay awake to feed it, and most experienced hot-tent campers let the fire die down before sleeping rather than running it all night, both to conserve fuel and to avoid the same carbon monoxide and fire risks that apply to any combustion heater. The tent gets genuinely cold again once the stove goes out, so a proper sleep system (see the layered sleep system section above) is still essential — the stove buys you a warm evening and a warm wake-up, not a warm sleep.
13. Power, Heaters, and Generators
Electric heaters are quieter, produce no carbon monoxide, and are generally easier to run safely than any combustion option — but they only work if you have a reliable power source, which is where winter car camping and basecamp trips have a real advantage over backpacking. If your site has vehicle access, a small portable power station or a generator run at a safe distance from the tent (never inside it, and never close enough for exhaust to drift toward the door) can power a low-wattage ceramic or ceramic-ceramic space heater rated for enclosed spaces.
Power Options That Work Well
- Portable lithium power stations (1,000+ Wh) for low-wattage heaters or electric blankets
- Vehicle-mounted inverters, if the vehicle is parked with the engine off or a battery isolator installed
- Solar panels paired with a power station, for multi-day trips with sun exposure
- USB or 12V heated gear (socks, gloves, jackets) that draw very little power
Power Pitfalls to Avoid
- Running a gas generator anywhere near the tent door or vents
- Leaving a vehicle idling near a tent for warmth or exhaust routing
- Underestimating cold-weather battery drain — lithium batteries lose usable capacity fast below freezing
- Overloading a small power station with a full-size space heater
Cold weather is genuinely hard on batteries. Lithium-ion power stations and battery packs can lose a meaningful percentage of their usable capacity once temperatures drop well below freezing, so it’s worth keeping backup batteries insulated — inside a pack or sleeping bag stuff sack rather than left exposed — and charging everything to full before you leave rather than assuming you’ll get full-rated runtime in the cold. For trips where a heater simply isn’t practical, low-draw heated gear like battery socks or a heated blanket sized for a sleeping bag can deliver a meaningful chunk of the comfort with a fraction of the power draw and none of the combustion risk.
14. Snow Walls, Skirts, and Berms
Wind is often the single biggest variable separating a merely cold night from a genuinely miserable one, and in snowy conditions you have a building material sitting right outside your tent door. Packing snow into a low wall on the windward side of your tent — sometimes combined with digging the tent pad slightly below the surrounding snow surface — can meaningfully cut wind speed at ground level, which reduces both convective heat loss and the physical strain of a fly snapping and flexing all night.
1Build a Windward Snow Wall
Cut or pack blocks of snow into a low wall roughly level with or slightly taller than your tent, positioned upwind of the prevailing wind direction. Leave a gap of a few feet between the wall and the tent itself so wind eddies don’t simply drop snow onto the fly, and round the wall’s profile rather than building a sharp corner, which helps wind slide up and over rather than slamming directly into the fabric.
2Use or Build a Snow Skirt
Some four-season tents include a built-in snow skirt — a flap of fabric that extends outward from the base of the fly and can be weighted down with piled snow to seal the gap between the tent and the ground completely. If your tent doesn’t have one, piling snow around the entire perimeter of the fly accomplishes something similar, blocking spindrift and ground-level drafts far more effectively than stakes alone in soft snow.
A word of caution: never dig so deep or build walls so enclosed that you restrict airflow around the tent entirely, and always maintain a clear, unobstructed vent even inside a snow wall setup. The same carbon monoxide and condensation principles from the ventilation section above still apply, and a snow wall that traps stale air against the tent fabric can make condensation noticeably worse. Also check your local avalanche and weather conditions before camping near any slope steep enough to be a hazard — snow shelter techniques are for wind protection on safe, flat terrain, not slope stabilization.
15. Winter Camping With Kids and Pets
Children and pets lose heat faster than adults — kids because they have a higher surface-area-to-body-mass ratio and less developed shivering response, and most dogs and cats because their tolerance varies enormously by breed, coat type, and body size. Winter camping with either is entirely doable, but it usually means budgeting extra margin everywhere: warmer bag ratings, more floor insulation, and a lower tolerance for “we’ll just tough it out” if someone starts shivering.
Helps With Kids
- Zip a child’s sleeping bag inside an adult bag or place them between two adults for shared body heat
- Oversize the bag rating — go warmer than you think is necessary
- Keep a hat and dry socks on at all times, even inside the bag
- Set a firm turnaround temperature for the trip and stick to it
Helps With Pets
- An insulated pad or blanket specifically for the pet, not just sharing yours
- A pet-safe insulated coat for thin-coated or short-haired breeds
- Watch closely for shivering, lethargy, or reluctance to move — early signs of cold stress
- Keep water from freezing solid; pets need access to drinking water overnight too
The most important gear decision for either group is often the simplest: don’t assume a system that comfortably handles an adult scales down safely for a child or a small dog. Rate the whole trip for the coldest-sleeping member of the group, not the average, and have a realistic plan — a nearby vehicle, a warmer backup site, or a firm decision to cut the trip short — if temperatures drop further than forecast.
16. Boots, Feet, and Overnight Drying
Cold, damp feet are one of the fastest ways to ruin a winter camping trip, and boots are also one of the trickiest pieces of gear to manage overnight, since leaving them outside means putting on frozen boots in the morning, while leaving them inside a cold tent doesn’t dry them much either. A few habits make a real difference here.
1Dry Liners and Insoles Overnight
Pull the liners and insoles out of your boots each night and bring just those into your sleeping bag, tucked near your core or at the foot of the bag. Body heat dries them far more effectively than leaving the whole boot in a cold vestibule, and dry liners in the morning make a huge difference to how warm your feet feel on the first hour of hiking.
2Keep the Boot Shells Accessible but Not Frozen Solid
Store the boot shells themselves in the vestibule rather than fully outside, ideally inside a stuff sack or pack liner so they don’t fill with blown snow overnight. If temperatures are extreme, some winter campers bring the whole boot into the foot of a roomy sleeping bag or a separate insulated stuff sack, though this uses up interior space that’s otherwise better spent on your own insulation.
Sock strategy matters just as much as boot strategy. A thin liner sock under a thicker insulating sock, both wool or synthetic, manages moisture far better than a single thick cotton sock, and packing at least one completely dry backup pair reserved only for sleeping — never worn during the day — means you always have one guaranteed-dry option no matter how wet the day’s hiking gets.
17. Cold-Weather Health and Hypothermia Awareness
Beyond comfort, winter camping carries real physical risks that are worth taking seriously, and knowing the warning signs matters more than any piece of gear on this list. Mild hypothermia often starts subtly — persistent shivering, clumsiness, and slurred or slowed speech — and can progress if it isn’t addressed. Frostnip and frostbite typically start at the extremities: fingers, toes, ears, and the nose, showing up first as numbness or a waxy, pale appearance to the skin.
Prevention Habits
- Change out of sweaty layers immediately after activity, before you start to cool down
- Eat and drink regularly — dehydration and low calorie intake both reduce cold tolerance
- Check in on tent-mates periodically rather than assuming everyone is fine
- Set a clear turnaround or bail-out plan before conditions get extreme
Warning Signs to Act On
- Uncontrollable shivering that doesn’t stop with added layers
- Confusion, slurred speech, or unusual clumsiness
- Numb, waxy, or discolored skin on fingers, toes, ears, or nose
- Someone insisting they’re “fine” while showing the above signs — a classic hypothermia symptom is impaired judgment about your own condition
If you or a companion show signs of moderate to severe hypothermia — confusion, loss of coordination, or stopped shivering after a period of intense shivering (a sign the body’s heat-generating response is failing) — treat it as a medical emergency, not something to sleep off. Get the person into dry insulation, add heat sources like hot water bottles near the core and armpits rather than directly on frostbitten extremities, and seek professional medical help as soon as possible. This section is general safety information, not a substitute for wilderness first aid training, which is genuinely worth taking before any serious winter trip.
18. Backpacking vs. Car Camping in Winter
How you’re getting to camp changes almost every decision on this list. Car camping and sled-hauled basecamp trips let you bring heavier, more effective gear — a bulkier four-season tent, a full-size sleeping pad stack, a hot tent stove setup, or a power station for an electric heater — because weight isn’t rationed the same way it is on your back. Backpacking trims all of that down to what you can realistically carry over distance, which usually means prioritizing a lighter, well-rated sleep system and accepting that some comfort trade-offs (like a heater) simply aren’t on the table.
| Factor | Car Camping / Basecamp | Backpacking |
|---|---|---|
| Tent weight limit | Minimal concern | Major factor in tent choice |
| Heater feasibility | Practical, especially electric | Rarely practical; weight and fuel limit options |
| Sleep system | Can double up pads and blankets | Optimized single high R-value pad and bag |
| Bail-out option | Vehicle nearby, easy to leave | Depends entirely on trip planning and distance from trailhead |
| Best for beginners | Generally yes — lower risk, easier to abort | Only with prior three-season backpacking experience |
If you’re new to winter camping, starting with a car-accessible site is genuinely one of the best decisions you can make: it removes the weight constraints that force compromises on your sleep system, and it gives you an easy way out if conditions turn worse than expected. Save winter backpacking for once you’ve got a few car-camping cold nights under your belt and a clear sense of how your own gear and body handle sustained cold.
19. Winter Camping Gear Checklist
Pulling everything above into one reference list makes packing for a cold trip faster and reduces the odds of forgetting something that matters at 2 a.m. This isn’t exhaustive for every trip type, but it covers the core items this guide discusses.
| Category | Items |
|---|---|
| Shelter | 4-season or extended 3-season tent, footprint, extra guy lines, sturdy stakes |
| Floor & sleep | Closed-cell foam pad, insulated inflatable pad, sleeping bag rated below expected low, liner |
| Warmth extras | Hot water bottle, vapor barrier liner (extended trips), tent-safe heater (if applicable) |
| Clothing | Non-cotton base, mid, and outer layers, spare dry socks reserved for sleep, warm hat, gloves |
| Power | Portable power station or spare insulated batteries, charging cables |
| Safety | First aid kit, tent repair kit, headlamp with spare batteries, means to communicate/call for help |
| Kids/pets (if applicable) | Oversized bag rating, extra insulation layer, pet coat, unfrozen water source |
20. Common Mistakes to Avoid
- Skipping the groundsheet: The floor is the single biggest source of heat loss — never skip insulating it.
- Sealing the tent completely airtight: This traps moisture and actually increases condensation, making everything feel colder.
- Using a summer-rated bag “just for one trip”: A 10–15°F gap between the bag rating and the actual low is common advice for a reason.
- Running an unvented heater overnight: This is a genuine carbon monoxide risk and should never be done.
- Pitching in a low valley or exposed ridge: Both maximize either cold-air pooling or wind chill.
21. Warmth Method Comparison
Not every method delivers the same return for the effort involved. Here’s how the major approaches stack up against each other:
| Method | Effort | Warmth Impact | Cost |
|---|---|---|---|
| Floor insulation (groundsheet + pad) | Low | Very High | $–$$ |
| Sealing drafts | Low | High | Free–$ |
| Layered sleep system | Medium | Very High | $$ |
| Tent-safe heater | Medium | High (with risk) | $$$ |
| Body-heat tricks | Very Low | Medium | Free |
| Site selection | Low | Medium–High | Free |
Frequently Asked Questions
What is the single best way to keep a tent warm in winter?
Insulating the floor with a groundsheet and a high R-value sleeping pad has the biggest single impact, since most heat loss happens through direct ground contact.
Is it safe to run a heater in a tent overnight?
Only with a heater specifically rated for enclosed tent use with an automatic low-oxygen shutoff, and even then most safety guidance recommends turning it off before sleep rather than running it unattended overnight.
Does a smaller tent stay warmer?
Generally yes — a smaller interior volume means less air for your body heat to warm, which is why minimizing unused space inside the tent helps.
Should I close all the vents to stay warm?
No — fully closing vents traps moisture and increases condensation, which makes bedding damp and ultimately colder. Leave a small gap for airflow.
How much warmer does a sleeping bag liner make a bag?
Liners typically add a noticeable boost to warmth, and fleece liners tend to add more than silk, though silk liners are lighter and pack smaller.
Is cotton clothing okay for winter camping?
No — cotton holds moisture against the skin and loses its insulating ability once damp, which accelerates heat loss. Wool or synthetic layers perform far better.
Does tent color affect warmth?
Darker tent colors absorb slightly more solar heat during the day, but the effect is minor compared to insulation and site choice, and it has no impact after dark.
Can I use a wood stove inside any tent?
Only inside tents specifically designed with a fire-resistant stove jack — standard nylon tents are not safe for wood stove use.
Why does my tent feel colder on a cot than on the ground?
Cots allow cold air to circulate underneath your body, increasing convective heat loss, which is why an insulated underquilt or extra pad beneath a cot mattress helps significantly.
How cold is too cold for tent camping without a heater?
With a properly rated sleep system, floor insulation, and good site selection, many campers comfortably handle temperatures well below freezing — the limiting factor is usually gear quality rather than a fixed temperature cutoff.
Does eating before bed actually help keep you warm?
Yes — digestion generates metabolic heat, so a calorie-dense snack before sleep can measurably help maintain core temperature through the night.
Should I sleep in a hat inside my tent?
Yes — since a meaningful share of heat loss happens through the head, a dry hat is a simple, low-cost way to retain more warmth overnight.
Conclusion
Keeping a tent warm in winter isn’t about one clever trick — it’s about stacking several reliable techniques so each one covers a different source of heat loss: an insulated floor to stop ground cold, sealed drafts to stop convective loss, a properly rated sleep system to trap your own body heat, and smart site selection to reduce wind chill before you even set up. Layer these together, and a winter night in a tent goes from something to endure to something you can genuinely enjoy.

Ready to upgrade your winter sleep system? Start with a bag rated well below your coldest expected night.
Shop Cold-Weather Sleeping BagsAs an Amazon Associate, this site earns from qualifying purchases. Product links on this page may be affiliate links.