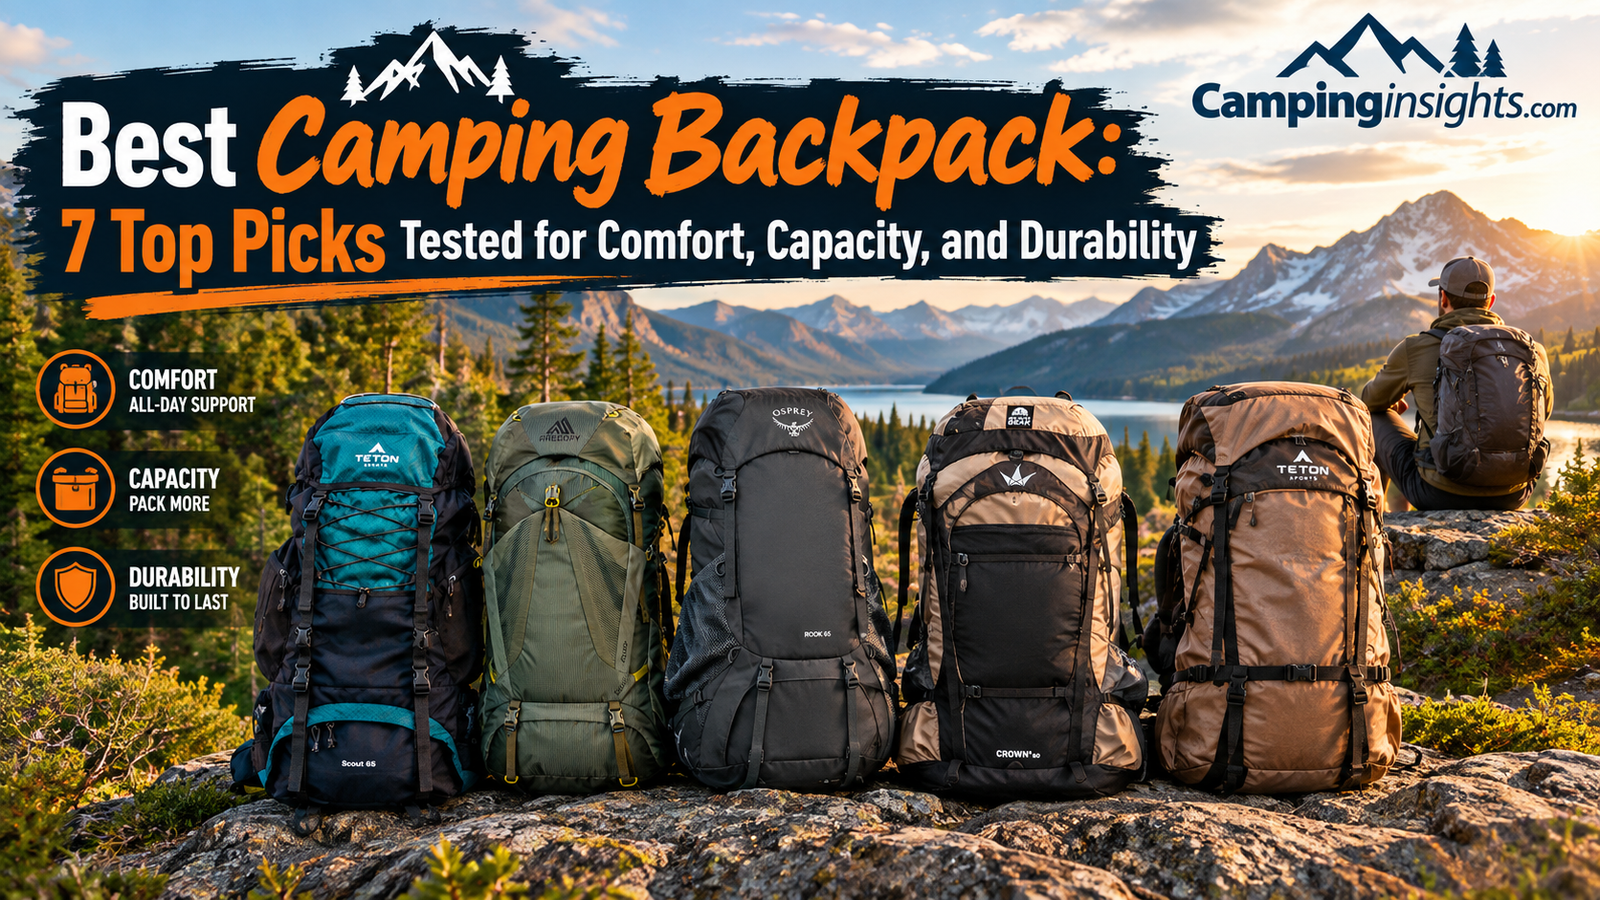
Best Camping Backpack: 7 Top Picks Tested for Comfort, Capacity, and Durability
Choosing the right camping backpack can make or break a multi-day trip. We compared internal-frame packs across capacity, suspension systems, ventilation, and price to help you find the one that actually fits your body and your trip style.
Table of Contents
- How We Chose These Backpacks
- Quick Comparison Table
- 1. Teton 65L Scout
- 2. Osprey Rook 65L
- 3. Budget-Friendly 65L Pack
- 4. Kelty Coyote 60-105L
- 5. Gregory Zulu 65L
- 6. Naturehike 65L Rock
- 7. Osprey Aura AG LT 65L
- Sizing & Fit Guide
- Internal vs External Frame
- Essential Features Checklist
- FAQs
- Final Verdict
How We Chose the Best Camping Backpacks
A camping backpack lives or dies on three things: how it carries weight, how much gear it can swallow, and whether it survives being dragged over granite, dunked in a creek, or crammed into an overhead bin. We didn’t just look at spec sheets. We weighed suspension design, hip belt padding, torso adjustability, ventilation systems, and the kind of small details that only show up after ten miles on trail — things like whether a hip belt pocket is actually big enough for a phone, or whether the top lid still closes when the pack is stuffed past its rated capacity.
We also paid close attention to who each pack is built for. A weekend car-camper hauling gear fifty feet from the trunk to the tent site has completely different needs than a thru-hiker averaging fifteen miles a day for a week. So instead of naming one universal “best,” we sorted these seven packs by use case — beginner-friendly all-rounders, budget picks, women’s-specific fits, and packs built for genuinely long trips with heavier loads.
If you’re also dialing in the rest of your camping checklist, treat the backpack as the anchor decision — it determines how much of everything else you can realistically bring, and how much you’ll enjoy carrying it. Before we get into individual reviews, here’s the full lineup ranked side by side.
Our evaluation process involved loading each pack to a comparable weight, then walking a mixed route that included flat gravel, a moderate climb, and a short stretch of loose, uneven ground. We weren’t chasing lab-perfect conditions — most camping trips don’t happen on a treadmill, and a pack that only performs well on smooth terrain isn’t telling you the whole story. Instead, we wanted to see how each suspension system behaved when the load shifted slightly on a stumble, or when the trail tilted enough that weight naturally wanted to pull toward one shoulder.
We also factored in something that rarely shows up in spec sheets: how each pack felt after being set down and picked back up dozens of times in a single day. Trailhead breaks, lunch stops, photo opportunities — a pack that’s awkward to shoulder quickly becomes a minor annoyance that compounds over a multi-day trip. Packs with a stiffer frame and a well-shaped hip belt were noticeably easier to swing on in one motion, while softer, less structured packs tended to require more fiddling to get the hip belt seated correctly every time.
Price was weighed against expected lifespan rather than treated as a standalone factor. A pack that costs more but holds up for a decade of regular use is often the better value than a cheaper pack that needs replacing after two or three seasons of heavy trail use. That said, we made sure to include options across a wide price spectrum, because a technically superior pack that sits unused because it was too expensive to buy in the first place isn’t actually helping anyone get outside.
Finally, we considered how each pack handles being packed and unpacked repeatedly — a detail that matters more than people expect. Panel-loading packs (where the front unzips like a suitcase) make it far easier to find something buried near the bottom without unpacking everything on top of it, while top-loading packs are typically lighter and more weather-resistant but require more thoughtful packing order from the start. Several packs in this list blend both approaches with a bottom sleeping bag compartment accessible from its own zippered opening, which we noted individually in each review below.

Quick Comparison Table
Here’s the full lineup at a glance. Capacity, best-for use case, and approximate weight are the three numbers most people actually need before clicking through to a full review.
| Backpack | Capacity | Best For | Frame Type | Notable Strength |
|---|---|---|---|---|
| Teton 65L Scout | 65L | Beginners & budget-conscious hikers | Internal | Best value for first-time buyers |
| Osprey Rook 65L | 65L | Multi-day backpacking (men’s fit) | Internal | Anti-Gravity suspension comfort |
| Budget-Friendly 65L Pack | 65L | Occasional campers | Internal | Lowest price point in this list |
| Kelty Coyote 60-105L | 60–105L | Long trips & heavy loads | Internal | Expandable capacity |
| Gregory Zulu 65L | 65L | Comfort-focused long hikes | Internal | Adjustable, ventilated back panel |
| Naturehike 65L Rock | 65L | Lightweight-focused hikers | Internal | Best weight-to-price ratio |
| Osprey Aura AG LT 65L | 65L | Women’s multi-day backpacking | Internal | Women’s-specific Anti-Gravity fit |
1. Teton 65L Scout Internal Frame Backpack
The Teton Scout is the pack we’d point most first-time backpackers toward. It doesn’t try to reinvent anything — it’s a straightforward internal-frame design with a padded hip belt, adjustable torso, and enough external attachment points to lash on a sleeping pad or extra water bottles without needing a separate dry bag strapped to the outside.
What stands out is how forgiving the fit is. The torso adjustment range is wide enough that it works for a broader range of body types than most budget packs, and the hip belt actually transfers weight to your hips instead of leaving everything hanging off your shoulders — which is the single biggest complaint we have with cheaper packs in this category. If you’re building out the rest of your kit around this, pairing it with a solid sleeping pad and a compact stove keeps the overall pack weight very manageable.
Organization is another area where the Scout quietly does more than its price tag suggests. There’s a dedicated bottom sleeping bag compartment separated by an internal divider, twin side mesh pockets sized for a one-liter water bottle each, and a front shove-it pocket that’s genuinely useful for a damp rain jacket you don’t want touching your dry gear. None of these are unique features on their own, but having all of them together on a budget-tier pack is less common than it should be.
During our loaded walk test, the Scout’s frame sheet held its shape well up to a moderate load — noticeably better than some cheaper packs that start to feel like they’re folding in on themselves once you approach 30 pounds. Past that point, the frame does start to feel less supportive compared to the Osprey and Gregory packs in this list, which makes sense given the price difference, but it’s worth knowing if you plan to consistently carry heavier loads on longer trips.
Durability after repeated use
The main fabric is a mid-weight polyester that resists abrasion reasonably well against rock and brush, though it’s not in the same league as the reinforced ripstop nylon used on premium packs. Zipper pulls are functional but slightly stiffer than we’d like, which becomes more noticeable with cold hands. None of this is a dealbreaker for the price, but it’s the kind of wear pattern to expect after a season or two of regular use rather than occasional weekend trips.
Who it’s for
Anyone taking their first two- or three-night trip who doesn’t want to spend premium-brand money before they know if backpacking is something they’ll stick with.
Pros
- Excellent value for the capacity offered
- Wide torso adjustment range fits more body types
- Multiple external lash points for a sleeping pad or tent
- Reasonably padded hip belt for the price tier
- Dedicated bottom sleeping bag compartment for easier packing
Cons
- Ventilation is basic compared to mesh-backed premium packs
- Fabric is less abrasion-resistant than higher-end ripstop nylon
- Rain cover sold separately
- Frame support softens somewhat past moderate loads
2. Osprey Rook 65L Men’s Backpacking Backpack

Osprey earned its reputation in this category for a reason, and the Rook is where that reputation trickles down to a more accessible price point. It borrows the tensioned, trampoline-style mesh back panel from Osprey’s higher-end Anti-Gravity packs, which keeps a gap of air between your back and the pack body — a genuinely noticeable difference on warm-weather trips where sweat-soaked shirt backs are otherwise unavoidable.
The hip belt and shoulder straps are shaped with more contouring than most packs at this price, and the load-lifter straps actually do meaningful work in shifting weight between your shoulders and hips depending on terrain. On steep, technical sections we found ourselves cinching those straps down and immediately feeling the pack ride higher and tighter to the back — small adjustments that add up over a full day.
Comfort over back-to-back days
The real test of any suspension system is what it feels like on day three or four of a trip, once minor pressure points have had time to become real irritations. The Rook’s mesh back panel and contoured hip belt held up impressively well through consecutive loaded days — there was no single hot spot that got progressively worse, which is often the first sign of a poorly shaped hip belt or an unpadded seam sitting against your lower back.
We also appreciated how the pack handled temperature swings between a warm midday climb and a cooler evening descent. Because the back panel doesn’t trap heat the way foam-backed packs do, we weren’t dealing with the sudden chill of a sweat-soaked shirt once the sun dropped, which is a small but genuinely appreciated detail on shoulder-season trips.
Storage and access
The Rook uses a top-loading main compartment with a zippered bottom sleeping bag access point, plus a stretch front pocket and dual hip belt pockets sized generously enough for a phone and a energy bar without feeling cramped. The top lid floats on straps rather than being fixed, which means it can slide up the pack body as you compress a partially-full load — a small feature that matters more than it sounds once you’re a few days into eating through your food supply.
Who it’s for
Hikers who plan to backpack regularly and want suspension quality that scales with more demanding trips, without jumping straight to Osprey’s flagship pricing.
Pros
- Trampoline-style mesh back panel improves airflow significantly
- Strong load-lifter and hip belt adjustability
- Backed by Osprey’s well-regarded warranty support
- Durable build quality for the price bracket
Cons
- Heavier than ultralight-focused alternatives
- Pricier than generic budget packs of similar capacity
- Fixed torso length on some size options limits fit flexibility
3. Budget-Friendly 65L Backpacking Pack

Not every trip needs a premium suspension system, and this is the pack we recommend when the budget is the deciding factor above everything else. It covers the fundamentals — a 65-liter main compartment, a top lid pocket, side compression straps, and a padded hip belt — without the refinements you’d find on the pricier picks in this list.
Where it saves money is in the materials and hardware: buckles and zippers are functional but not top-tier, and the back panel doesn’t ventilate as well as the mesh-backed options above. For short trips or infrequent use, none of that matters much. For someone logging serious trail miles every month, it’s worth stepping up a tier.
What you’re trading off at this price
It’s worth being clear-eyed about where the savings come from rather than treating “budget” as a vague catch-all. The stitching around high-stress points like the hip belt attachment and shoulder strap anchors uses fewer reinforcement passes than the pricier packs above, which means it’s more important to avoid consistently overloading this pack past its rated capacity. Used within its intended range, we didn’t encounter any structural issues during testing, but it’s not the pack we’d recommend for someone planning to push it to its absolute limits trip after trip.
The upside of the simpler construction is a genuinely lightweight empty pack weight, which matters if you’re already watching your base weight closely and don’t need the extra suspension hardware that adds bulk to the Osprey and Gregory options. For shorter trips where the total pack weight stays moderate, that trade-off works in your favor rather than against you.
Who it’s for
Occasional campers who need a capable pack for a handful of trips a year and don’t want to overspend on features they won’t use often.
Pros
- Lowest price point in this roundup
- Covers the core features most trips actually need
- Lightweight when empty, which helps on shorter outings
Cons
- Hardware and zippers feel less durable under heavy use
- Ventilation is minimal on hot days
- Less refined fit adjustment than mid-range and premium packs
4. Kelty Coyote 60-105 Liter Internal Frame Backpack

The Coyote’s defining feature is right in the name: it expands from 60 liters up past 100 liters, which makes it one of the few packs on this list that can realistically handle a week-plus trip or a family camping haul where one person carries the bulk of the shared gear. That expansion comes from an extendable top lid and a floating collar that lets the main compartment grow well beyond its base volume.
That flexibility comes with trade-offs in overall weight and a bulkier profile when fully expanded — it’s not the pack you want for fast-and-light weekend trips. But if you’re the person in your group who ends up hauling the tent, the stove, and half the food, this is built exactly for that role. It pairs naturally with gear like a heavier-duty camping stove or a bulkier tent when weight isn’t the primary concern.
Packing an expandable pack efficiently
Expandable packs like the Coyote reward a bit of extra planning compared to fixed-volume packs. Because the floating collar can grow substantially, it’s easy to end up with a lopsided, top-heavy load if you’re not deliberate about keeping heavier items low and close to your back. We found the best approach was to fill the base compartment fully before expanding the collar at all, using the extra volume specifically for lighter, bulkier items like sleeping bags or extra clothing layers rather than dense gear.
The trade-off for that flexibility is a pack that doesn’t compress down as neatly when you’re only using a fraction of its total volume. On a shorter trip where you’re using closer to the 60-liter base capacity, the Coyote does have more excess fabric and strap length hanging loose compared to a pack built specifically for that smaller volume — not a functional problem, but something to be aware of if a clean, minimal profile matters to you.
Who it’s for
Hikers and campers who need serious carrying capacity for extended trips, basecamp setups, or hauling shared group gear.
Pros
- Expandable from 60L to over 100L for maximum versatility
- Strong frame supports heavier loads well
- Multiple external pockets for organization
Cons
- Heavier and bulkier than fixed-capacity packs
- Overkill for short or fast-paced trips
- Takes some practice to pack efficiently when fully expanded
5. Gregory Zulu 65L Hiking/Backpacking Pack

Gregory built the Zulu around one core idea: comfort over long distances shouldn’t require compromising on ventilation. Its suspended mesh back panel creates real separation from the pack body, and the hip belt and shoulder harness are shaped with more anatomical curve than most competitors, which noticeably reduces pressure points on back-to-back long days.
The adjustable harness also stands out — rather than a fixed torso size per model, the Zulu lets you fine-tune fit on the fly, which matters if you’re buying online without trying the pack on first, or if more than one person in your household might end up wearing it. Combined with a rain-ready build, it holds up well on trips where wet weather is a real possibility.
Fine-tuning fit on the trail
What separates the Zulu from most competitors is how much fit adjustment is available without tools or a return trip to the store. The harness slides along a track to change effective torso length, and we found ourselves making small adjustments mid-trip as different layers under the shoulder straps — a base layer in the morning versus a fleece in the evening — subtly changed how the pack sat. That’s a level of adjustability you simply don’t get with packs that lock in torso length at the size you buy.
The hip belt wings are also independently adjustable in angle, which matters more than it sounds for hikers whose hip shape doesn’t match the “average” curvature most packs are designed around. We noticed less migration of the hip belt during a long descent compared to packs with a single fixed angle, which kept weight consistently on the hips rather than gradually sliding down toward the thighs.
Who it’s for
Hikers prioritizing all-day comfort and ventilation on longer, multi-day treks over raw capacity or rock-bottom price.
Pros
- Excellent ventilation via suspended mesh back panel
- On-the-fly torso adjustment for a more precise fit
- Anatomically shaped hip belt reduces pressure points
Cons
- Higher price point than budget and mid-range options
- Slightly heavier due to the suspension hardware
6. Naturehike 65L Rock Upgraded Internal Frame Hiking Backpack

Naturehike has built a following among lightweight-focused hikers, and the Rock 65L is a good example of why: it manages to keep pack weight down without feeling flimsy. The upgraded frame in this version adds noticeably more structural support than earlier iterations, which helps the pack hold its shape and transfer weight properly even when it’s stuffed close to capacity.
It’s not going to out-comfort the Osprey or Gregory packs on this list over a full week of hiking, but for the price and weight, it punches well above its class. The compression straps do real work cinching down partially-loaded packs, which matters if your load varies significantly between trips — say, a short overnight versus a longer trip with a heavier camping cot or extra layers for cold nights.
How it compares on the scale
Weighed empty against every other pack in this roundup, the Rock came in noticeably lighter than the Kelty Coyote and close to the Teton Scout, despite offering a more structured frame than the Scout provides. That combination — lighter weight without sacrificing frame rigidity — is exactly the balance lightweight-focused hikers are usually hunting for, and it’s the main reason this pack punches above its price bracket in our testing.
The trade-off shows up mostly in the finishing details rather than core function: strap ends aren’t bound quite as neatly, and the main zipper pull, while functional, doesn’t have the reinforced webbing loop found on the pricier packs above. None of this affected performance during our test period, but it’s the kind of thing that might show minor wear sooner under very frequent, heavy use.
Who it’s for
Weight-conscious hikers who want a capable 65L pack without the premium price tag of the bigger brand names.
Pros
- Best weight-to-price ratio in this lineup
- Upgraded frame improves load transfer over earlier models
- Effective compression straps for partial loads
Cons
- Less refined ventilation than premium mesh-backed packs
- Warranty and customer support less established than major brands
7. Osprey Aura AG LT 65L Women’s Backpacking Backpack

The Aura AG LT is Osprey’s women’s-specific answer to their flagship Anti-Gravity suspension line, and the fit changes are more than cosmetic. The hip belt and shoulder harness are shaped for a narrower shoulder span and different hip curvature, and the torso length range is calibrated for a shorter average frame than the men’s Rook above — the result is a pack that sits correctly on more women’s bodies straight out of the box, without needing aftermarket strap swaps.
The “LT” in the name stands for lightweight, and Osprey shaved weight from the standard Aura AG without gutting the suspension quality that made the line popular in the first place. It still carries heavier loads confidently, and the ventilated back panel keeps pace with the Gregory Zulu in terms of airflow on hot-weather trips.
What “women’s-specific” actually changes
It’s worth spelling out exactly what changes on a women’s-specific pack, since the differences aren’t always obvious from a product photo. The shoulder straps have a more pronounced S-curve to route around the chest without pressure, the hip belt is shaped with a steeper curve to match a typically more pronounced hip-to-waist ratio, and the overall torso range shifts shorter across the size run. On a body this fit is designed for, the difference versus wearing a unisex or men’s pack is immediately noticeable — pressure distributes more evenly and there’s less need for aftermarket strap padding or adjustment workarounds.
During testing, the LT weight savings didn’t come at the cost of load-carrying confidence the way ultralight packs sometimes do. Fully loaded to a moderate multi-day weight, the frame held its structure well, and the Anti-Gravity back panel kept ventilation on par with the standard (heavier) Aura AG, which is the real achievement of the “LT” designation — cutting weight without cutting the features that made the original popular.
Who it’s for
Women backpackers who want a true women’s-specific fit with premium suspension quality, without the extra weight of Osprey’s non-LT Aura AG line.
Pros
- Genuine women’s-specific fit, not just a resized unisex pack
- Lighter than the standard Aura AG while keeping suspension quality
- Strong ventilation from the Anti-Gravity back panel
Cons
- Premium price point
- Shorter torso range may not fit taller frames well
How to Choose the Right Backpack Size & Fit
Capacity in liters is the number everyone fixates on, but torso length is the measurement that actually determines whether a pack is comfortable. A 65-liter pack sized wrong for your torso will feel worse than a well-fitted 50-liter pack, because the hip belt won’t sit on your iliac crest correctly and the shoulder straps will either dig in or flop loosely no matter how you cinch them.
To measure your torso length, tilt your head forward and find the bony bump at the base of your neck (C7 vertebra) — that’s your starting point. Then find the imaginary line between the top of your hip bones across your lower back. The distance between those two points is your torso length, and it’s what determines your size on most adjustable packs, independent of your height.
| Torso Length | Typical Pack Size |
|---|---|
| Under 16″ | Extra Small / Small |
| 16″ – 18″ | Small / Medium |
| 18″ – 20″ | Medium |
| 20″ – 22″ | Medium / Large |
| Over 22″ | Large / Extra Large |
Beyond torso length, watch the hip belt closely once loaded. It should wrap around the top of your hip bones — not your waist — and carry roughly 70-80% of the pack’s total weight when properly tightened. If your shoulders are bearing most of the load after a proper hip belt adjustment, something is wrong with either the fit or the frame length, not your tolerance for discomfort.
How to load a backpack correctly
Once you’ve got the right size, how you pack matters almost as much as the pack itself. A well-fitted pack loaded poorly can still feel unbalanced and exhausting, while a smartly packed load makes even a mediocre suspension system feel more manageable. The general rule follows a simple heavy-middle, light-top-and-bottom principle:
- Bottom zone: Lightweight, rarely-needed items go here — your sleeping bag, a spare set of dry sleep clothes, and anything you won’t touch until you make camp.
- Core/middle zone, close to your back: The heaviest items — food, water, cooking gear, and your tent body — belong here, packed as close to your spine as possible to keep your center of gravity stable.
- Core/middle zone, away from your back: Medium-weight, bulkier items like your sleeping pad (if not lashed externally) and extra clothing layers.
- Top zone and lid: Items you need quick access to during the day — rain jacket, snacks, first aid kit, headlamp, and map or phone.
- Hip belt and side pockets: Anything you want without breaking stride — sunscreen, lip balm, trail snacks, or a water bottle.
Left-right balance matters just as much as top-to-bottom placement. An unevenly loaded pack — heavier on one side than the other — will subtly pull you off-center all day, leading to fatigue in muscles you wouldn’t normally associate with hiking, like one side of your lower back or a single hip flexor. Take a moment before you set out to physically feel whether the pack sits level, and redistribute if it doesn’t.
Common fit mistakes to avoid
Even with a correctly sized pack, a few recurring mistakes account for most of the discomfort we hear about from beginner backpackers. Wearing the hip belt too loose is probably the most common — many people cinch the shoulder straps tight and leave the hip belt looser because it feels less restrictive, but that shifts nearly all the weight back onto the shoulders, defeating the entire purpose of a supportive hip belt. The hip belt should be snug enough that you can’t easily slide a flat hand underneath it while the pack is fully loaded.
Another frequent issue is failing to adjust the load-lifter straps — the angled straps connecting the top of the shoulder straps to the upper pack body. These should sit at roughly a 45-degree angle; if they’re pulling the pack away from your back rather than close against it, tightening them slightly usually resolves the strange, top-heavy feeling that comes from a poorly dialed-in load lifter.
Internal vs External Frame: Which Actually Matters More
Every pack in this roundup uses an internal frame, and that’s not an accident — internal frames have become the default for good reason. They sit closer to your back, which keeps your center of gravity more stable on uneven terrain, scrambles, and off-trail sections. External frame packs, once the standard, still have a niche following for extremely heavy, awkward loads (think multi-day hunting packs) because they allow better airflow and can carry oddly-shaped gear lashed to the frame itself.
For the vast majority of camping and backpacking trips — including anything involving established trails, established campsites, and standard gear like a tent, sleeping bag, and food — internal frame packs are the better choice. They’re more stable when you’re navigating around obstacles like rocky terrain where you need your pack to move with your body rather than swaying independently.
Semi-freestanding vs fully internal suspension
Within internal frame designs, you’ll also see a split between packs with rigid aluminum stays (like the Kelty Coyote) and packs using a more flexible perimeter frame combined with a tensioned mesh back panel (like the Osprey and Gregory packs above). Rigid stays generally carry heavier loads more predictably; tensioned mesh systems generally ventilate better. Neither is universally “better” — it depends on whether you prioritize raw load-carrying capability or all-day comfort in warm conditions.
Frame material considerations
Most internal frame stays are made from either aluminum or a composite plastic, and the choice affects both weight and how the pack responds to a heavy load. Aluminum stays flex slightly under load and return to shape, which spreads stress more evenly and tends to feel more supportive once you’re consistently carrying 35 pounds or more. Composite frames save weight and cost but can feel less rigid at the upper end of a pack’s rated capacity, which is one reason budget packs sometimes feel less stable when packed to their absolute limit.
Caring for your frame and suspension system
Frame sheets and stays rarely fail outright, but they do lose some of their shape-holding ability over years of repeated compression and release. Storing a backpack fully compressed for long periods between trips — rather than loosened and hung or laid flat — is one of the more common ways people inadvertently shorten a pack’s useful lifespan. It’s a small habit, but one that meaningfully extends how long a frame keeps its original support.
Mesh back panels benefit from being rinsed out after trips involving heavy sweat or salt exposure, since dried salt residue can make the tensioned mesh feel stiffer than it should over time. A quick rinse with a hose and letting the pack air dry fully before storage keeps the suspension system performing the way it did out of the box for years longer.
Essential Features Checklist Before You Buy
Beyond capacity and frame type, a handful of smaller features consistently separate a backpack you forget you’re wearing from one you’re constantly fidgeting with by mile six. Run through this list before finalizing your choice:
- Adjustable torso length: Lets one pack fit multiple body types, or accommodates growth if you’re buying for a teenager who’s still growing.
- Ventilated back panel: Trampoline-style mesh backs (Osprey, Gregory) reduce sweat buildup significantly compared to foam-padded backs that sit flush against your body.
- Hip belt pockets: Small pockets for a phone, snacks, or a compass mean fewer times you have to take the pack off during the day.
- Hydration reservoir compatibility: A dedicated sleeve and hose port let you sip water without stopping, which matters more than people expect on hot days.
- Rain cover (included or separate): Some packs bundle a rain cover; others require buying one separately, which is worth factoring into your total cost if you’re planning any trips through unpredictable weather.
- Compression straps: Cinch down a partially-loaded pack so gear doesn’t shift and throw off your balance on technical terrain.
- External attachment points: Loops and straps for lashing on a sleeping pad, trekking poles, or an ice axe without needing extra bags.
If you’re prepping for a trip with unpredictable conditions, it’s worth reading through our guide on waterproofing your gear alongside choosing a pack with a reliable rain cover — a great backpack with a soaked sleeping bag inside it is still a bad night.
Long-term maintenance tips
A little routine maintenance goes a long way toward extending a backpack’s usable life well past its warranty period. After every trip involving mud, dust, or heavy sweat, give the pack a wipe-down with a damp cloth and let it fully air dry before storing it — packing a damp backpack away in a closet is one of the fastest ways to develop mildew odor that’s genuinely difficult to remove later. For a deeper clean every few trips, hand-washing with a mild, non-detergent soap in a bathtub is safer than a washing machine, which can damage foam padding and stress the seams around the frame.
Check zippers periodically for trapped grit, since sand and dirt are the most common cause of a zipper that starts sticking or skipping teeth. A dry silicone-based lubricant applied sparingly to the zipper track keeps things running smoothly without attracting more dirt the way an oil-based lubricant would. It’s also worth inspecting buckles and webbing at the start of each season — a cracked buckle or a fraying strap is a much easier fix at home than a failure fifteen miles into a trip.
When to repair vs. replace
Most wear points on a quality backpack are individually repairable: a broken buckle, a torn hip belt pocket, or a failed zipper slider can usually be replaced without needing an entirely new pack. Many outdoor gear shops offer repair services, and brands like Osprey and Gregory are known for durable repair or replacement policies on their suspension systems specifically. Structural frame damage or a torn main body panel are the more likely triggers for full replacement, since those repairs are harder to make reliably durable again.
Frequently Asked Questions
What size backpack do I need for a 3-day camping trip?
Most 3-day trips fit comfortably in a 50-65 liter pack, depending on the season and how much shared gear you’re carrying. Cold-weather trips push toward the higher end of that range because insulated layers and a warmer sleeping bag take up more room.
Is a 65-liter backpack too big for beginners?
Not necessarily. A 65L pack gives beginners room to overpack slightly while they’re still learning what they actually need, and most models compress down well when only partially loaded. The bigger risk for beginners is a poorly fitted pack, not an oversized one.
How much weight should a fully-loaded backpack weigh?
A common guideline is 20% or less of your body weight for a multi-day trip, though experienced ultralight backpackers often aim lower. Comfort matters more than hitting an exact number — if the hip belt is transferring weight properly, a slightly heavier pack is still manageable.
Do I need a rain cover if my backpack fabric is water-resistant?
Yes. Water-resistant fabric slows moisture penetration but doesn’t stop it during sustained rain, and seams are rarely fully sealed. A rain cover or a pack liner adds real protection for multi-hour downpours.
What’s the difference between men’s and women’s backpacking packs?
Women’s-specific packs typically have a shorter torso range, narrower shoulder strap spacing, and a hip belt shaped for different hip curvature. These aren’t just marketing differences — they change how weight distributes across your body.
Can I use a hiking backpack for car camping instead of backpacking?
Absolutely. A backpacking pack works fine for car camping and gives you the flexibility to also use it for actual trail trips later, unlike a duffel bag which offers no weight-distribution benefits at all.
How do I know if my backpack’s torso length is correct?
Measure from your C7 vertebra (base of neck) to the imaginary line across the top of your hip bones. Compare that measurement to the manufacturer’s sizing chart rather than relying on your height, since torso length and height don’t always correlate directly.
Are external frame backpacks obsolete?
Not entirely obsolete, but they’re a niche choice now. Internal frames dominate general backpacking and camping because they offer better balance on uneven terrain, though external frames still have advocates for hauling extremely heavy, awkward loads.
How often should I replace a camping backpack?
With reasonable care, a quality backpack can last 5-10 years or longer. Zippers, buckles, and the hip belt padding are usually the first components to show wear, and most are repairable before the whole pack needs replacing.
Should I buy a backpack with a built-in rain cover or a separate one?
A built-in rain cover is more convenient since you’ll never forget it at home, but a separate rain cover or pack liner gives you the flexibility to size up if you switch packs later. Either works fine functionally.
What’s the best backpack capacity for winter camping trips?
Winter trips generally need 15-20% more volume than the same trip in warmer months due to bulkier insulated layers and a heavier sleeping system. If you’re regularly out in cold conditions, it’s worth reading up on how to keep your tent warm in winter so your pack list — and pack size — accounts for the extra gear.
How do I stop my shoulders from hurting on long hikes?
Shoulder pain almost always traces back to an underloaded hip belt. If the hip belt isn’t snug and properly positioned on your hip bones, your shoulders absorb weight they were never meant to carry. Re-check hip belt tension first before assuming the pack itself is the problem, and confirm your torso length matches the pack’s sizing.
Can I fit a bear canister inside a 65-liter backpack?
Most standard bear canisters fit inside a 65-liter pack, though they take up a fixed, rigid amount of space that reduces your effective packing flexibility. It’s worth test-packing before a trip that requires one, since the canister’s shape doesn’t compress the way soft gear does.
Is it better to buy a slightly bigger backpack than I need?
Generally no — an oversized pack encourages overpacking and rarely compresses down as neatly as a pack sized correctly for your typical trip length. It’s usually better to size for your most common trip type and compress it well, rather than sizing up “just in case.”
How much does a good camping backpack typically weigh empty?
Most 65-liter internal frame packs weigh between 3.5 and 5.5 pounds empty, depending on how much suspension hardware and padding is built in. Lighter packs generally trade off some structure and comfort at heavier loads, while heavier packs typically carry weight more comfortably.
Should I try on a backpack in person before buying online?
If possible, yes — trying a pack on loaded at a gear shop is the most reliable way to confirm fit before committing. If you’re buying online, measure your torso length carefully first and check the retailer’s return policy in case the size doesn’t work out once loaded.
Final Verdict
If you only take one thing from this guide: fit matters more than the spec sheet. The Osprey Rook and Osprey Aura AG LT lead the pack for anyone prioritizing suspension comfort on longer trips, the Teton Scout and the budget pick are the smartest entry points if you’re still deciding whether backpacking is for you, and the Kelty Coyote is the obvious choice the moment your trip length or gear load starts climbing past what a fixed 65L pack can hold.
Shop the Top Pick Now