How to Make Coffee Camping: The Complete Outdoor Brewing Guide
Table of Contents
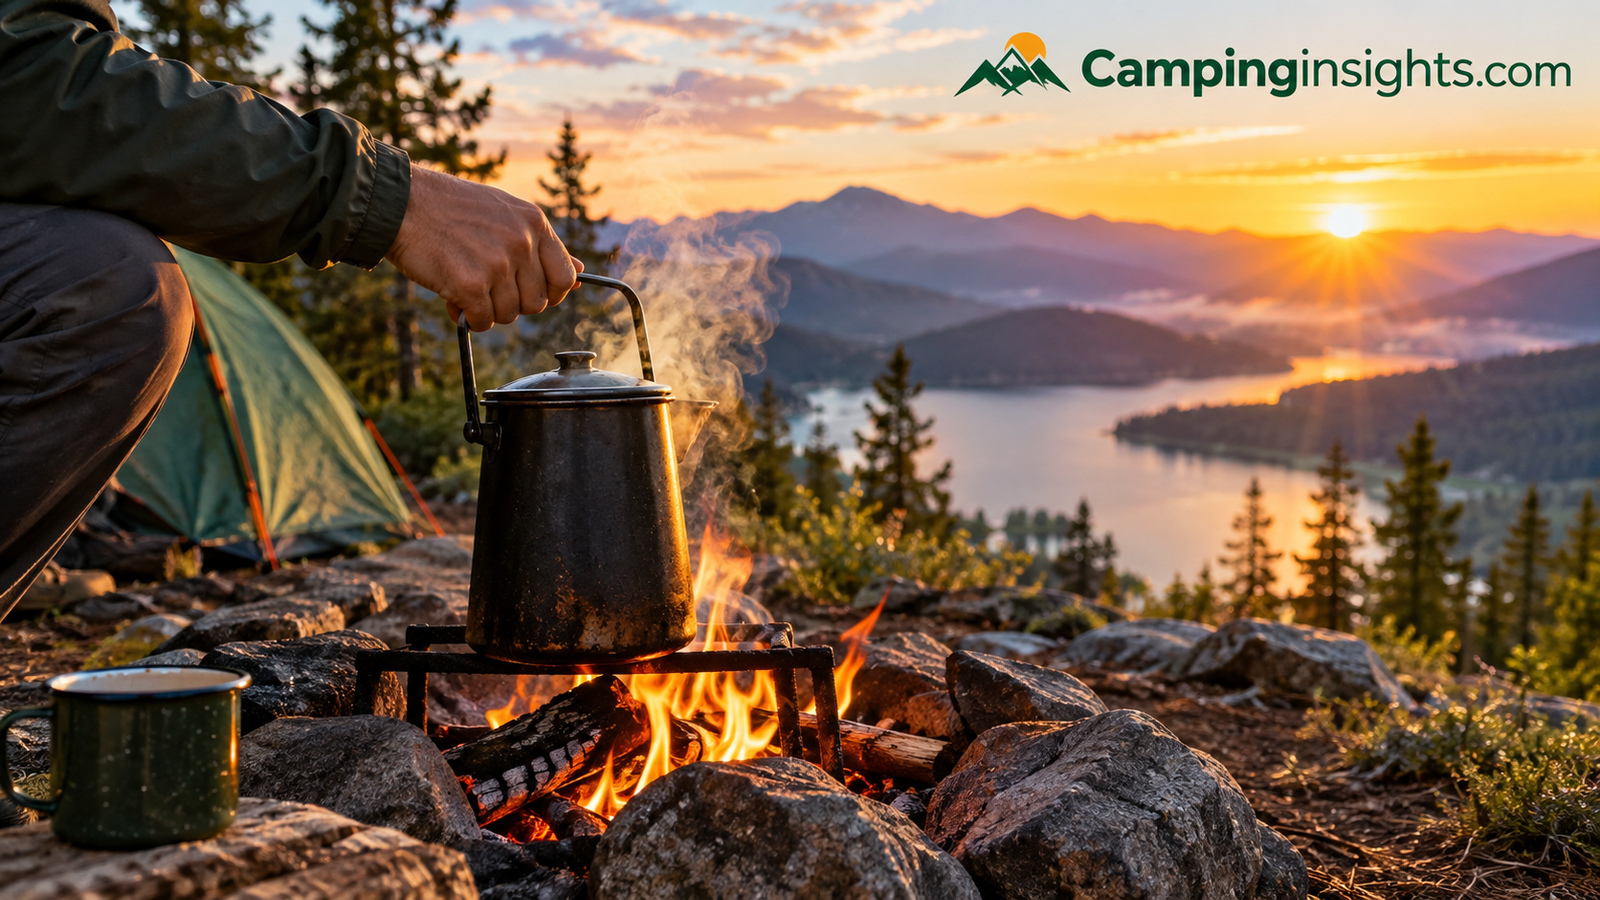
There is a very specific kind of quiet that settles over a campsite right before sunrise — the fire reduced to orange coals, dew sitting heavy on the rainfly, and everyone else still zipped into their sleeping bags. That quiet is exactly when camp coffee earns its reputation. It tastes better outside, and not just because the air is cold and the view is good. Once you understand what is actually happening in the cup, you can replicate that experience on demand, whether you are car camping fifty feet from the trunk or three days into a backcountry loop with nothing but a titanium pot and a pour-over cone.
This guide walks through every realistic way to make coffee camping, from the no-equipment cowboy method to a full French press setup, and tells you honestly which one fits which kind of trip. If you are still finalizing your camping checklist or figuring out how to plan a camping trip around your morning routine, this is the piece to bookmark.

1. Why Camp Coffee Tastes Different
Ask ten campers why coffee tastes better outside and you will get ten different answers, but the science lines up with the folklore more than you would expect. Altitude changes the boiling point of water, which changes extraction. Cold morning air makes your senses sharper and more attentive to aroma. And there is a genuine psychological effect: coffee tied to a reward, like finishing a hike or surviving a cold night in a tent, tastes better because your brain associates it with relief and accomplishment.
There is also a less romantic explanation. At home, most people drink coffee out of habit while distracted by a phone or a commute. At a campsite, coffee is often the only thing happening. You are not multitasking. You are standing by a fire, mug in both hands, actually paying attention to what you are drinking. That single change in attention does more for perceived flavor than almost any brewing upgrade.
None of that means technique does not matter. Coffee made with stale grounds, lukewarm water, or the wrong grind size will taste bad no matter how nice the sunrise is. The rest of this guide focuses on the technique side, because that is the part you can actually control.
Elevation is worth understanding in a little more depth, because it explains a lot of confused first attempts at camp coffee. Water boils at a lower temperature the higher you climb, which means water at, say, 8,000 feet is boiling at a noticeably cooler temperature than water at sea level. Lower extraction temperatures pull less flavor out of the grounds in the same amount of time, which is part of why high-altitude campers often report their coffee tasting weak even when they used the same ratio they always use at home. The fix is simple once you know it: either use slightly more grounds, extend your steep or contact time a little, or both.
Temperature swings matter just as much on the other end of the process. Coffee brewed hot but drunk lukewarm from sitting exposed in a cold mug loses most of what made it enjoyable in the first place. This is one of the most overlooked details in outdoor brewing, and it is entirely solvable with better insulation and a bit of timing discipline, both of which get their own dedicated coverage later in this guide.
2. Gear You Actually Need (and What to Skip)
Camp coffee gear ranges from a folded piece of foil to a five-piece espresso setup, and most people overbuy before their first trip. Here is the realistic breakdown, starting with what belongs on every camping checklist of what to bring.
The Non-Negotiables
- A heat source — a camp stove, a fire grate, or a reliable fire pit
- A pot or kettle — stainless steel or titanium, at least 1 liter for two people
- A brewing device — pour-over cone, French press, percolator, or nothing at all for cowboy coffee
- Insulated mugs — double-wall stainless holds heat far longer than ceramic or plastic
- A way to filter grounds — paper filters, a metal mesh, or a cloth sock filter
Nice-to-Haves
- A hand grinder, if you are grinding fresh at camp instead of pre-grinding at home
- A small collapsible funnel for pour-over setups
- A dedicated coffee scoop so you are not eyeballing every batch
Skip These for Most Trips
- Battery-powered espresso machines — heavy, fussy, and unnecessary unless you are car camping and genuinely love espresso
- Glass carafes — one bump on a rock and your morning coffee plan is over
Choosing Between Titanium and Stainless Steel
Titanium pots are lighter and heat faster, which backpackers appreciate, but they also transfer heat unevenly, creating hot spots that can scorch grounds sitting directly against the metal in cowboy coffee. Stainless steel is heavier but distributes heat more evenly and tends to be more forgiving for beginners still learning to judge boil timing by sound and sight rather than a thermometer. If you already own a stainless pot for cooking, it will do the job for coffee too, and there is rarely a need to buy a second dedicated pot just for brewing.
If you are backpacking rather than car camping, weight changes everything. A folding pour-over dripper and a bag of pre-ground coffee will beat a percolator every time once you are carrying it on your back all day, which is worth factoring in alongside the rest of your camping backpack loadout.
It helps to think about coffee gear the same way you think about the rest of your kit: every item earns its place by doing something the others cannot. A pot that boils water can also serve as your cowboy coffee brewer, which means you may not need a separate device at all on trips where you are trying to keep your pack light. On the other hand, if coffee is a genuine daily ritual rather than an afterthought, it is worth carrying the extra few ounces for a dedicated brewer, because a rushed, mediocre cup made purely out of convenience rarely satisfies the way a properly brewed one does.
Group size changes the calculation too. A single hiker can get by comfortably with a mug-sized pour-over setup, while a group of four or more car campers will move through cups faster with a French press or percolator that brews several servings in one pass. Matching your method to your group avoids the common mistake of brewing four rounds of a single-serving AeroPress while everyone else stands around waiting for their turn.

3. Sourcing and Treating Your Water
Coffee is roughly 98 percent water, so the water you use matters more than most campers assume. If you are at a developed site with a potable tap, you are set. If you are relying on a stream, lake, or spring — common on trips built around dispersed camping or genuinely remote primitive camping — that water needs to be filtered or treated before it goes anywhere near your pot, boiling included, since a rolling boil handles pathogens but not sediment or off-flavors from tannins and algae.
Step 1 — Choose your source
Moving water is generally cleaner than stagnant water. When you are deciding how to choose a campsite, proximity to a clean running water source is worth weighing alongside shade and wind protection.
Step 2 — Filter, then boil
Run water through a mechanical filter or purifier first to remove sediment and organisms, then bring it to a full rolling boil for at least one minute (three minutes above roughly 6,500 feet) before brewing. Never rely on visual clarity alone.
If you are camping through wet weather, check our camping in the rain tips for keeping your fuel and filters dry, since a soaked filter cartridge or a stove that will not light is the single most common reason campers skip their morning coffee entirely.
Not all treated water tastes the same, either. Chemical purification tablets can leave a faint metallic or chlorine-like aftertaste that is noticeable in a delicate pour-over but nearly invisible in a bold cowboy brew, which is one more reason cowboy coffee remains popular on trips where treated water is your only option. If you are sensitive to that aftertaste, a mechanical filter paired with a short boil is generally the cleaner-tasting route, and a small pinch of salt in the pot can neutralize some of the flatness that comes from heavily treated water.
Water volume planning is easy to overlook until you run short mid-trip. As a rough guide, budget six to eight ounces of water per cup of coffee, plus a small buffer for evaporation during boiling and any water used to preheat your mug or rinse your gear afterward. On multi-day trips, tallying up your coffee water needs alongside your drinking and cooking water keeps you from discovering a shortfall on morning three.
4. Grinding and Prepping Beans Ahead of Time
Grind size changes everything about how coffee tastes, and camping is not the place to improvise it. As a rule: coarser grinds for methods with longer steep times (cowboy coffee, French press), medium grinds for pour-over, and fine grinds only for an AeroPress or a percolator you are watching closely.
| Brewing Method | Recommended Grind | Grind at Home or at Camp? |
|---|---|---|
| Cowboy Coffee | Coarse | Home (pre-ground travels fine) |
| French Press | Coarse | Home or camp |
| Pour-Over | Medium | Camp preferred for freshness |
| Percolator | Coarse | Home |
| AeroPress | Fine-medium | Camp preferred |
| Instant / Coffee Bags | N/A | Pre-made |
If you want fresh-ground coffee at the site, a small hand grinder is worth the extra half-pound in your pack. If you would rather simplify, grind everything at home in individual portioned bags labeled by day — one less decision to make before you have had caffeine.
Freshness matters more than most campers expect. Coffee begins losing aromatic oils within about 30 minutes of grinding, which is why coffee ground weeks in advance and left exposed to air tends to taste flat and dull by the time it reaches a campsite. If you are pre-grinding at home, use airtight, vacuum-sealed bags rather than a loose container, and keep the bags away from direct sunlight and heat in your vehicle or pack. Whole beans hold their flavor far longer than ground coffee, sometimes for several weeks when stored properly, so if a trip is more than a week out, it is worth waiting to grind until closer to departure rather than doing it all at once.
Portioning is the other detail that saves real frustration at camp. Pre-measuring each day’s coffee into its own small bag or container means you are not trying to eyeball tablespoons with cold hands before sunrise, and it keeps your ratios consistent from the first morning of the trip to the last, which matters more for taste than almost any other single variable.

5. Method 1: Cowboy Coffee (No Equipment Required)
Cowboy coffee is the oldest camp brewing method there is: grounds go directly into boiling water, steep, and settle. No filter, no gadget, just a pot and a fire. It is the fallback every camper should know, especially useful on trips built around a stripped-down camping safety mindset where fewer items means fewer failure points around an open flame.
Step 1 — Boil your water
Bring water to a rolling boil in your camp pot, then pull it just off the direct heat.
Step 2 — Add grounds and steep
Add roughly 2 tablespoons of coarse grounds per cup directly to the pot, stir once, and let it steep off-heat for 4 minutes.
Step 3 — Settle the grounds
Sprinkle a small splash of cold water on top, which helps the grounds sink, then let it sit for another minute before pouring slowly, leaving the last bit in the pot.
Pros
- Zero equipment beyond a pot
- Works over any fire or stove
- Bold, full-bodied flavor
Cons
- Some sediment ends up in the cup
- Easy to over-steep and go bitter
- Not ideal if you dislike grit
Troubleshooting Cowboy Coffee
If your cup consistently comes out too weak, you are probably pulling the pot off heat too early or using too fine a grind, which lets particles pass through and forces you to under-steep to avoid excess grit. Switch to a visibly coarse grind, closer to what you would use in a French press, and let the full steep time run its course. If the coffee tastes bitter or scorched instead, the water was likely still at a rolling boil when the grounds went in rather than pulled just off heat, which over-extracts quickly. A thirty-second rest before adding grounds solves this in almost every case.

6. Method 2: Camp French Press
A French press is one of the easiest upgrades from cowboy coffee, and it packs well enough for most car camping trips. It gives you full control over steep time without leaving grit in the cup.
Step 1 — Add grounds to the carafe
Use roughly 1 tablespoon of coarse grounds per 4 ounces of water directly in the empty carafe.
Step 2 — Pour hot water and steep
Pour water just off a boil over the grounds, place the plunger lid on top without pressing, and steep for 4 minutes.
Step 3 — Press slowly and pour
Push the plunger down slowly and evenly, then pour immediately to stop extraction before it turns bitter.
Pros
- Rich, sediment-free cup
- Easy to make for a group
- Simple two-minute cleanup
Cons
- Glass carafes can crack in transit
- Heavier than pour-over gear
- Not ideal for solo backpacking
Troubleshooting the French Press
A press that feels gritty in the plunger, requiring real force to push down, usually means the grind is too fine and is clogging the mesh filter. Switch to a coarser, more uniform grind. If the coffee tastes muddy or over-extracted, either the steep time ran too long or the plunger sat down partway through steeping instead of after, which continues extraction slowly even without a full push. Set a timer rather than guessing, and press only once you are ready to drink immediately.

7. Method 3: Pour-Over
Pour-over is the cleanest-tasting method on this list and the lightest packable option after cowboy coffee. A collapsible dripper and a handful of paper filters weigh almost nothing, which is why it is the go-to for anyone counting ounces in a camping backpack.
Step 1 — Set up the filter and dripper
Place a paper or reusable filter into the dripper cone, seated over your mug, and add medium-ground coffee.
Step 2 — Bloom the grounds
Pour a small amount of hot water just to saturate the grounds, wait 30 seconds while it bubbles and releases gas, then continue pouring in slow circles.
Step 3 — Finish pouring in stages
Continue in two or three slow pours until you hit your target water amount, letting the water fully drain between pours.
Pros
- Cleanest, brightest flavor
- Very lightweight and packable
- Precise control over strength
Cons
- Slower for large groups
- Needs a steady, controlled pour
- Filters can run out on longer trips
Troubleshooting Pour-Over
If the water drains through almost instantly and the coffee tastes weak and sour, your grind is probably too coarse for the filter you are using, letting water rush through without enough contact time. If instead the water pools at the top and drains painfully slowly, the grind is too fine, and you should size up slightly or pour in smaller stages so the bed does not saturate and clog all at once. Wind is the other silent culprit on exposed campsites — a light breeze cools the water stream mid-pour more than most people expect, so brewing in the lee of a rock, tree, or your vehicle makes a noticeable difference on blustery mornings.

8. Method 4: Percolator
Percolators are the classic car-camping choice, brewing an entire pot at once directly on the fire or stove. They are heavier and bulkier, so they belong in the truck or trunk more than a pack — a natural fit if you are outfitting a base camp alongside your camping tent setup rather than a backcountry loop.
Step 1 — Fill the basket, not the pot
Add coarse grounds to the metal percolator basket only — never directly into the water chamber.
Step 2 — Watch the perk cycle
Set over medium heat until you see steady perking in the glass knob, then reduce heat and let it perk gently for 8 to 10 minutes.
Pros
- Makes a full pot for groups
- Simple, durable design
- No paper filters needed
Cons
- Bulky and heavy
- Easy to over-extract and taste burnt
- Not suited to backpacking
Troubleshooting the Percolator
Bitter, over-extracted percolator coffee is almost always a heat problem rather than a grounds problem. Once you see steady perking begin, resist the urge to leave it on full heat for the full brew time — drop to the lowest flame that maintains a gentle perk. Letting it perk too vigorously for too long pulls harsh, over-extracted flavors from the grounds every time, no matter how good the beans are.
9. Method 5: AeroPress
The AeroPress splits the difference between pour-over precision and French press body, and its compact plastic build travels better than glass. It is popular with campers who care about specialty-grade flavor but do not want to babysit a slow pour.
Step 1 — Assemble and add grounds
Insert a paper filter into the cap, screw it on, and add fine-medium ground coffee into the chamber.
Step 2 — Steep and stir
Add hot water, stir gently for 10 seconds, and let it steep for roughly a minute before inserting the plunger.
Step 3 — Press with steady pressure
Push the plunger down slowly and evenly over about 20 to 30 seconds until you hear the hiss that signals it is finished.
The AeroPress also supports an inverted method, where you assemble it upside down, add water and grounds into the open chamber, steep, then flip and press onto your mug at the last moment. It gives you a longer, more controlled steep before any water passes through the filter, and many campers who want maximum flavor control prefer it once they have the base method down, even though it takes a bit more practice to flip without spilling in a cramped campsite.
Pros
- Fast, roughly 90-second brew
- Durable plastic build for travel
- Smooth, low-acid cup
Cons
- Makes one serving at a time
- Needs paper filters
- Small parts can get lost at camp

10. Method 6: Instant Coffee and Coffee Bags
Instant coffee has improved dramatically, and quality single-origin instant packets and pour-over-style coffee bags are now legitimate options rather than a last resort. For minimalist trips — the kind built around primitive camping or a quiet overnight described by stealth camping norms where you want to pack light and leave no trace of a setup — this is often the smartest choice, not just the laziest one.
Step 1 — Boil just enough water
Heat only the amount of water you need per cup to save fuel, especially important on longer trips where fuel is rationed.
Step 2 — Stir or steep
Stir instant granules directly into hot water, or dunk a coffee bag like a tea bag for two to three minutes.
Not all instant coffee is created equal, and it is worth spending a little more per serving on freeze-dried, single-origin packets rather than the cheapest bulk jar you can find. Freeze-drying preserves far more of the original aromatic compounds than older spray-dried processes, which is the main reason modern specialty instant coffee tastes noticeably closer to fresh-brewed than the instant coffee many people remember from decades past. Coffee bags work on the same principle as tea bags and are a reasonable middle ground if you like the ritual of steeping but do not want to carry a grinder or filter.
Pros
- Zero cleanup, zero grounds
- Lightest possible option
- Ready in under a minute
Cons
- Flavor ceiling lower than brewed methods
- Fewer bean-origin choices
- Some brands taste noticeably thin

11. Comparing All Six Methods
If you are still deciding which method fits your trip, this side-by-side should settle it quickly. As a general rule, weight and flavor quality trade off against each other on one end of the spectrum, while brew time and equipment bulk trade off on the other. Cowboy coffee and instant sit at the “least equipment” end, French press and percolator sit at the “most flavor control for a group” end, and pour-over and AeroPress land in between as the best all-around choices for one or two people who care about taste but still want to keep their pack light.
Trip length matters too. On a single overnight, almost any method works fine because fatigue and gear failures have not had time to compound. On a five-day trip, small annoyances multiply — a percolator that is a hassle to clean on day one becomes a real chore by day four, while a pour-over’s simplicity holds up just as well on the last morning as the first.
Budget is the last factor worth naming honestly. A pot you already own and a bag of pre-ground coffee gets you cowboy coffee for free. A quality collapsible pour-over dripper or a compact AeroPress typically costs less than a single dinner out, while a full French press or percolator setup sits a bit higher but still lasts for years of trips. None of the six methods in this guide require a significant investment, so the right choice really does come down to weight, group size, and how much you care about flavor on that particular trip.
| Method | Weight | Brew Time | Flavor Quality | Best For |
|---|---|---|---|---|
| Cowboy Coffee | Lowest | ~5 min | Bold, some grit | Emergency / minimalist |
| French Press | Medium-High | ~4 min | Rich, full-bodied | Car camping groups |
| Pour-Over | Low | ~3-4 min | Clean, bright | Backpacking, solo |
| Percolator | High | ~10 min | Strong, can be bitter | Large groups, basecamp |
| AeroPress | Low-Medium | ~2 min | Smooth, low acid | Solo specialty drinkers |
| Instant / Bags | Lowest | <1 min | Fair to good | Ultralight, fast mornings |
12. Keeping It Hot, Clean, and Consistent
A few habits separate campers who drink great coffee every morning from those who fight their gear every time.
Keep it hot longer
Preheat your mug with a splash of hot water before pouring your coffee in, and use a double-wall insulated mug rather than ceramic or plain steel. This matters even more on cold mornings when you are already thinking about how to keep your tent warm at night — the same insulation logic applies to your mug.
Deal with condensation and dampness
Damp grounds, a wet stove, or a foggy morning can all slow down your routine. If you are consistently finding gear damp, it is worth checking why your tent is wet inside and how to stop condensation in a tent, since a dry gear bag keeps your coffee kit dry too.
Winter and cold-weather brewing
Cold air pulls heat out of your brew fast. Boil slightly hotter than usual, brew in a wind-sheltered spot, and drink immediately rather than letting it sit. If winter trips are part of your plans, pair this with guidance on keeping a tent warm in winter and choosing the right sleeping pad for winter camping, since a warm night leads to a much more motivated morning routine.
Cleanup and Leave No Trace
Never dump coffee grounds directly on the ground near a campsite or water source — pack them out or scatter them well away from trails, following the same principles covered in general camping safety guidance. Rinse gear with hot water immediately after use; cold grounds bond to metal and are far harder to scrub off later.
Pairing coffee with breakfast
Coffee timing matters as much as method — start your water boiling before you touch anything else so it is ready right when your food is, an easy win covered in more detail in our camping food ideas guide.
Build it into your morning rhythm
The campers who reliably enjoy great coffee on every trip tend to do one thing differently: they treat it as the first task of the morning rather than something squeezed in between packing up camp. Lay out your gear the night before — pot filled with treated water if you have it, grounds portioned, mug within reach — so the only thing standing between you and a hot cup is lighting the stove. This small bit of prep removes the fumbling that usually delays that first cup on cold, groggy mornings, and it means you are not searching for a grinder or a filter while everyone else is already breaking down tents.
Evening coffee and quiet-hours brewing
Coffee is not strictly a morning ritual for every camper — some prefer a decaf version by the fire after dinner. If you are camping somewhere with posted quiet hours or brewing near other campers after dark, keep clattering metal gear to a minimum and consider a near-silent method like pour-over or instant rather than a percolator’s audible perking, the same consideration that matters for keeping bugs away while camping after sunset when you want to move quietly and not draw attention with light or noise.

Frequently Asked Questions
Can I make coffee camping without any special equipment?
Yes. Cowboy coffee needs nothing beyond a pot, water, and grounds, making it the simplest method on any trip.
What is the best grind size for camping coffee?
Coarse grinds work best for cowboy coffee, French press, and percolators, while medium grinds suit pour-over and fine-medium suits AeroPress.
How do I keep camping coffee hot longer?
Preheat your mug, use a double-wall insulated cup, and brew in a wind-sheltered spot away from open airflow.
Is it safe to use stream or lake water for coffee?
Only after filtering and bringing it to a full rolling boil for at least one minute, longer at higher elevations.
What is the lightest way to make coffee while backpacking?
Instant coffee or coffee bags are the lightest, followed closely by a collapsible pour-over dripper with paper filters.
Why does my cowboy coffee always have grounds in it?
Use a coarser grind, avoid stirring too aggressively, and add a splash of cold water at the end to help grounds settle before pouring.
Can I use a French press for backpacking?
You can, but the added weight and fragility of most carafes make it better suited to car camping than long trail days.
How long should I steep pour-over coffee at camp?
Total brew time, including the bloom, usually runs three to four minutes depending on your grind size and pour speed.
Do percolators make coffee taste burnt?
They can if left on high heat too long. Reduce to a gentle perk once brewing starts and keep total time under 10 minutes.
What is the fastest way to make coffee camping?
Instant coffee takes under a minute once water is hot, followed by AeroPress at around two minutes total.
How much coffee should I pack per person per day?
A good baseline is two tablespoons of grounds per 8-ounce cup, times the number of cups each person typically drinks daily.
Can I reuse coffee grounds on a second brew?
Technically yes, but flavor drops sharply on a second pass, so it is only worth it in a genuine low-supply situation.
What is the healthiest way to dispose of used coffee grounds at camp?
Pack them out with the rest of your trash whenever possible, or scatter them thinly well away from water sources and trails if pack-out is not practical, since concentrated grounds can alter soil and attract wildlife.
Final Thoughts
There is no single correct way to make coffee camping — the right method depends entirely on how you are traveling, how much weight you can carry, and how particular you are about flavor. Backpackers should lean toward pour-over or instant, car campers can enjoy the full French press or percolator experience, and cowboy coffee remains the reliable fallback everyone should know by heart. Whatever method you choose, dial in your water quality and grind size first, and the rest falls into place quickly.
Ready to upgrade your setup before your next trip?
Shop All Camping Coffee Gear